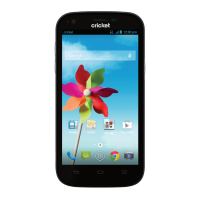
10 GETTING STARTED 11GETTING STARTED
3. When the battery is fully charged, unplug the charger and disconnect it
from the phone.
Note: If the battery is extremely low, you may be unable to power on the
phone even when it is being charged. In this case, try again after charging
the phone for at least 10 minutes. Contact customer service if you still cannot
power on the phone after prolonged charging.
Extending the battery life
Active applications, screen brightness levels, Bluetooth, Wi-Fi usage and GPS
functionality can drain your battery. You can follow the helpful tips below to
conserve your battery power:
• Reduce the screen backlight time.
• Lower the screen brightness.
• Turn auto-sync, Wi-Fi, and Bluetooth off when not in use.
• Disable the GPS function when not in use. Most applications using this
function will periodically query the GPS satellites for your current location;
each query drains your battery.
Powering your phone on/off
Make sure the micro-SIM card is inserted in your phone and the battery is
charged.
• Press and hold the Power key to power on your phone.
• To power it off, press and hold the Power key to open the options menu.
Tap Power off > OK.
Restarting the phone
• If the screen freezes or takes too long to respond, try pressing and
holding the Power key to open the options menu. Tap Restart and
then tap OK.
Setting up your phone for the rst time
When you rst power on your phone after initial purchase or reset it to factory
settings (see Settings – Personal – Backup & reset), you need to set up your
phone settings before using it.
1. Tap the language eld to select the language you want to use and then
tap Start.
2. Select data use connections and tap Next.
3. Tap Skip to set up Wi-Fi connections later or tap a network. If the network is
secured, enter the password and tap Connect > Next.
4. Set the date, time, and time zone, or use date and time data provided by
the network. Then tap Next.
5. Tap Existing or New to sign into a Google account. Follow the instructions
to complete setup. You can also tap Not now to set up an account later.
6. Congure the Google location options and tap Next.
7. Enter your name, which the phone uses to personalize some apps, and
tap
.
8. You will be prompted to accept the terms of Google service. Tap Next
to continue.
9. Tap Finish to complete the setup.
Note: If the SIM is not installed, the step for selection of data use connections
would be skipped, and you will be prompted to read the instructions that
came with your phone.
 Loading...