EasyManua.ls Logo

Zummo Z22 User Manual

Zummo Z22
13 pages
To Next Page IconTo Next Page
Page #1 background imageLoading...
Page #1 background image
011319-03 1
Technical instructions
Z22
TECHNICAL INSTRUCTIONS FOR JUICE EXTRACTOR Z22
INDEX:
1.- Disassemble machine
2.- Dismantling and change motor
3.- Closing machine
4.- Grating disc change
5.- Electric diagram
6.- Troubleshooting
1.- Disassemble machine
1.1. This juicer machine has a metallic locking arm, that allows locking the machine up while
working. When the locking arm is unlocked, turns a micro-switch off and it makes that the
juicer doesn’t works and we can work safety. (Otherwise we should disconnect the mains
before doing anything with the machine)
Question and Answer IconNeed help?

Do you have a question about the Zummo Z22 and is the answer not in the manual?

Zummo Z22 Specifications

General IconGeneral
BrandZummo
ModelZ22
CategoryKitchen Appliances
LanguageEnglish

Summary

Disassemble Machine

Locking Arm Safety Feature

Explains the locking arm's role in safety and micro-switch activation.

Juicer Component Removal

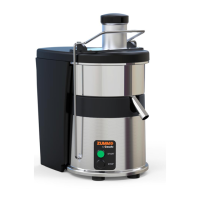
Details removing the juicer cover, bowl, and basket components.

Dismantling and Motor Replacement

Base Screw Access and Marking

Locating and removing base screws under rubber feet and marking base orientation.

Guideway and Spring Detachment

Unscrewing fixed guideway and removing attaching springs.

Capacitor Discharge and Arm Removal

Safely discharging capacitor and removing the locking arm.

Motor Area Access and Drive Disc Removal

Clearing motor area and detaching the drive disc from the shaft.

Rubber Cover and Motor Fasteners

Removing rubber cover and loosening motor mounting bolts.

New Motor Installation Procedure

Fitting the new motor and reattaching the rubber cover.

Machine Reassembly

Guideway and Locking Arm Securing

Fixing locking arm to guideway and adding rubber washer/bolt.

Base and Plastic Part Attachment

Assembling plastic base, ensuring correct alignment with machine slot.

Grounding During Assembly

Connecting ground wire to locking arm fitting and chassis.

Grating Disc Replacement

Grating Disc Removal Steps

Disconnecting mains and removing bowl contents to access grating disc.

Electric Diagram

Troubleshooting

Diagnosing Motor Start Issues

Steps to check voltage, disc, buttons, micro-switch, capacitor, and motor resistance.

Relay Check and Replacement

Verifying relay functionality and replacement procedure with wire labeling safety.

Related product manuals