Step 9. We can move to the Strike Zone (#G) assembly now. For the Strike Zone, you may receive either the one with all
nylon straps or the one in combination with the nylon straps and the bungee ropes. The assembly steps are
different.
9
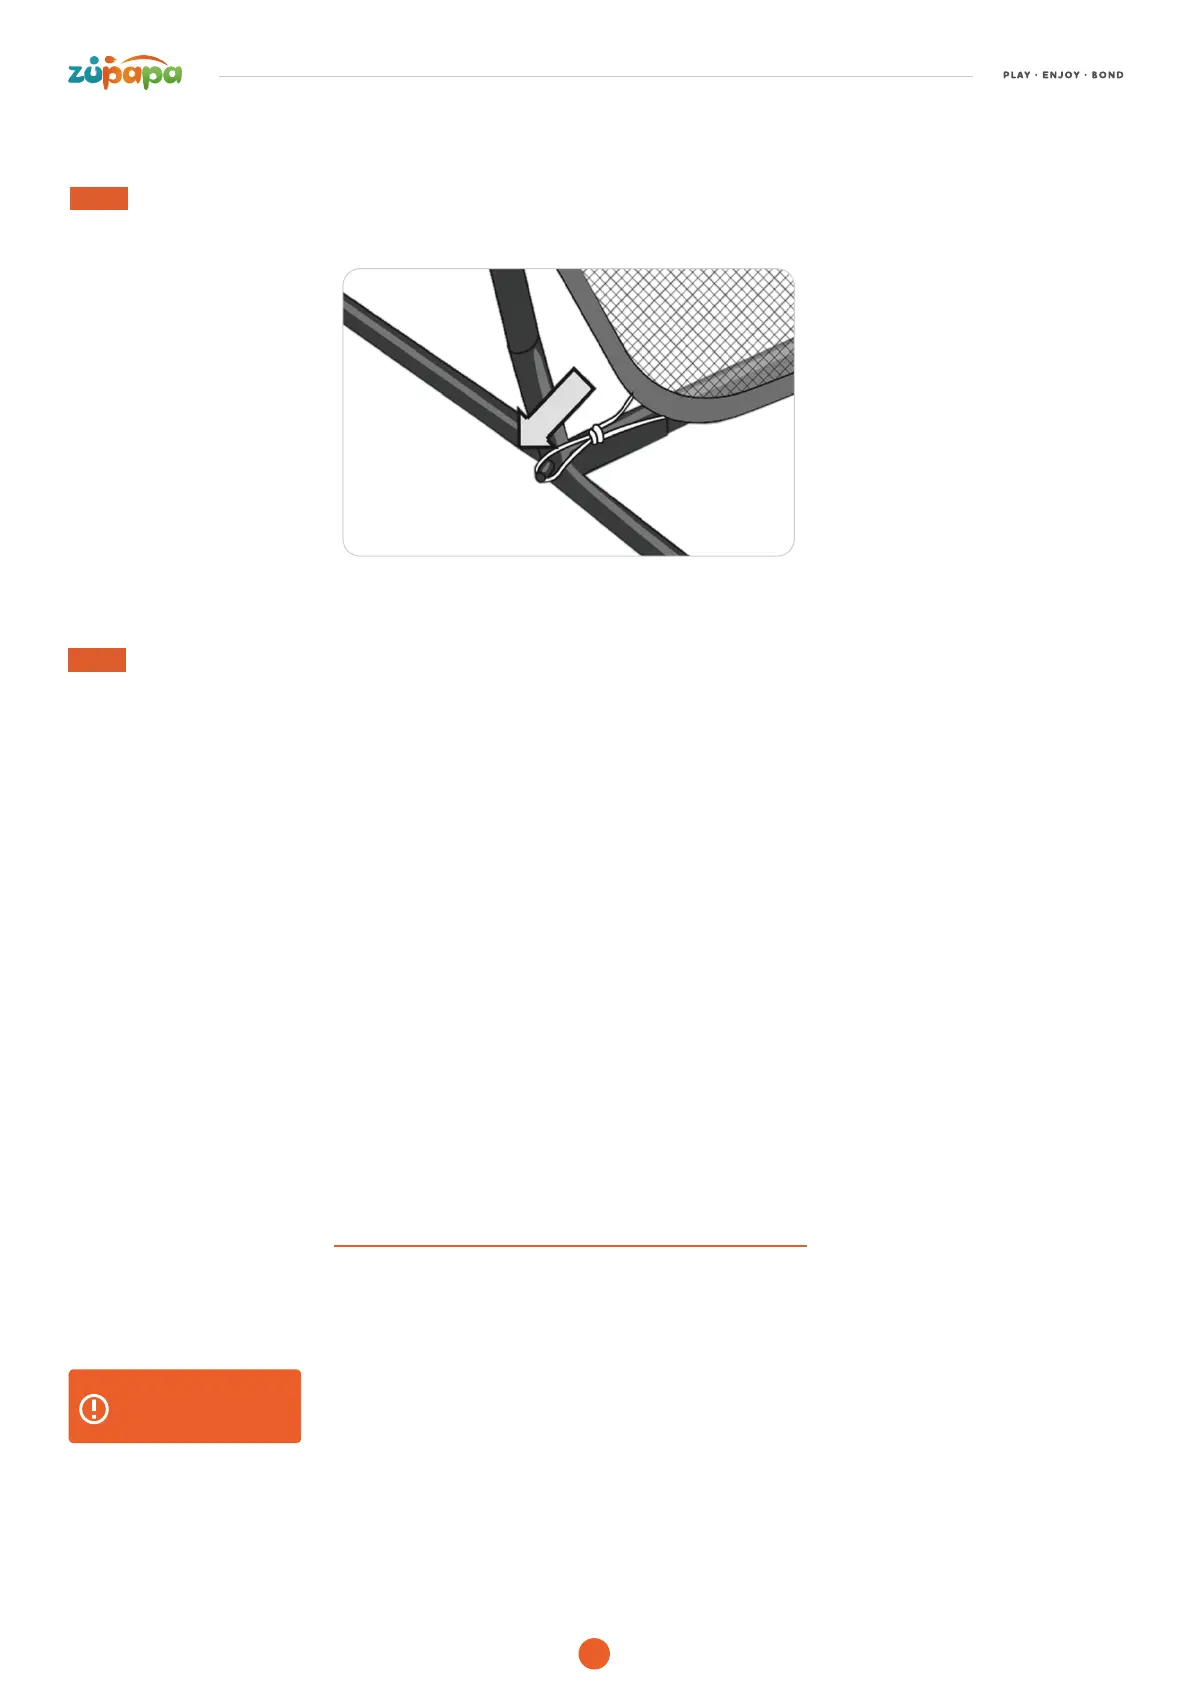
Step 8. Hang the two loops at the bottom of the Baseball Net (#F) into the end of the two Base Legs (#E) respectively and
fix the Velcro (the part marked as X in the picture of Step 7) with the pole.
• If you receive the one with all nylon straps, please hang the four snap hooks with the white loops on the four corners of the
frame accordingly.
• If you receive the one in combination with the nylon straps and the bungee ropes, please make the bungee rope face
downward, then connect it with the small hooks on the base accordingly.
Congratulations! You finished the assembly! If you have any further questions, please feel free to email
Zupapa® Customer Happiness Executives (official@zupapa.us), we are glad to help out all the time.
To disassemble the baseball net, follow the assembly instructions through Step 1 - Step 9 in reverse order.
IMPORTANT
• Please ensure all parts are dry and clean before storing the equipment.
• Please store the equipment in a dry place with good ventilation.
DISASSEMBLY
05
 Loading...