Before Assembling
Assembly Instructions
Please read the assembly instructions before starting your work. A quick approach to the online version
(https://www.zupapa.us/pages/assembly-instructions) is to scan the following QR code.
1. Check and confirm you have all labeled parts according to the chapter Parts List. If you need any replacement(s), feel free to reach
out to Zupapa® Customer Happiness Executives (official@zupapa.us) with the ORDER NUMBER, PART NUMBER, REQUIRED
QUANTITY for each part, and photos or videos (if applicable).
2. Ensure all parts are clean and dry before the assembly.
3. Ensure no one else is next to the baseball net during the assembly, especially when installing the fiberglass poles - because it may
cause serious injuries if a pole pops up.
To avoid the risk of getting injured during the assembly process, please follow the guidelines below. Please understand that the
owner (or installer) should take responsibility for any improper operations.
6
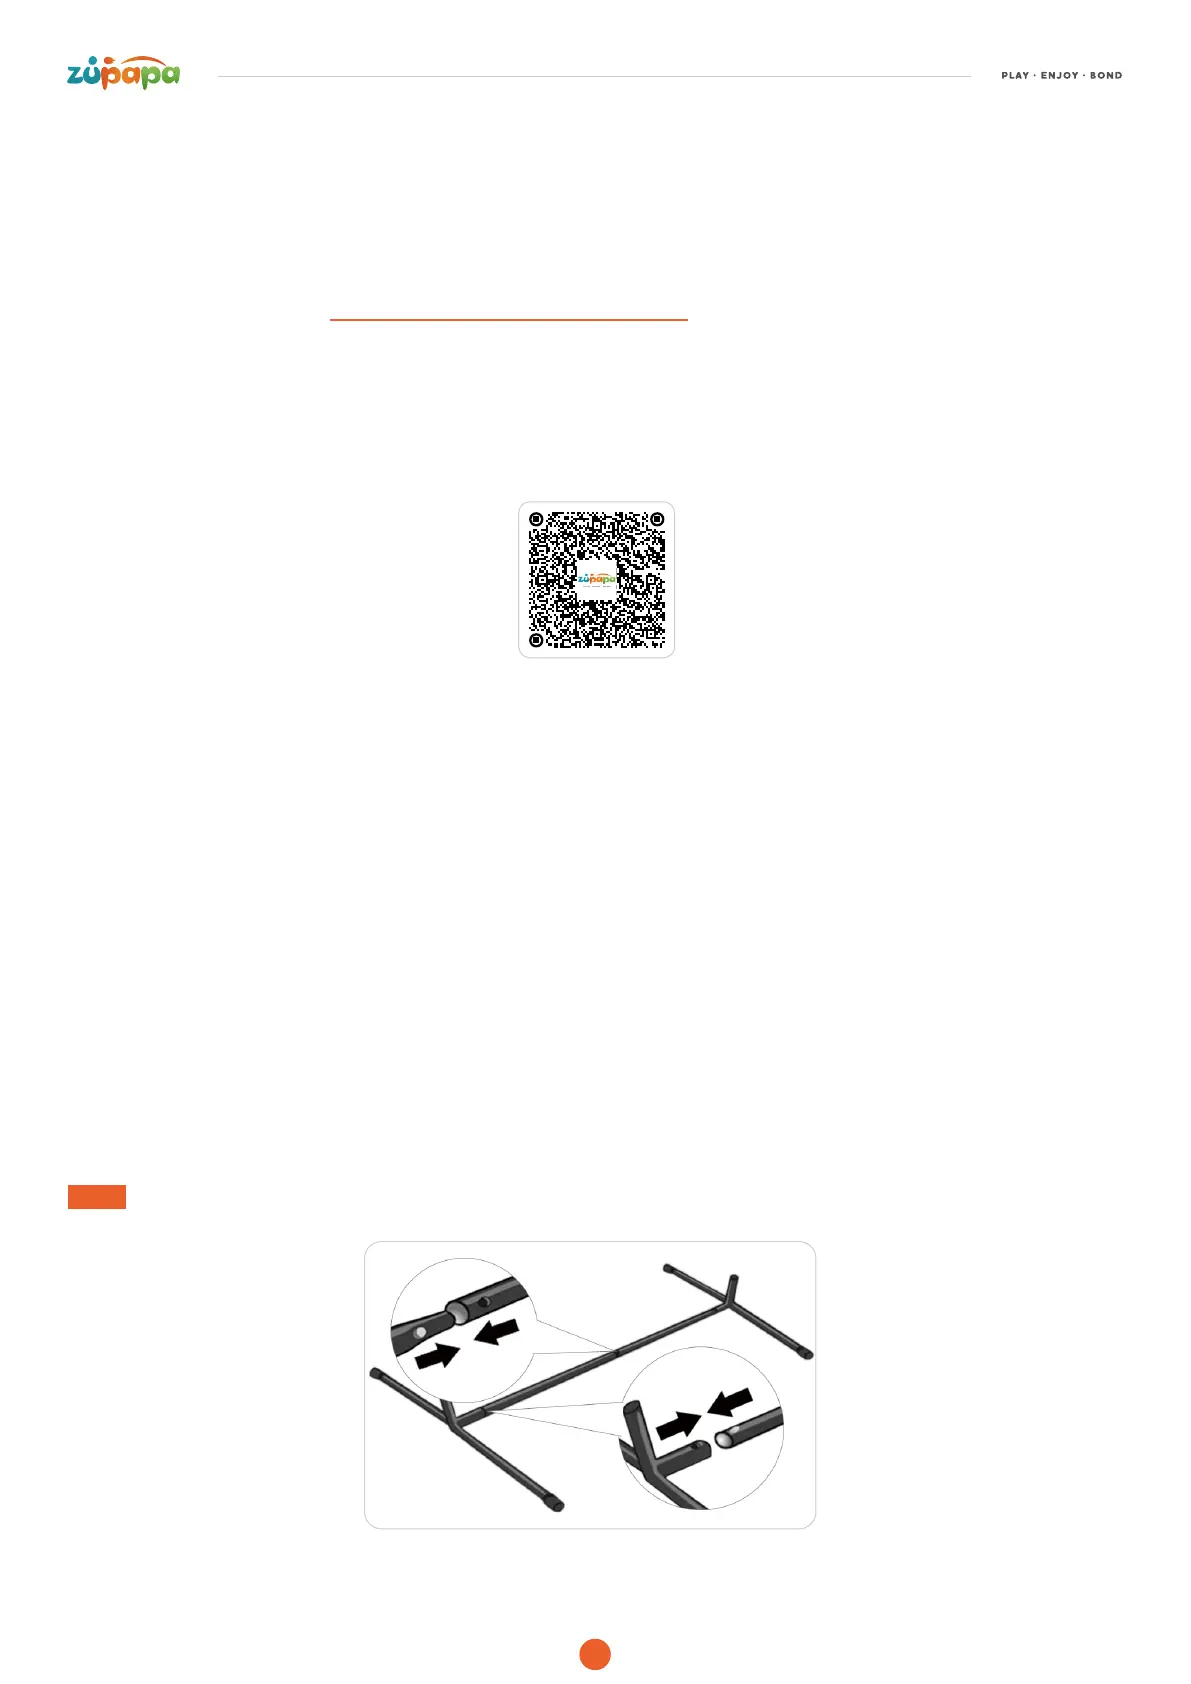
From the assembly of the frame, the baseball net, and the strike zone, there are nine steps.
Step 1. Connect the Middle Male Bar (#A) with the Middle Female Bar (#B), then insert the Base Leg (#E) at each pole end.
04
ASSEMBLY
 Loading...