The ZWO ASI Camera Quick Guide provides essential information for setting up and troubleshooting ZWO ASI cameras, designed for astronomical imaging. This guide aims to get users up and running quickly with their new camera, covering driver and software installation, connecting the camera to a telescope, and common troubleshooting scenarios.
Function Description:
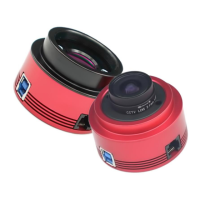
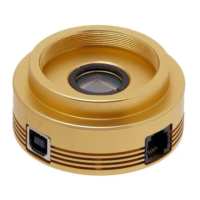
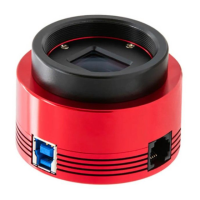
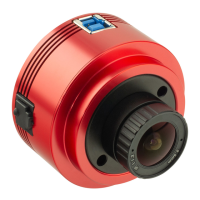
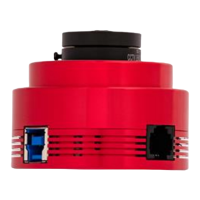
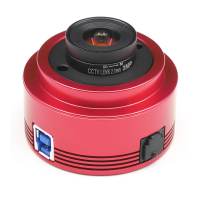
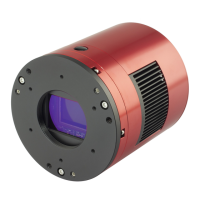
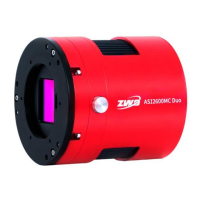
ZWO ASI cameras are specialized imaging devices primarily used for astrophotography, capturing high-quality images of celestial objects. These cameras are designed to interface with telescopes and computers to record astronomical data. They are capable of capturing various types of astronomical images, including planetary, lunar, solar, and deep-sky objects, depending on the specific camera model and setup. The cameras connect to a computer via USB (either 2.0 or 3.0, depending on the model) and require specific drivers and imaging software to function. The core function involves converting light from the telescope into digital data that can be processed and stored on a computer. Many models come with an all-sky lens for wide-field views, which needs to be removed when attaching the camera to a telescope for focused imaging. The camera's performance is influenced by various settings such as exposure time, gain, resolution, and USB traffic, all of which can be adjusted through the accompanying software to optimize image capture for different astronomical targets and conditions.
Usage Features:
-
Driver and Software Installation:
- Driver Installation: The first step involves downloading and installing the "ASI Cameras driver" from the ZWO website or using the provided CD-ROM. Once the driver is successfully installed and the camera is plugged in, the ZWO camera model should appear under the "Imaging devices" category in the Windows Device Manager, confirming proper driver recognition.
- Imaging Software (SharpCap): Users need to download and install SharpCap, a popular image capture software, from the ZWO website or CD-ROM. After launching SharpCap, the specific ZWO camera model can be selected from the camera menu. This allows users to view a live preview video from the camera. It's important to note that without a lens or telescope attached, the preview video will only show some brightness, not a focused image.
- Adjustable Settings: Within SharpCap, several key parameters can be adjusted to control the camera's behavior and image quality:
- Resolution: Users can adjust the capture resolution to suit their imaging needs, balancing detail with file size and frame rate.
- Exposure: The exposure time can be set to control the amount of light captured by the sensor. Longer exposures are typically used for fainter deep-sky objects, while shorter exposures are suitable for brighter objects like planets or the Moon.
- Gain: Gain amplifies the signal from the sensor. Higher gain can make faint objects more visible but may also increase image noise.
- USB Traffic: This setting controls the data transfer rate between the camera and the computer. Adjusting USB traffic can help optimize performance and prevent dropped frames, especially with high-speed cameras.
- Frame Rate (FPS): The software displays the current frames per second (FPS), allowing users to monitor the camera's live performance.
-
Connecting to a Telescope:
- Lens Removal: For cameras that include an all-sky lens (e.g., ASI120MM/MC, ASI178MM/MC, ASI290MM/MC, ASI185MC, ASI224MC), it is crucial to remove this lens before attempting to attach the camera to a telescope.
- Attaching the Nose-piece: The camera is typically attached to a telescope using a 1.25" nose-piece, which screws onto the camera body.
- Eyepiece Replacement: The camera replaces the eyepiece in the telescope's focuser. The process involves focusing the telescope first with an eyepiece to achieve a sharp view, then removing the eyepiece and inserting the camera into the focuser.
- Refocusing: After inserting the camera, refocusing the telescope is usually necessary to achieve a sharp image on the computer screen.
- USB Connection: The camera connects to the computer via a USB 2.0 or 3.0 cable, ensuring data transfer for live view and image capture.
Maintenance Features (Troubleshooting):
The guide provides solutions for common issues encountered during camera operation:
-
Completely White Preview Image with Normal FPS:
- Cause: This indicates that the camera is overexposed.
- Solution: Reduce the exposure time and/or gain settings in the imaging software (e.g., SharpCap). It's also reiterated that without a lens or scope, only brightness will be visible, not a focused image.
-
Black Preview Screen with 0 FPS:
- Cause: This often points to issues with data transfer speed or connectivity.
- Solution:
- Reduce the "Turbo USB" setting in the camera controls to slow down the capture speed.
- Try connecting the camera directly to the PC, bypassing any USB hubs or extenders, as these can sometimes interfere with data transfer.
-
Camera Not Previewing at Declared FPS (Specifications):
- Cause: This can be due to incorrect USB connection, software settings, or outdated drivers.
- Solution:
- USB 3.0 Connection: Ensure that if it's a USB 3.0 camera, it is connected to a USB 3.0 host port on the computer. Verify that the camera is recognized as "via USB3.0" in the software. Update the computer's USB Host Controller driver if necessary.
- High Speed Mode: Confirm that "High Speed Mode" is enabled in the camera settings.
- Turbo USB Adjustment: Adjust the "Turbo USB" setting, typically recommending 80-90%. Higher values generally mean faster performance, but this can depend on the computer's capabilities.
- Exposure Time: Remember that exposure time directly impacts FPS. To achieve higher FPS, the exposure time needs to be shorter than the inverse of the desired FPS (e.g., for 1 FPS, exposure time should be less than 1 second).
-
Previewing at 60 FPS but Dropping to 20 FPS During Recording:
- Cause: This issue usually stems from the hard disk drive's inability to keep up with the camera's high data transfer speed. Many ASI cameras can generate data at up to 400 MB/s, while typical HDDs might only manage 40-50 MB/s.
- Solution:
- SSD Upgrade: Replace the traditional HDD with a fast Solid State Drive (SSD) to handle higher data transfer rates.
- Raw Format Capture: If using a color camera, try capturing data in raw format instead of RGB24, as raw data often has a smaller file size and requires less processing overhead during capture.
-
Camera Not Running Continually on a Laptop Without External Power:
- Cause: This is typically due to the laptop's power save mode, which can disable or reduce power to USB ports to conserve battery.
- Solution: Disable the power saving features for USB ports in the laptop's power options (specifically, the "USB selective suspend setting" should be disabled).
-
Yellow Hint with Camera Model Name and Error Code 10 in Device Manager:
- Cause: This error usually indicates a problem with the camera's firmware or a conflict with the USB port. This is more common with USB 2.0 cameras.
- Solution:
- Try a different USB port or a different PC.
- If a good PC is found, upgrade the camera's firmware using the FWTool available on the ZWO website. The original firmware is generally more stable and faster.
-
"Unknown Device" Shown in Device Manager After Plugging in Camera:
- Cause: The driver is either not installed, or it is not installed correctly. Anti-virus software can sometimes interfere with driver installation.
- Solution:
- Close all anti-virus software and re-install the driver.
- If re-installation doesn't work, manually update the driver. Right-click the "Unknown device," select "Update Driver Software," and point to the driver directory (typically
C:\Program Files (x86)\ZWO Design\ZWO_USB_Cameras_driver).
These troubleshooting steps cover the most frequent problems users might encounter, providing practical solutions to ensure the camera operates as expected for astronomical imaging.