NE
12
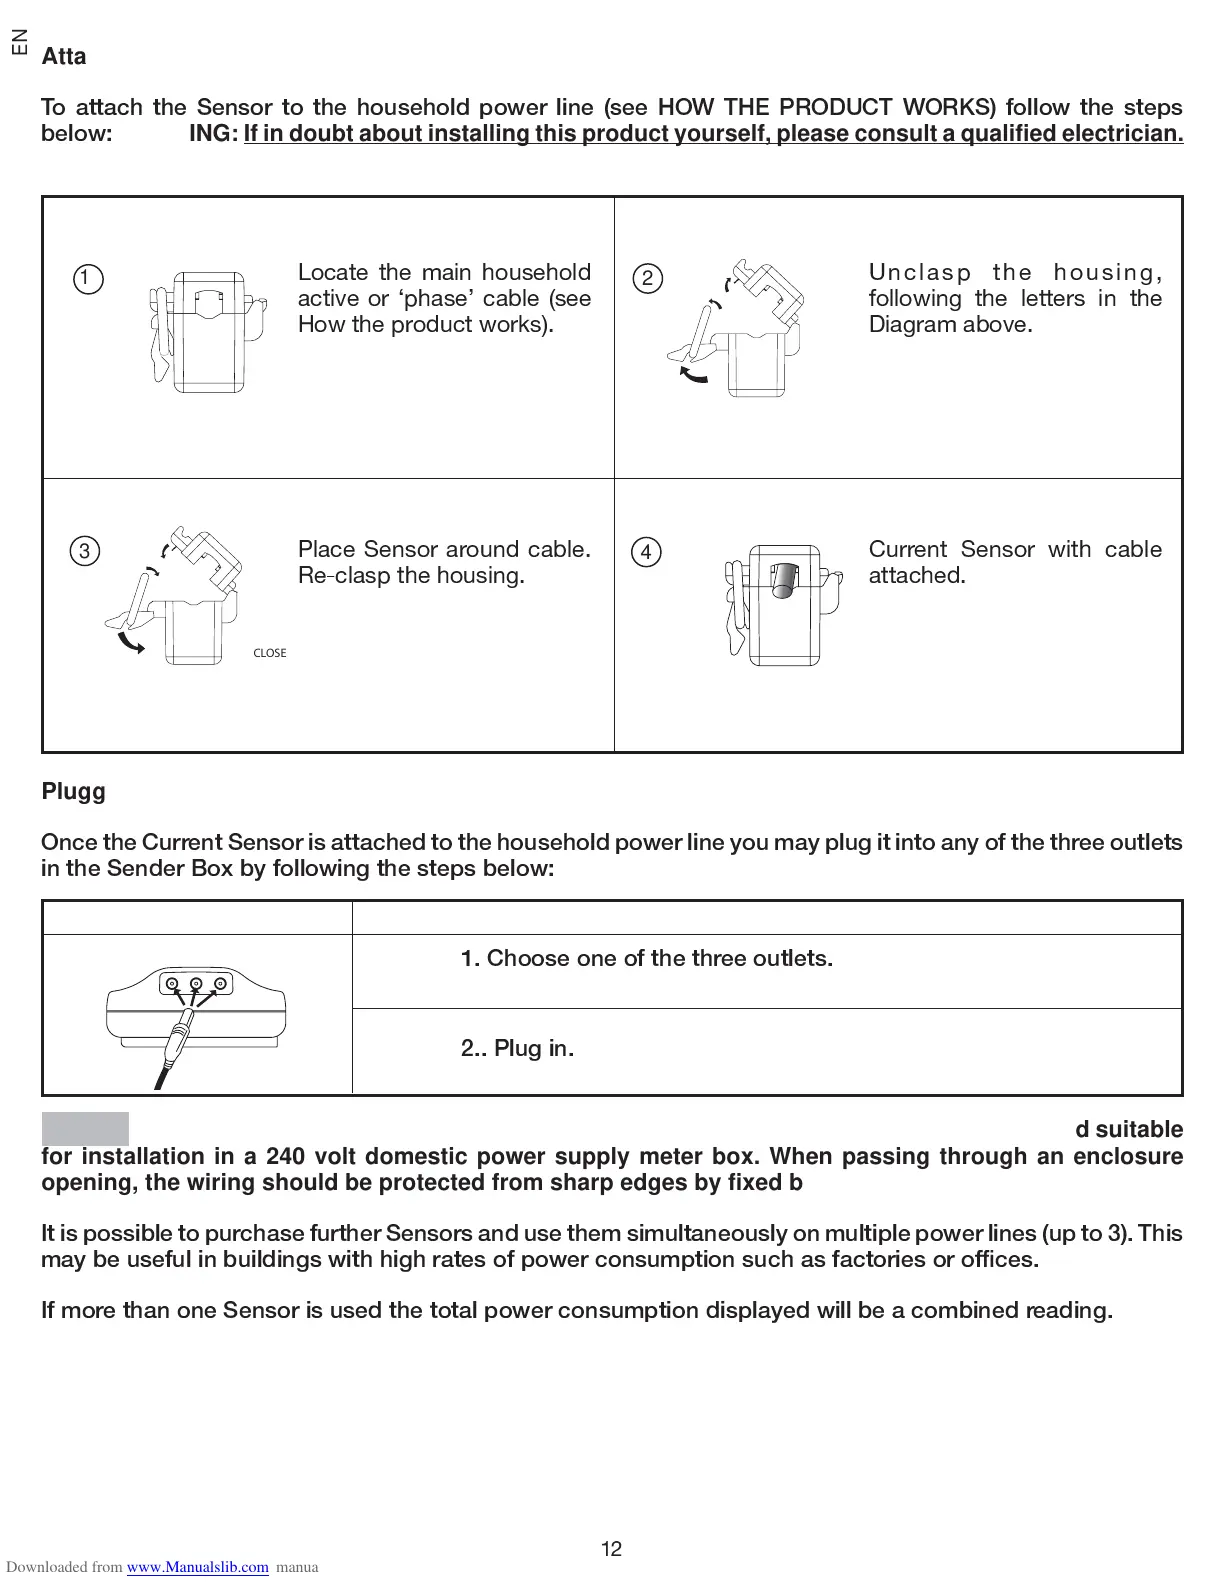
Attaching the Sensor
To attach the Sensor to the household power line (see HOW THE PRODUCT WORKS) follow the steps
below:
WARNING: If in doubt about installing this product yourself, please consult a qualified electrician.
Plugging the Sensor into the Sender Box
Once the Current Sensor is attached to the household power line
y
ou
m
a
y
plu
g
it into an
y
of the three outlets
in the Sender
B
o
x
b
y
followin
g
the steps below:
Diagram Instructions
1.
Choose one of the three outlets
.
2..
Plu
g
in
.
NOTE The signal wiring (approx. 1 volt, 1 milliamp) on the current sensor is double insulated suitable
for installation in a 240 volt domestic power supply meter box. When passing through an enclosure
opening, the wiring should be protected from sharp edges by fixed bushes.
I
t is possible to purchase further Sensors and use the
m
si
m
ultaneousl
y
on
m
ultiple power lines (up to
3
)
.
This
m
a
y
be useful in buildin
g
s with hi
g
h rates of power consu
m
ption such as factories or of
Þ
ces
.
I
f
m
ore than one Sensor is used the total power consu
m
ption displa
y
ed will be a co
m
bined readin
g
.
Locate the main household
active or ÔphaseÕ cable (see
How the product works).
Unclasp the housing,
following the letters in the
Diagram above.
Place Sensor around cable.
Re-clasp the housing.
Current Sensor with cable
attached.
OPE
A.
B.
A.
B.
C.
C.
N
2
4
CLO
3
SE
1