Tabl e 22 lists the meaning of DIP switches for 4-port E1/CE1/PRI modules and
shows how to set them:
Caution:
■ To avoid damage to the interface module or router, verify that the identifier on
the interface is correct.
■ If the 4-port E1/CE1/PRI module is connected to a cable that extends outside
the building, you should install a lightning arrester at the input end of the cable
to for lightning protection.
To connect the interface cable to the 4-port E1/CE1/PRI module:
1 Power off the router.
2 Select the appropriate 4E1 cable and E1 cable according to the type of interface
on the remote device, and set the DIP switches of the 4-port E1/CE1/PRI module
correctly.
■ If the resistance of the interface in the remote device is 75-ohm, select the E1
75-ohm non-balanced coaxial cable and 75-ohm 4E1 conversion cable and set
all the DIP switches on the 4-port E1/CE1/PRI module to ON so the interface
resistance is 75-ohm.
■ If the resistance of the interface in the remote device is 120-ohm, select the E1
120-ohm balanced twisted pair cable and 120-ohm 4E1 conversion cable and
set all the DIP switches on the 4-port E1/CE1/PRI module to OFF so the
interface resistance is 120-ohm.
3 Plug the DB-25 connector of the 4E1 conversion cable into the DB-25 interface of
the 4-port E1/CE1/PRI module and secure the screws.
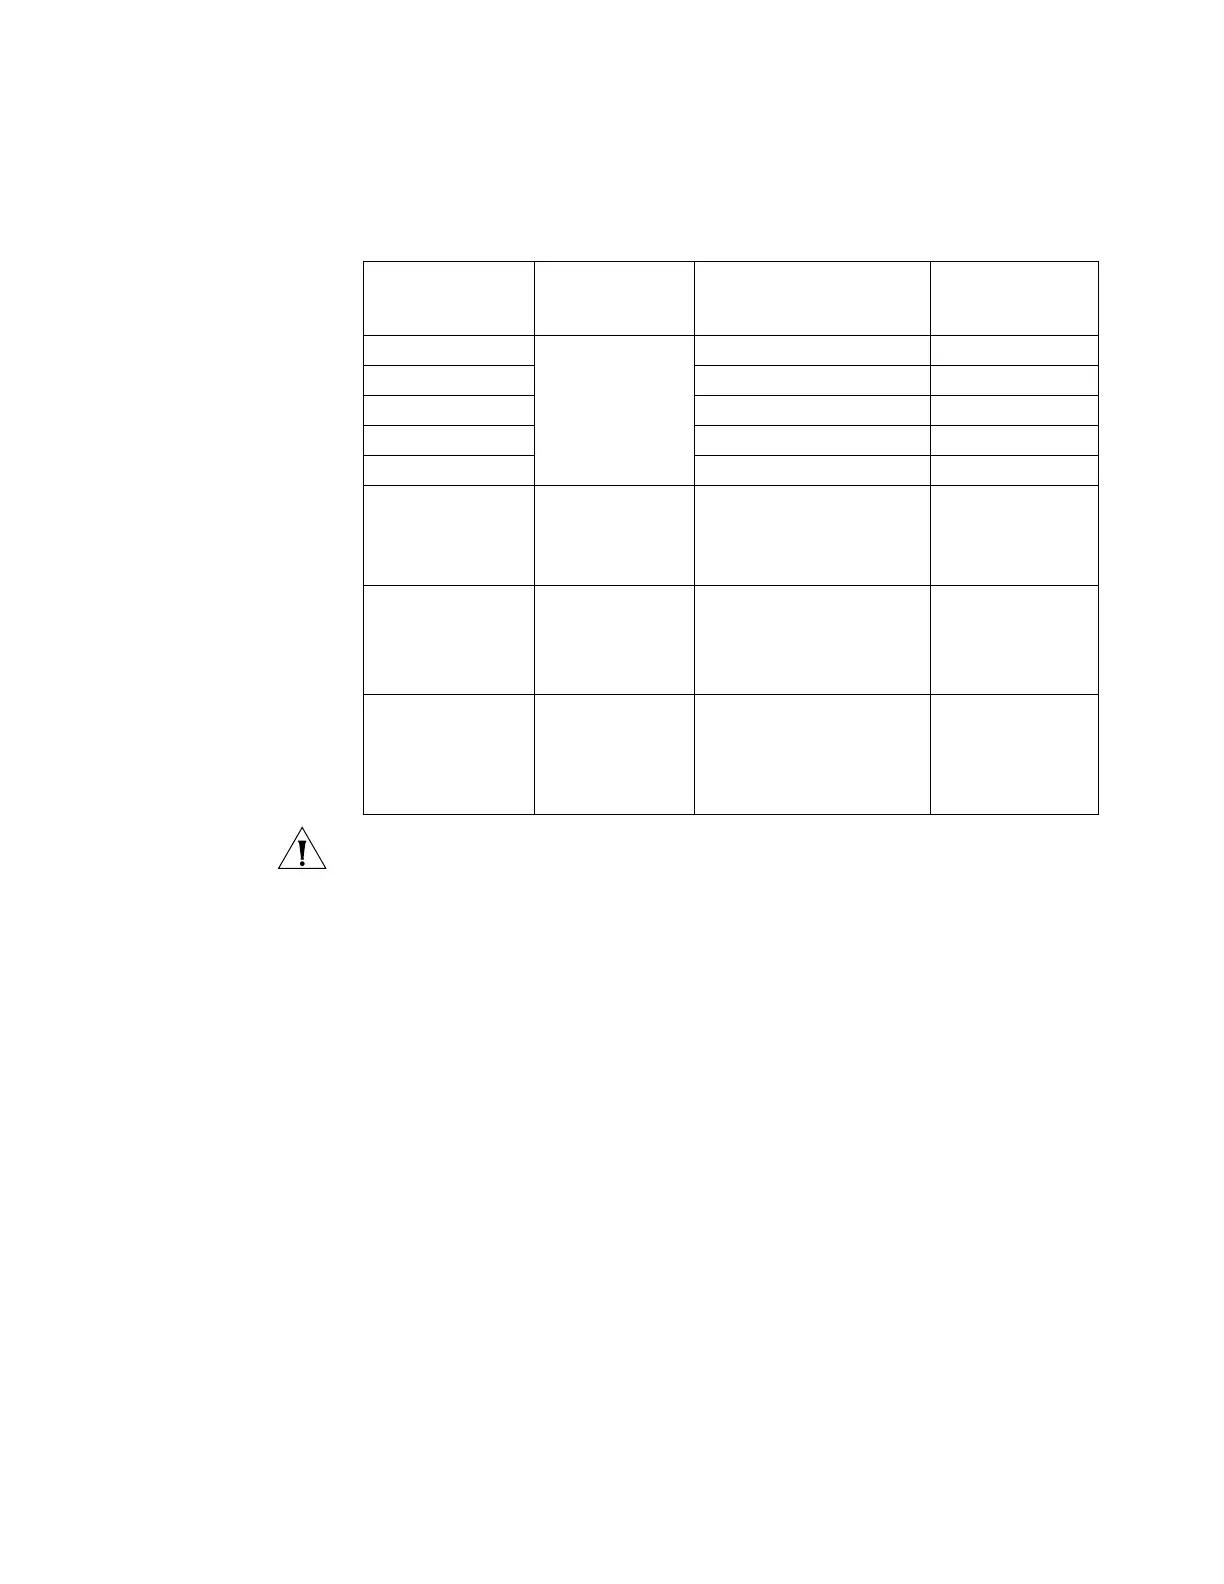
Tabl e 22 DIP Switch Settings for the 4E1 Module
DIP Meaning
Configuration of 75-ohm
impedance
Configuration of
120-ohm
impedance
1BIT 75-ohm/120-ohm
selection switch
ON OFF
2BIT ON OFF
3BIT ON OFF
4BIT ON OFF
5BIT ON OFF
6BIT RxRing grounding
mode selection
switch
OFF: RxRing is grounded via
capacitance.
ON: RxRing is grounded
directly.
-
7BIT RxShield
grounding mode
selection switch
- ON: RxShield is
grounded.
OFF: RxShield is not
grounded.
8BIT SxShield grounding
mode selection
switch
- OFF: RxShield is
grounded via
capacitance
ON: RxShield is
grounded directly.
3Com Router Release Notes for V1.20
 Loading...