This document is a user guide for the 3DLabPrint Piper J-3 Cub, a fully 3D printable RC model airplane designed for desktop 3D printers. The guide emphasizes the ease of building and flying this model, making it suitable for both beginners and experienced RC pilots.
Function Description:
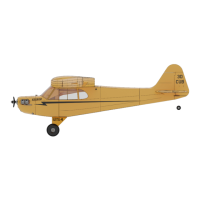
The Piper J-3 Cub is a fully 3D printable RC model of the classic Piper J-3 Cub aircraft. It is designed to be printed using a desktop 3D printer, primarily with PolyLight 1.0 LW-PLA active foaming filament, which allows for a lightweight and robust airframe. The model is intended for remote-controlled (RC) flying, offering flight characteristics comparable to or superior to classic build model airplanes. Its design incorporates extensive hi-tech 3D structural reinforcement to ensure rigidity while maintaining a lightweight airframe and exact airfoil. The model can be printed entirely at home, with spare parts easily reprinted as needed. The assembly process is designed to be straightforward, requiring minimal tools and hardware. Users need to add a brushless motor, ESC (Electronic Speed Controller), servos, and a radio system to complete the model. The guide also details an experimental floats assembly for water-based operations.
Important Technical Specifications:
- Wingspan: 1068 mm / 42.0 inch
- Length: 675 mm / 26.6 inch
- Height: 310 mm / 12.2 inch
- Wing area: 18.15 dm² / 1.94 square feet
- Wing loading: 31 g/dm² / 15.3 oz/square feet
- Center of gravity (CG): 44 mm / 1.73 inch from leading edge
- Airfoil: LHK12 modified by 3DLabPrint
- Print weight (LW PLA): 224 g / 7.90 oz
- Empty weight (w/o battery): 380 g / 13.40 oz
- Takeoff weight (3s 1300 lipo): 500 g / 17.63 oz
- Max takeoff weight: 700 g / 24.70 oz
- Never exceed speed (VNE): 70 km/h / 50 mph
- Design maneuvering speed (VA): 50 km/h / 31 mph
- Stall speed (VS): 15 km/h / 9.4 mph
- Max speed VH (level flight): 105 km/h – 56.7kn – 65.2mph with GWS 9x7.5 propeller
- Rate of climb: 20 m/s (5 373 ft/min) with GWS 9x7.5 propeller
- Flight time (3s 1300mAh/full): 7:30 with GWS 8x4 propeller
- Recommended Motor: Leopard LC2830 980KV (for 3S setup) or any 2830 1000KV similar
- Recommended ESC: Turnigy 20A / 3S or similar (any 20A/3s similar)
- Recommended Propeller: two blade GWS 8 x 4 (ugly orange) or any 8/4 CCW
- Recommended Battery: LiPol 1300mAh / 3s or any 1300mAh/3s similar
- Recommended Servos: 4x HXT900 or any similar sized servos (23x12x26 mm / 0.74x0.42x0.78 inches)
- Printing Filament: PolyLight LW-PLA (main material), PLA or PETg for specific parts (elevator arm, motor mount, landing gear).
- Printer Build Volume Requirement: 200x200x200 mm (for A6M2 Zero, similar for Cub)
- Nozzle Recommendation: 0.4mm (0.35 or 0.5mm alternatively)
- Heated Bed Recommendation: Yes, 55-60° Celsius.
- Wall Thickness: 0.55-0.67mm
Usage Features:
- Fully Printable: The entire airplane, including structural components and many scale details, can be printed on a desktop 3D printer.
- Easy to Build: Designed for simple assembly, requiring only glue (CA glue - medium + activator), pushrods, and basic RC components. No extra tools or hardware are needed beyond what's typically found in an RC hobbyist's toolkit.
- Lightweight Construction: Utilizes PolyLight 1.0 LW-PLA filament, which actively foams during printing, reducing part weight by approximately 50% compared to standard PLA. This contributes to excellent flight performance and low stall speed for easy landings.
- Detailed Design: Features many scale details like airframe plating, encouraging realistic paint jobs and customization.
- High Performance: Offers superb flight performance with a highly efficient powerplant, capable of flying 7+ minutes at full throttle and speeds exceeding 80 kph.
- Cost-Effective: Printing the entire plane or spare parts costs only about $10 in filament.
- Digital Files Included: Comes with 3MF 3D files (primary, with slicing info for Prusa Slicer 2.4+), Factory files for Simplify3D (with all necessary settings and bed layout), and Gcodes (basic, universal, for i3 style printers).
- Comprehensive Guides: Includes a detailed PDF user guide with step-by-step instructions and video guides for wing assembly, fuselage assembly, tail assembly, landing gear assembly, servo installation, motor setup, decals, and final settings.
- Customization: The LW-PLA material can be dyed, and the surface is suitable for self-adhesive decals after applying a clear acrylic spray varnish.
- Floats Assembly (Experimental): An optional assembly for water takeoffs and landings is provided, requiring carbon rods and self-tapping screws.
- Beginner-Friendly Flying: The model is designed for stability, especially with initial CG adjustments and transmitter expo settings, making it suitable for beginner RC pilots.
Maintenance Features:
- Easy Part Replacement: In case of damage, individual parts can be easily reprinted from the digital files, reducing repair costs and time.
- Simple Hinge System: Ailerons use a filament or carbon rod hinge that slides in without glue, allowing for easy servo replacement.
- Rubber Band Wing Holders: The wing is secured with rubber bands, allowing for easy removal and replacement.
- Adjustable Landing Gear: The landing gear is designed for easy assembly and adjustment, with components secured by nuts and screws.
- Cleaning Printed Parts: A snap knife can be used for cleaning the surface of printed parts, although it's often not necessary. Cosmetic issues can be fixed with a snap knife or sandpaper, as LW-PLA is easily sanded and cut.
- Printing Guide: The guide provides tips and advice for thin-wall printing, including recommendations for extrusion multiplier (0.5), zero retraction with LW-PLA, hotend temperature (220°-260°C), and turning off the cooling fan for better layer adhesion.
- CG Adjustment: The guide emphasizes the importance of proper CG balance and provides recommendations for initial flights (5mm forward of CG tag for nose-heavy stability) and later adjustments for increased maneuverability.