ProJet
®
x60 Series User Guide Additional Operations
3dscentral.3dsystems.com 33 All Rights Reserved
5/12/13
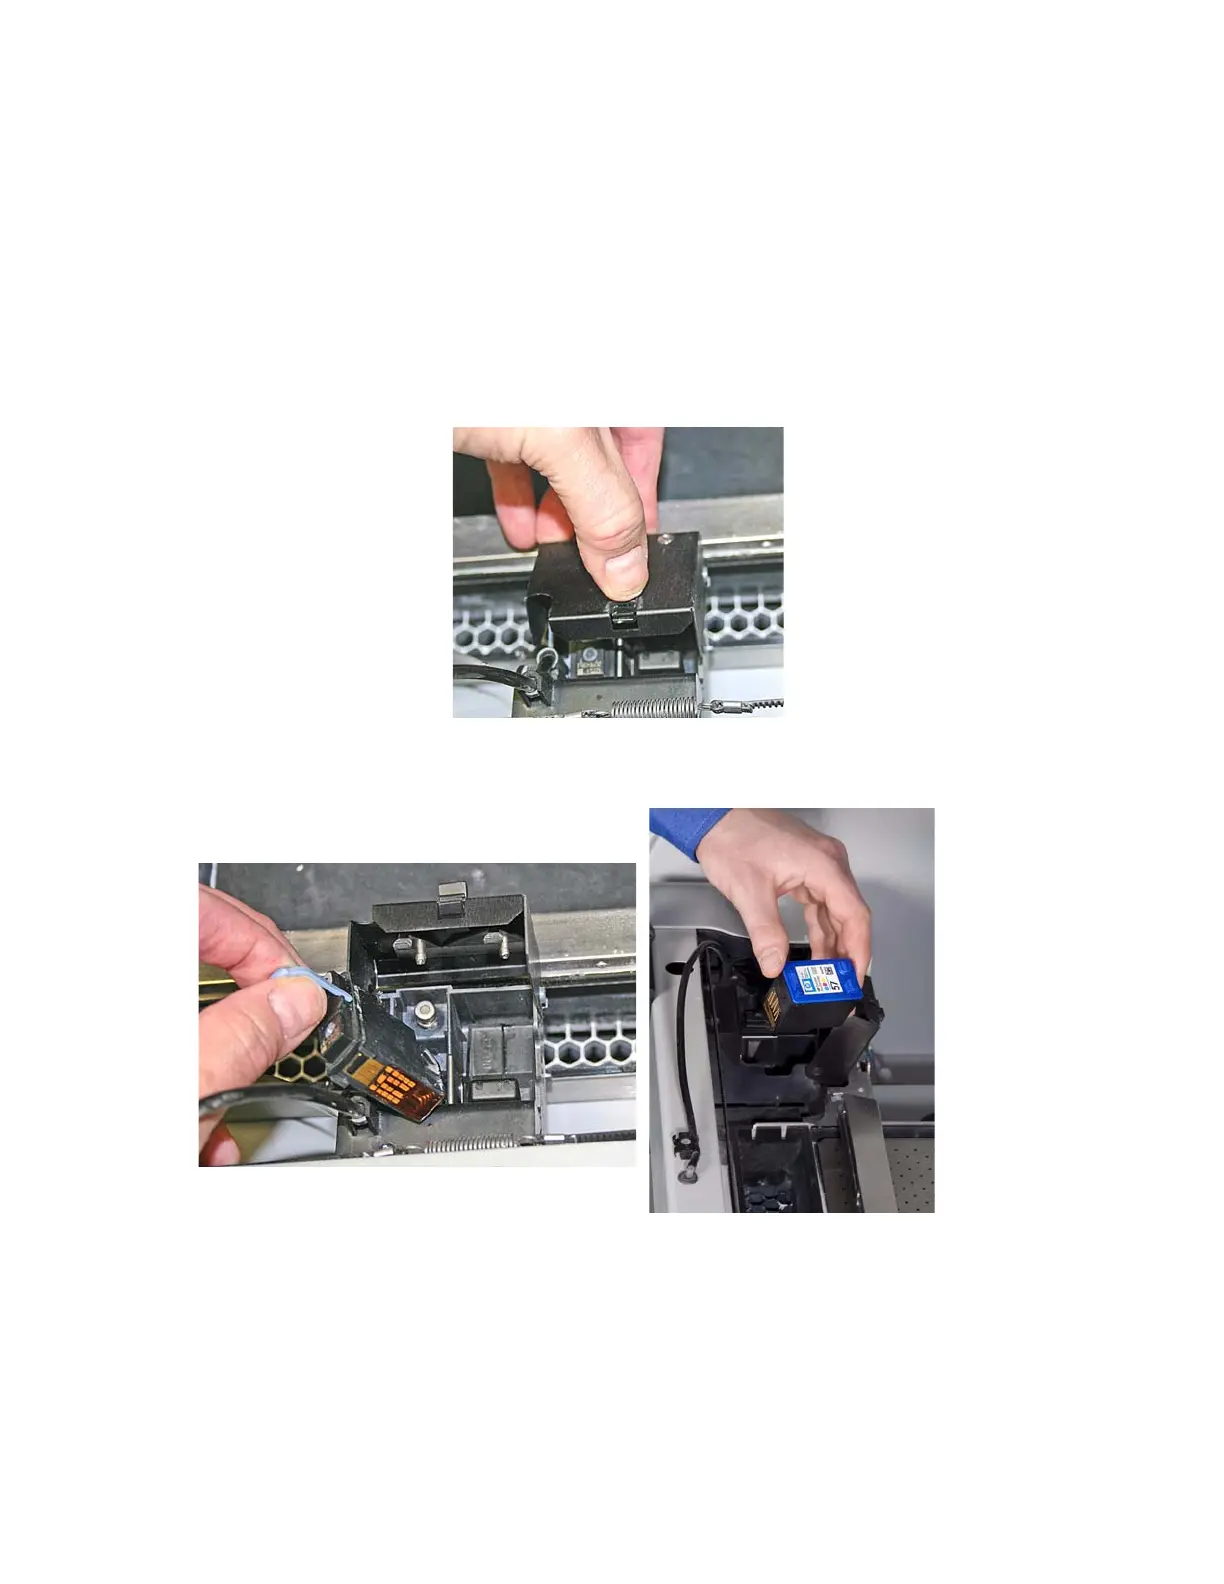
5.3 Change Print Head
If the Printer Status dialog indicates a print head needs changing, follow the steps below.
1. Open the printer top cover.
2. On the printer’s LCD menu, select
PRINT HEAD then CHANGE PRINT HEAD. The Printer moves
the Fast Axis out over the Build Bed.
3. If the piston is not already lowered some distance into the build box, lower it now by selecting
LOWER
PISTON
. The piston will lower a short distance. To lower it further, select LOWER PISTON again.
4. Open the carriage cover by releasing the latch.
5. Lift print head out of its slot and properly recycle or dispose of the empty cartridge.
On a ProJet 260C, ALSO remove the other printhead even if it does not need replacing.