Use Limitation
Thisrespiratordoesnotsupplyoxygen.Donotusein
atmospherescontaininglessthan19.5%*oxygen.
1. Donotuseforrespiratoryprotectionagainstatmospheric
contaminants that have poor warning properties or are
unknownorimmediatelydangeroustolifeandhealth(IDLH)
or against contaminants which generate high heats of reaction
with chemical filters.
2. Donotmisuse,alter,modifyorrepairthisproduct.
3. Donotusewithbeardsorotherfacialhairthatpreventdirect
contact between face and edge of the respirator.
4. Donotusewithunknownconcentrationsofcontaminants.
5. Donotuseforescapepurposes.
6. Leavetheworkareaimmediatelyandchecktheintegrityof
the respirator and replace face mask if:
- Damagehasoccurredorisapparent.
- Breathingbecomesdicultorincreasedbreathing
resistance occurs.
- Dizzinessorotherdistressoccurs.
- You taste or smell the contaminant or an irritation occurs.
7. Storethisdeviceinasealedcontainerawayfrom
contaminated areas when not in use.
8. Usestrictlyinaccordancewithrespiratorandlteruser
instruction leaflet.
9. Incaseofintendeduseinexplosiveatmospheres,contact3M
technical service.
*3Mdefinitionminimum19.5%byvolumeoxygen
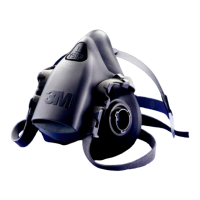
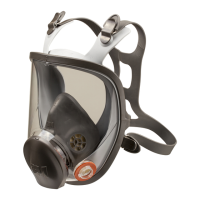
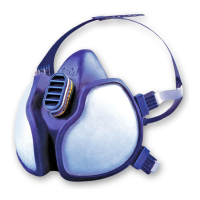
Fitting Instructions
Beforeassigninganyrespiratortobeworninacontaminated
area, we recommend that a qualitative or quantitative fit check be
performed before entering the workplace.
Fitting instructions must be followed each time the respirator is
worn.
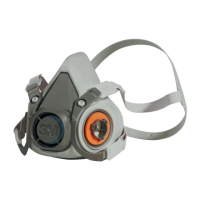
1. Assemble/adjustheadcradlebyfeedingtheperforatedstrip
through the buckle and pressing down on the stud at the
required length. Repeat for second strip.
2. Placetherespiratorovertheface,ttingitcomfortablyon
bridge of the nose, then pull the head harness over the crown
of the head.
3. Ifnecessaryremovetherespiratorandreadjustthehead
cradletoacomfortabletandrepeatstep2.
4. Take a bottom strap in each hand, place them at the back of
the neck and hook the straps together
5. Tightenthetopheadharnessrstbypullingontheendsto
achieve a comfortable and secure fit. Tighten bottom straps in
a similar manner. Strap tension may be decreased by pushing
out on back side of buckles.
6. (Whereapplicable)Aftertighteningtheheadharness(see5),
slide the 4 plastic
 Loading...