(English)
3
OPERATING INSTRUCTIONS
Unpacking
Inspect the package contents for shipping damage and ensure all components are present (Refer to Fig. 27). The product should be inspected before
each use following the procedures in the “Inspection” section of this User Instruction.
Assembly
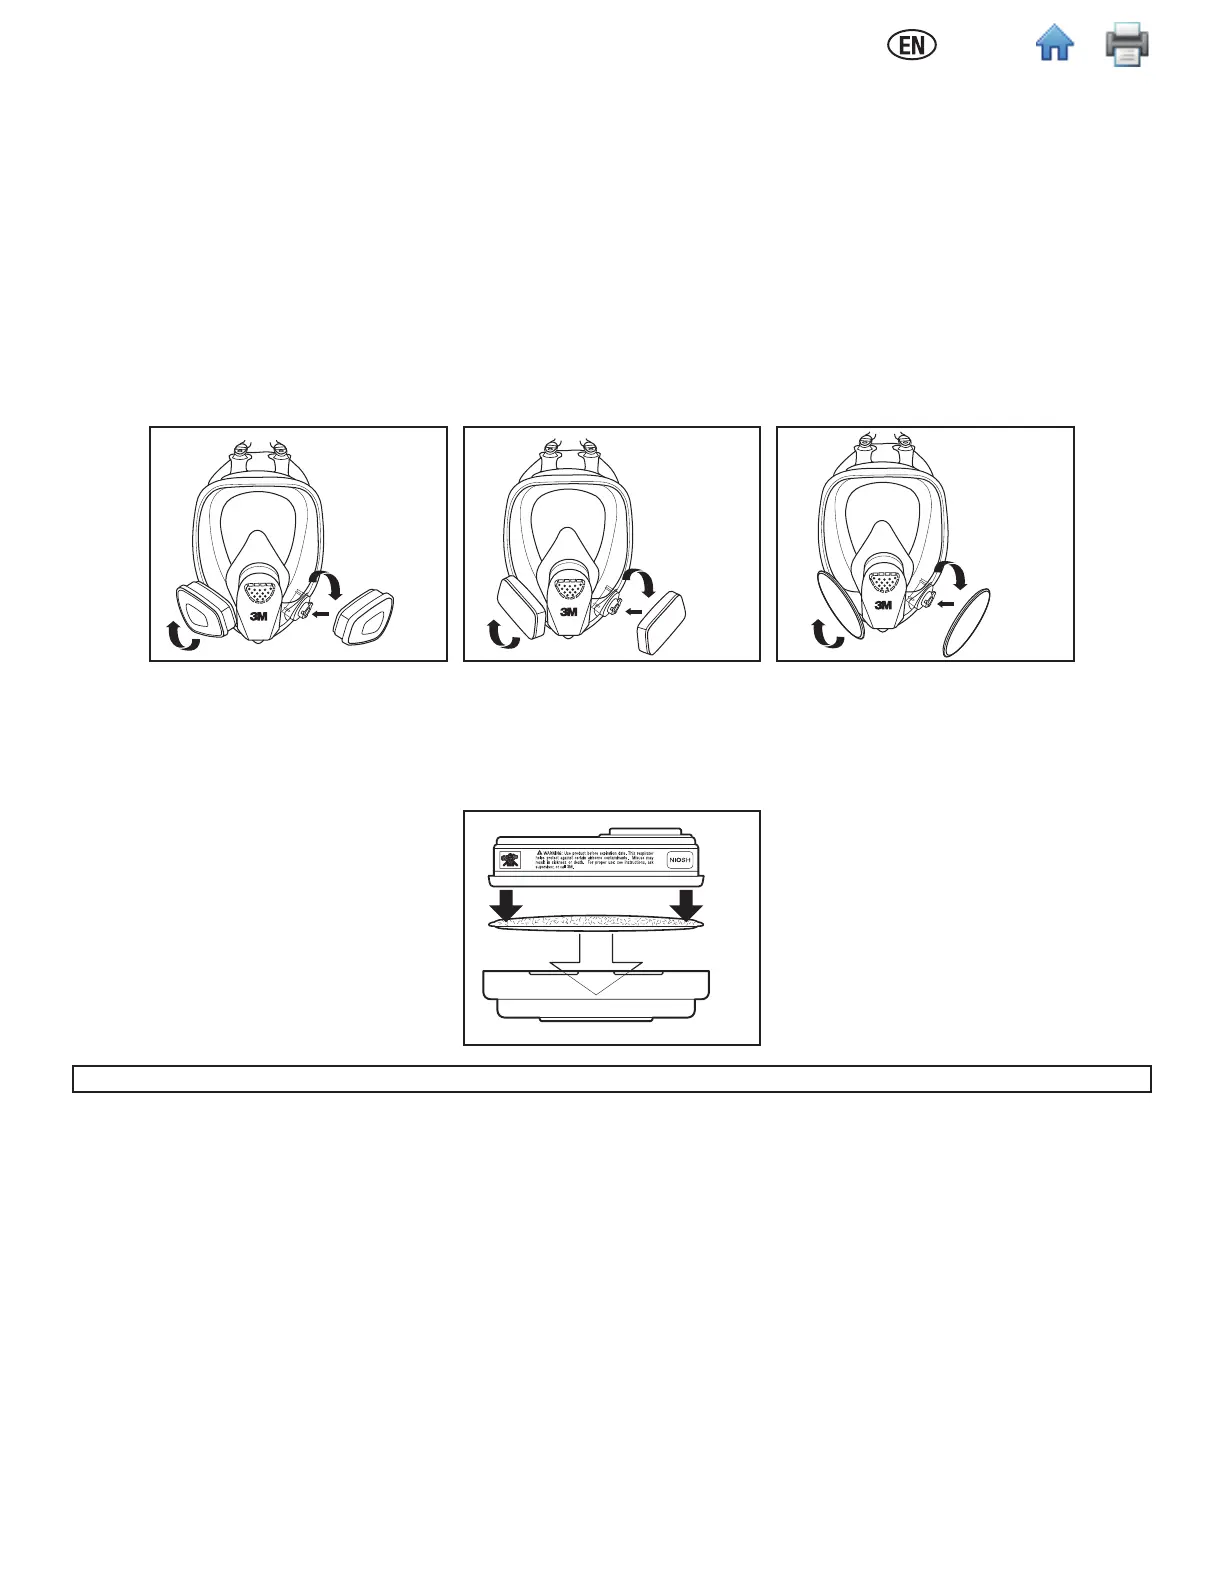
3M™ Cartridge 6000 Series, Filter 7093, and Cartridge/Filter 7093C Assembly (Fig. 1, 2)
1. Align the cartridge or lter notch with the small solid bayonet lug on facepiece and push together.
2. Turn cartridge or lter clockwise until it is rmly seated and cannot be further turned (about 1/4 turn).
3. Repeat with second cartridge or lter.
3M™ Filter 2000 Series (Fig. 3)
1. Align opening of lter with lter attachment on facepiece and push together.
2. Turn lter clockwise until it is rmly seated and cannot be further turned.
3. Repeat for second lter.
Fig. 1 Fig. 2 Fig. 3
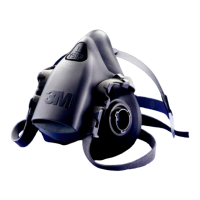
3M™ Filters 5N11 and 5P71
1. Place lter into 3M™ Retainer 501 so printed side of lter faces the cartridge.
2. Press cartridge into lter retainer. It should snap securely into lter retainer. When correctly installed, lter should completely cover face of cartridge
(Fig. 4).
3. To replace lter, remove retainer by lifting on tab.
Fig. 4
In Brazil, the 3M™ Filter 5935BR can be used with the 3M™ Filter Retainer 501 on the 3M™ Full Facepiece FF-400 Series.
3M™ Adapter Assembly 502
1. Align adapter over cartridge. Engage front snap by squeezing front of cartridge and adapter together, placing thumbs of both hands over top of
adapter and ngers along bottom sides of cartridge (Fig. 5).
2. Engage back snap by squeezing back side of cartridge and adapter together using the same hand positions. An audible click should be heard as each
snap is engaged (Fig. 6).
3. Place lter onto the lter holder so that lter comes into even contact with gasket. Twist clockwise a quarter turn until it is rmly seated and lter
cannot be turned further. Repeat for second lter.