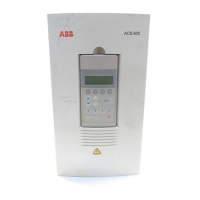
1. Remove the control panel if fitted.
2. In the control panel slot there is a little hole.
Press the retaining lever inside.
3. Remove the cover.
4
1. Stripp off the insulation from the motor cable and
mains cable. Twist the screen wires to bundles.
2. Make suitable holes to motor and mains cable
grommets.
3. To minimise radio frequency interference (RFI) at the
motor end screen 360° earthing at cable lead-through.
5
STOP!
CHECK THE INSULATIONS OF MOTOR, AND MAINS AND MOTOR CABLE.
6
7
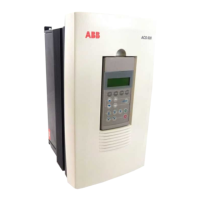
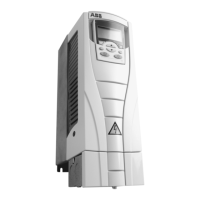
MOTOR AND MAINS CONNECTION
1.Lead the motor and mains cables through the
clamp plate.
2. Connect the motor cable to the terminal block
marked U2 V2 W2 on the right hand side of the
ACS 400.
3. Connect the mains cable to the terminal block
marked U1 V1 W1 on the left hand side of the
ACS 400.
4. ENSURE PROPER EARTHINGS.
NOTE!
ACS 400 does not carry internal fusing.
Please ensure correct fuses are installed at the supply distribution board.
See ACS 400 User’s Manual for correct fuse sizes.
1. Remove the control panel if fitted.
2. In the control panel slot there is a little hole.
Press the retaining lever inside.
3. Remove the cover.
4
1. Stripp off the insulation from the motor cable and
mains cable. Twist the screen wires to bundles.
2. Make suitable holes to motor and mains cable
grommets.
3. To minimise radio frequency interference (RFI) at the
motor end screen 360° earthing at cable lead-through.
5
STOP!
CHECK THE INSULATIONS OF MOTOR, AND MAINS AND MOTOR CABLE.
6
7
MOTOR AND MAINS CONNECTION
1.Lead the motor and mains cables through the
clamp plate.
2. Connect the motor cable to the terminal block
marked U2 V2 W2 on the right hand side of the
ACS 400.
3. Connect the mains cable to the terminal block
marked U1 V1 W1 on the left hand side of the
ACS 400.
4. ENSURE PROPER EARTHINGS.
NOTE!
ACS 400 does not carry internal fusing.
Please ensure correct fuses are installed at the supply distribution board.
See ACS 400 User’s Manual for correct fuse sizes.
Replace the front cover:
1. First hook the bottom end fingers.
2. Click the retaining lever to its place.
3. Replace the control panel if available.
8
9
CHECK that starting the motor does not cause any danger. If there is a risk of
damage to the driven equipment in case of incorrect rotation direction of the motor, it
is recommended having the driven equipment disengaged when first start is
performed.
STOP!
10
CONTROL PANEL:
Proceed with the step 11.
6&5
$,
$*1'
$*1'
9
$,
9
'&20
$2
$*1'
',
',
',
',
',
'&20
I/O TERMINAL (X1) WIRING
CABLE
EARTHING
SPEED
SETTING
POTENTIOMETER
START
/
STOP
DIRECTION
NO CONTROL PANEL:
Note!
The drive may start when mains
is switched on.
For analogue speed reference,
connect potentiometer (2-10 k
Ω
) to
terminals 1-4.
Default setting for AI1 is voltage.
As default motor nominal values are
400(230) V and 50 Hz and 1440 rpm.
To start the drive activate digital input
DI 1.
As default digital input DI 2 is
deactivated and the rotation direction
is forward. To reverse the rotation
direction activate DI 2.
Switch on mains.
Note!
For further information on I/O settings, refer to User’s Manual for product type ACS 400.
Replace the front cover:
1. First hook the bottom end fingers.
2. Click the retaining lever to its place.
3. Replace the control panel if available.
8
9
CHECK that starting the motor does not cause any danger. If there is a risk of
damage to the driven equipment in case of incorrect rotation direction of the motor, it
is recommended having the driven equipment disengaged when first start is
performed.
STOP!
10
CONTROL PANEL:
Proceed with the step 11.
6&5
$,
$*1'
$*1'
9
$,
9
'&20
$2
$*1'
',
',
',
',
',
'&20
I/O TERMINAL (X1) WIRING
CABLE EARTHING
SPEED
SETTING
POTENTIOMETER
START
/
STOP
DIRECTION
NO CONTROL PANEL:
Note!
The drive may start when mains
is switched on.
For analogue speed reference,
connect potentiometer (2-10 k
Ω
) to
terminals 1-4.
Default setting for AI1 is voltage.
As default motor nominal values are
400(230) V and 50 Hz and 1440 rpm.
To start the drive activate digital input
DI 1.
As default digital input DI 2 is
deactivated and the rotation direction
is forward. To reverse the rotation
direction activate DI 2.
Switch on mains.
Note!
For further information on I/O settings, refer to User’s Manual for product type ACS 400.

 Loading...