EasyManua.ls Logo

ABB AZ200 737 User Manual

ABB AZ200 737
8 pages
To Next Page IconTo Next Page
Page #1 background imageLoading...
Page #1 background image
Instruction IN/ANAINST/032-EN Rev. B
Endura AZ20 series probe
Combustion oxygen monitor
Installing large surface area filter
Kit reference: AZ200 737
Measurement made easy
1Introduction
This publication details fitting of a large surface area filter
to the AZ20 probe.
These procedures must be carried out by suitably trained
personnel and in accordance with the information given.
2 Tools / Items required
M4 open-ended spanner
3 mm A/F hexagon wrench
Solvent (lighter fluid / petroleum ether) or alcohol
(surgical spirits)
Non-metallic pan scouring pad
Scalpel / Small sharp blade
Small flat-bladed screwdriver
Transmitter Instruction manual IM/AZ20E-EN
Probe Instruction manual IM/AZ20P-EN
Maintenance guide IM/AZ20M-EN
Question and Answer IconNeed help?

Do you have a question about the ABB AZ200 737 and is the answer not in the manual?

ABB AZ200 737 Specifications

General IconGeneral
Output Signal4-20 mA
Power Supply24 V DC
Protection RatingIP65
Probe Length100 mm
Operating Temperature-20°C to +60°C

Summary

Introduction to Endura AZ20 Probe Installation

Tools and Items Required for Installation

Health and Safety Precautions

Potential Safety Hazards

Details potential hazards associated with the Endura AZ20 sensor/probe and its installation.

Safety Precautions for Pressurized Process Installation

Specific safety precautions for installing the sensor/probe to a pressurized process.

Process Conditions and Requirements

Considerations for process conditions, environmental factors, and personal protective equipment (PPE).

Weight Handling of AZ20 Components

Guidance on handling the weight of the AZ20 components and necessary lifting equipment.

Electrical Safety for AZ20 Analyzer

Electrical safety considerations for the AZ20 analyzer, including voltage hazards.

Product Disposal and Recycling Guidelines

Instructions for the proper disposal and recycling of the product according to regulations.

Isolating Transmitter and Shutting Down Supplies

Isolating the Transmitter

Procedure for isolating the transmitter from incoming mains power supplies.

Shutting Down Sensor Assembly at Process

Steps to shut down the sensor assembly by closing air supply and test gas lines.

Removing the Sensor from the Process

Instructions for disconnecting connections and removing the sensor from the process.

Removing the Diffuser Flame Arrestor and Cell

Component Removal Steps

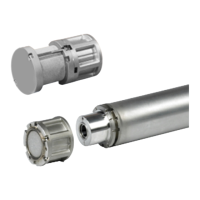
Detailed steps for loosening bolts, removing the flame arrestor, and withdrawing the cell.

Handling Stuck Cells

Methods for gently freeing a stuck cell using rocking or wire separation.

Separating Cell from Thermocouple/Electrode

Procedure to carefully separate the cell tip from the wire nest on the electrode assembly.

Removing the C-ring

Instructions for removing the C-ring, including techniques for stuck rings.

Refitting the Cell and Large Surface Area Filter

Preparing the Cell Mounting Area

Checking and cleaning the cell mounting area for damage and debris.

Fitting New C-ring and Cell

Steps to fit a new C-ring and correctly align and slide the cell into the probe body.

Refitting Test Gas Injection Pipe

Procedure for refitting the test gas injection pipe into its designated hole.

Attaching Probe Filter Carrier and Adaptor

Steps for locating and securing the probe filter carrier and ceramic filter adaptor.

Installing Filter Gaskets, Filter, and Clamp Plate

Guidance on fitting filter gaskets, the ceramic filter, and the clamp plate.

Finalizing Installation and Commissioning

Instructions for re-installing the probe, making gas/electrical supplies, and commissioning.

Contact Information

Related product manuals