Do you have a question about the ABB E1N 12 and is the answer not in the manual?
Outlines the procedure for checking received material for damage or errors.
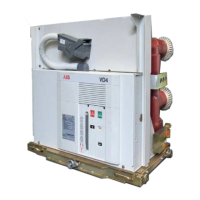
Provides guidelines for storing circuit-breakers and information on their weights.
Details important cautionary notes for handling and storing circuit-breakers.
Specifies requirements for the installation room environment for circuit-breakers.
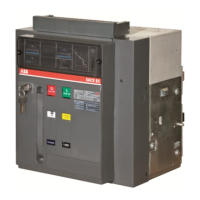
Instructions for installing the fixed part of the circuit-breaker.
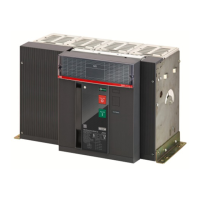
Details the installation of the fixed part for withdrawable circuit-breakers.
Outlines the preparation steps for the fixed part of withdrawable circuit-breakers.
Explains the procedure for installing the fixed part, including screw usage.
Details connections required for the power circuit of the circuit-breaker.
Step-by-step procedure for assembling connection busbars.
Instructions for earthing connections for circuit-breakers.
Guidance on wiring the auxiliary circuits of the circuit-breaker.
Outlines general procedures for putting the circuit-breaker into service.
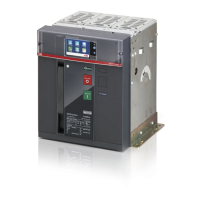
Identifies and describes the operating and signalling components of the circuit-breaker.
Details the step-by-step procedures for closing and opening the circuit-breaker.
Explains the procedures for racking the circuit-breaker in and out.
Provides essential warnings before performing maintenance on the circuit-breaker.
Outlines the recommended maintenance program and intervals.
Details the specific operations involved in circuit-breaker maintenance.
Lists preliminary operations before starting maintenance tasks.
Describes the steps for a general inspection of the circuit-breaker.
Details how to check the wear on circuit-breaker contacts.
Provides instructions for maintaining the operating mechanism.
Lists common anomalies and their corresponding causes and remedies.
Describes various electrical accessories for the circuit-breaker.
Introduces the PR121, PR122, and PR123 electronic protection releases.
Provides crucial safety information regarding the use of the device.
Details the general and electrical specifications of the PR121/P release.
Provides an overview of the PR121/P unit's general characteristics and functions.
Lists the electrical characteristics of the PR121/P release.
Explains the self-supply capability of the PR121/P release.
Details the auxiliary power supply requirements for the PR121/P release.
Lists the independent protection functions offered by the PR121/P unit.
Provides detailed descriptions of the various protection functions (L, S, I, G, Iinst).
Details the overload protection function 'L' with inverse time delay.
Details the short-circuit protection function 'S' with adjustable delay.
Details the instantaneous short-circuit protection function 'I'.
Details the earth fault protection function 'G' with adjustable delay.
Describes the instantaneous short-circuit protection 'Iinst'.
Illustrates the trip curves for various protection functions (L-I, L-S(t=k/I2)-I, L-S(t=k)-I, G).
Explains how to check trip causes and use the trip test button.
Instructions for connecting and setting up the PR121/P unit.
Instructions for making the necessary connections for the relay.
Guidance on checking current sensor and trip coil connections.
Describes the user interface elements and their functions on the PR121/P unit.
Details how to perform the trip test on the PR121/P unit.
Explains the importance of initial settings for the PR121/P unit.
Guides the user on how to change protection functions and settings.
Provides guidance on operating and servicing the PR121/P release.
Explains how to adjust the neutral protection settings.
Step-by-step guide for replacing an electronic release.
Details the meaning of alarms and optical signals (LEDs) on the PR121/P unit.
Explains the optical signals (LEDs) and their indications.
Provides a table of typical service conditions and suggested solutions for faults.
Recommends actions if the PR121/P unit is suspected of being faulty.
Details the general and electrical specifications of the PR122/P release.
Lists the independent protection functions offered by the PR122/P unit.
Details the protection functions (L, S, S2, D, I, G, Gext, Rc, U, OT, UV, OV, RV, RP, UF, OF).
Details the overload protection function 'L' with inverse time delay.
Details the short-circuit protection function 'S' with adjustable delay.
Illustrates trip curves for various PR122/P functions (L-I, L-S(t=k/I2)-I, L-S(t=k)-I, G, U, UV, OV, RV, RP).
Instructions for connecting and setting up the PR122/P unit.
Instructions for making the necessary connections for the PR122/P unit.
Guidance on checking CS and TC connections for the PR122/P unit.
Describes how to perform auto-test and trip test on the PR122/P unit.
Explains the importance of initial settings for the PR122/P unit.
Details how to manage the password for the PR122/P unit.
Step-by-step guide for installing and uninstalling a PR122/P unit.
Steps for installing a PR122/P electronic release.
Steps for uninstalling a PR122/P electronic release.
Describes the user interface elements and their functions on the PR122/P unit.
Explains how to use the pushbuttons on the PR122/P unit's interface.
Describes the 'Read' and 'Edit' modes of the user interface.
Guides on how to navigate and change parameters via the user interface.
Instructions for modifying the basic configuration of the unit.
Details the general and electrical specifications of the PR123/P release.
Lists the independent protection functions offered by the PR123/P unit.
Details the protection functions (L, S, S2, D, G, Gext, OT, UV, OV, RV, RP, UF, OF, MCR).
Details the overload protection function 'L' with inverse time delay.
Details the short-circuit protection function 'S' with adjustable delay.
Details the instantaneous short-circuit protection function 'I'.
Details the earth fault protection function 'G' with adjustable delay.
Illustrates trip curves for various PR123/P functions (L-S(t=k/I2)-I, L-S(t=k)-I, G, L).
Instructions for connecting and setting up the PR123/P unit.
Instructions for making the necessary connections for the PR123/P unit.
Guidance on checking CS and TC connections for the PR123/P unit.
Describes how to perform auto-test and trip test on the PR123/P unit.
Explains the importance of initial settings for the PR123/P unit.
Details how to manage the password for the PR123/P unit.
Step-by-step guide for installing and uninstalling a PR123/P unit.
Steps for installing a PR123/P electronic release.
Steps for uninstalling a PR123/P electronic release.
Describes the user interface elements and their functions on the PR123/P unit.
Explains how to use the pushbuttons on the PR123/P unit's interface.
Describes the 'Read' and 'Edit' modes of the user interface.
Guides on how to navigate and change parameters via the user interface.
Instructions for modifying the basic configuration of the unit.
Instructions for operating the PR120/V module.
Instructions for putting the residual current protection function into service.
Details how to access and perform the Rc test.
Explains the symbols and codes used in the circuit diagrams.
| Brand | ABB |
|---|---|
| Model | E1N 12 |
| Category | Circuit breakers |
| Language | English |