Do you have a question about the ABB SwirlMaster FSS450 and is the answer not in the manual?
Outlines dangers and potential severe injury or death from improper use.
Details owner responsibilities regarding explosion protection and Ex-marking.
Specifies Ex-marking and electrical parameters for non-sparking protection.
Details Ex-marking and electrical data for intrinsically safe applications.
Covers Ex-marking and electrical data for flameproof enclosure protection.
General requirements and considerations for installing the flowmeter in pipelines.
Procedures for proper grounding of the transmitter and sensor for measurement accuracy.
Details on connecting devices using HART communication protocols.
Information on connecting devices using the Modbus protocol for network communication.
Provides electrical specifications for power supply, current, and HART outputs.
Step-by-step guide for connecting the signal cable between sensor and transmitter.
Critical safety precautions to be observed before and during commissioning.
Essential checks to perform before powering up and operating the device.
How to configure current and digital outputs for specific applications.
Steps and checks for safely powering up the device after installation.
Overview of factory settings and initial device configuration.
Guide to configuring common parameters using the intuitive Easy Setup menu.
Procedures for calibrating the zero flow point to ensure accurate readings.
Functionality for measuring energy flow in liquids, excluding water.
Energy calculation for steam/hot water based on IAPWS-IF97 standard.
Automatic procedure to set the zero flow point by determining sensor signal noise.
Safety precautions for operating the device safely.
How to navigate menus and configure device parameters via the LCD.
Accessing diagnostic information and operator pages.
Accessing and modifying device parameters.
Understanding and interpreting error messages shown on the LCD.
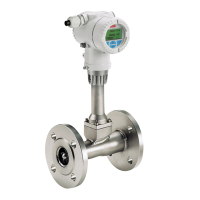
| Type | Swirl flow meter |
|---|---|
| Measurement principle | Vortex shedding |
| Accuracy | ±1% of reading |
| Output signal | 4-20 mA, pulse output |
| Materials | Stainless steel, Hastelloy |
| Approvals | ATEX, IECEx |
| Media | Liquids, gases, steam |
| Power Supply | 24 V DC |
| Protection Class | IP67 |
| Temperature range | -40 to +240 °C (-40 to +464 °F) Standard; -200 to +400 °C (-328 to +752 °F) Extended |