20 Maintenance guide UCG | 1ZSE 5492-124 en, Rev 6
B
A
3.10 Checking the contact wear
The contact system consists of fixed and moving contacts.
Check the degree of contact burning on the breaking
contacts.
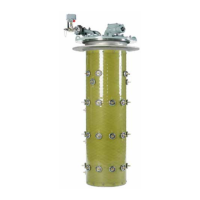
For a new contact with tips of copper-tungsten (Fig. 7), the
thickness at (A) and (B) is 5.5mm in the upper end of the
contact. In the lower end, the thickness is 3 mm.
Estimate the degree of contact burning and record this to
enable comparison with the condition at the next overhaul. Do
not file or smooth the burned and pitted contact surfaces.
A contact with a tip of copper-tungsten should be replaced
when the thickness at (A) and (B) in the upper end of the
contact is approximately 0.5 mm. (The thickness in the upper
and the lower end of the tip will be approximately the same
when close to the limit for replacement).
Also replace contacts which are assumed to wear out before
the next overhaul.
The dimensions above are valid for both main contacts and
transition contacts. For contact replacement, see chapter 4
”Contact replacement”.
3.11 Checking the transition resistors
Measurement is carried out on the side with open contacts.
Connect one cable from the ohmmeter to a fixed main contact
and the other cable to a fixed transition contact. Measure the
resistance.
Measure the resistance of each resistor branch across the
open switch.
Operate the diverter switch to the other side as described in
section 3.9 and measure the resistance with open contacts.
Check that the resistors are undamaged and compare with
the value on the rating plate. The values must not differ by
more than 10 %.
Check that nothing has worked loose. Operate the diverter
switch back to its previous position.
3.12 Checking before closing
Before installing the diverter switch, make sure that no foreign
objects, tools, wires, rags etc. are left in the diverter switch
housing.
3.13 Installation of the diverter switch
CAUTION
Check the serial numbers to make sure that the
diverter switch is mounted in the correct housing, see
Fig. 2.
CAUTION
Make sure that the diverter switch housing is clean
and dry and that no foreign objects (tools etc.) are left
in the housing.
CAUTION
Lower the diverter switch into its housing carefully so
that neither the diverter switch nor the housing are
damaged.
The UCG diverter switch is provided with a guiding slot that
fits against the oil draining tube in the diverter switch housing,
see Figs. 8 and 9.
Rotate the diverter switch so the half-circle shaped guiding
slot is aligned with the oil draining tube.
Fig. 7. Tolerance limits for contact erosion.

 Loading...