Do you have a question about the Abbott FreeStyle Libre2 and is the answer not in the manual?
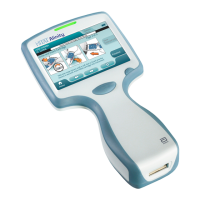
Overview of the Reader device, including USB Port, Touchscreen, and Home Button.
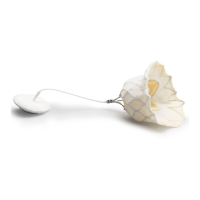
Overview of the Sensor Applicator and its related parts like the Sensor Pack.
References to key steps: Assemble/Apply Sensor, Start New Sensor, and Check Glucose.
Select site on back of upper arm, avoiding scars, moles, and insulin injection sites.
Wash site with soap, dry, and clean with an alcohol wipe. Allow to air dry.
Peel lid off Sensor Pack, unscrew cap from Applicator. Ensure codes match.
Line up dark marks on Applicator and Sensor Pack. Press Applicator firmly.
Lift Sensor Applicator out of Sensor Pack. Caution: Applicator contains a needle.
Sensor Applicator is ready. Do not touch inside or put back into Sensor Pack.
Place Sensor Applicator over site and push down firmly to apply Sensor.
Gently pull Sensor Applicator away from your body after applying the Sensor.
Ensure Sensor is secure. Discard used Sensor Pack and Applicator per manual.
Press Home Button to turn on Reader. Follow prompts for date and time if new.
Touch 'Start New Sensor' option on the Reader's Home Screen.
Hold Reader within 4 cm of Sensor to scan. Sensor ready after 60 minutes.
Press Home Button to turn on the Reader.
Hold Reader within 4 cm of Sensor to scan.
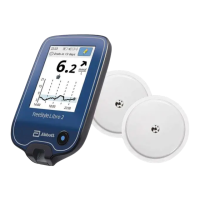
Reader displays Current Glucose, Trend Arrow, and Glucose Graph.
Navigate to Settings > Alarm Settings to adjust alarms.
Set Low Glucose, High Glucose, and Signal Loss alarms.
Alarms notify you of glucose levels below/above set points or signal loss.
Sound/vibration and signal status display on Home Screen when alarms are ON.
Touch 'Dismiss Alarm & Check Glucose' or Home Button to dismiss.
Symbols indicate Sound/Vibration status and Sensor communication.
This document describes the FreeStyle Libre 2 Flash Glucose Monitoring System, a device designed for continuous glucose monitoring. The system consists of a Reader, a Sensor Applicator, and a Sensor Pack.
The FreeStyle Libre 2 system provides continuous glucose readings for up to 14 days without the need for routine fingerstick calibrations. It measures glucose levels from interstitial fluid, offering a comprehensive view of glucose trends and patterns. The system is designed to help individuals manage their diabetes by providing real-time glucose data and customizable alarms for low and high glucose levels, as well as signal loss. The Reader displays current glucose, a trend arrow indicating the direction of glucose change, and a glucose graph showing historical data.
| Sensor Wear Duration | 14 days |
|---|---|
| Sensor Warm-up Time | 1 hour |
| Reader Connectivity | NFC |
| Operating Temperature | 10°C to 45°C (50°F to 113°F) |
| Type | Continuous Glucose Monitoring System |
| Communication | Near-field communication (NFC) |
| Water Resistance | IP27 (water-resistant up to 1 meter for 30 minutes) |
| Glucose Monitoring | Continuous |
| Alerts | Optional glucose alarms |
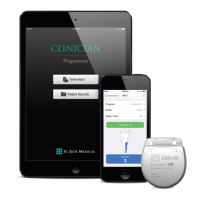
| Compatibility | FreeStyle Libre 2 app |
| Data Storage | 8 hours |