Do you have a question about the Abbott e i-STAT Alinity and is the answer not in the manual?
Steps for powering on the instrument and verifying battery charge status.
Instructions for locating and scanning the region code barcode for instrument setup.
How to set the instrument's display language and system clock.
Steps to configure measurement units and date/time display formats.
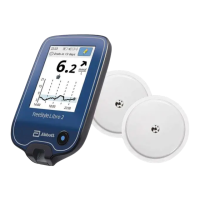
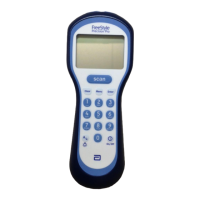
Identifies the i-STAT Alinity instrument and its base station for charging.
Describes i-STAT test cartridges and the rechargeable battery pack.
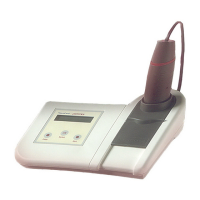
Overview of the electronic simulator and portable printer accessories.
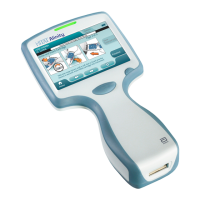
Explanation of the instrument's LED indicators and the main display screen.
Details on power button, barcode capture button, and cartridge/IR ports.
Information about the rechargeable battery as the instrument's power source.
Overview of the Home screen displayed after successful instrument self-checks.
Detailed breakdown of the Home screen's header, body, and footer areas.
Description of the Alert screen, including warning icons, alert indicators, titles, and descriptions.
Breakdown of a generic pathway screen, including header, message area, body, side tabs, and buttons.
Meaning of icons related to Wireless Status, Battery Status, and Network Status.
Step-by-step guide for cleaning the instrument, base station, and simulator.
Protocol for disinfecting the i-STAT Alinity instrument between patients.
Procedures for disinfecting the base station, electronic simulator, and printer.
List of recommended disinfectant products for use with the instrument.
Identification and causes of quality check failures during testing.
Information on alerts displayed before the Home screen appears.
How to access and understand alert descriptions and indicators.
The i-STAT Alinity is a portable, handheld blood analyzer designed for point-of-care testing, providing rapid and accurate diagnostic results. It is used to perform cartridge testing, review test results, and conduct quality control (QC) testing. The instrument is part of a system that includes a base station, test cartridges, a rechargeable battery, an electronic simulator, and a portable printer.
The i-STAT Alinity instrument is a sophisticated diagnostic device that performs a series of self-checks upon power-up to ensure proper functionality. Its primary function is to analyze blood samples using i-STAT test cartridges, which contain sensors and reagents specific to the analytes being measured. The instrument guides the user through the testing process via a display screen and provides prompts for actions such as scanning region codes, entering operator IDs, and filling cartridges. It is capable of displaying test results, managing data, and interfacing with a portable printer for record-keeping. The device's software undergoes periodic expiration, and updates are managed through the System Operations Manual.
The i-STAT Alinity operates on a rechargeable battery, which is its sole power source. The battery status is indicated by an LED light and on the display screen, with different colors signifying charging (blue), sufficient charge (green), or the need for immediate attention (yellow or red). The instrument features a barcode capture button and an integrated camera for scanning region codes and other barcodes. An IR port allows for communication with the portable printer. The device's software is designed to perform quality checks throughout the testing cycle, notifying operators of any failures through on-screen alerts. These alerts can indicate issues related to the instrument, cartridge, sample, or software, and provide instructions for resolution. The instrument supports various language, unit, and date/time formats, which can be configured through the "Instrument Settings" menu.
The i-STAT Alinity is designed for ease of use in a point-of-care setting.
Regular cleaning and disinfection are crucial for maintaining the i-STAT Alinity instrument, base station, printer, and electronic simulator.
| Brand | Abbott |
|---|---|
| Model | e i-STAT Alinity |
| Category | Medical Equipment |
| Language | English |