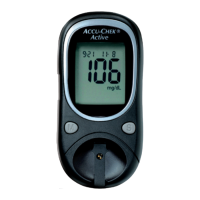
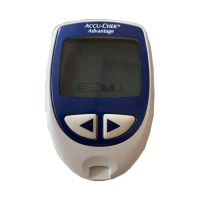
1.
2. 3. 4.
D
E
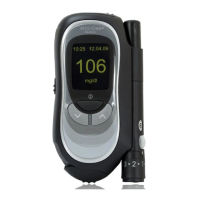
Test area at the tip of the cassette
Tip cover
Multifunction button for
priming and releasing
the nger pricker
Window showing number
of available lancets
Lever for loading a new
lancet
Release button for
opening the cassette compartment cover
Test cassette
with 50 tests
Rotatable cap for
setting the penetration
depth
Welcome to a brand new way of
blood glucose monitoring!
This Getting Started Guide assists you in using your new Accu-Chek Mobile system quickly
and easily and in experiencing a brand new way of blood glucose monitoring.
This guide provides detailed information about the following topics:
1. When your meter is new
2. Preparing the nger pricker
3. Performing a blood glucose test
4. Loading a new lancet
5. What you need to know
W
This guide does not replace the comprehensive Reference Manual supplied with
your Accu-Chek Mobile system. Please be sure to observe the safety information in
the Reference Manual.
Accu-Chek
®
Mobile
BLOOD GLUCOSE MONITORING SYSTEM
Getting Started
Guide
Start using the system and experience
a brand new way of blood glucose monitoring.
PLEASE READ CAREFULLY
BEFORE USING.
05771978001(02) – 2010-11 M_Version03_Rev0
Last update: 2010-06
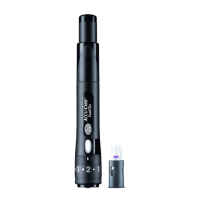
1. When your meter is new
Open the tip cover completely as far as
it will go. Only then will you be able to open
the cassette compartment and to insert the
test cassette.
Remove the protective lms
D
from the
display. Pull the protective strip
E
back-
wards out of the meter to activate the
batteries.
Push the release button
B
for the cassette
compartment cover downwards.
Remove a new test cassette from the pack-
aging and insert it
. Close the cassette
compartment cover and the tip cover.
C
©2010 Roche Diagnostics
ACCU-CHEK, ACCU-CHEK MOBILE and FASTCLIX
are trademarks of Roche.
M
Roche Diagnostics GmbH
Sandhofer Strasse 116
68305 Mannheim, Germany
www.accu-chek.com
5. 6.
1. 2. 3.
D
4.
Remove the cap .
Insert a new lancet drum
(white end
rst). You now have 6 new and sterile
lancets at your disposal.
Place the cap
back on again.
Rotate the cap
D
of the nger pricker
until the desired penetration depth is level
with the indicator. Start with a medium
penetration depth such as 3.
2. Preparing the nger pricker
W
The nger pricker is intended for personal use only! It may only be used by one person for obtaining blood. There is a risk of infections being transmitted if the nger pricker is
used by other people, or if healthcare professionals use this nger pricker to obtain blood from more than one person. This nger pricker is therefore not suitable for professional
use in healthcare facilities or institutions.
ONR 1088 – 4all 3951 V5/1 – gsg_05771978001_02_EnUk_280x420mm – Black
(2010) Herr Broß V5/2 – gsg_05771978001_02_EnUk_280x420mm – Cyan
Prüfmittelnummer 307 V5/3 – gsg_05771978001_02_EnUk_280x420mm – Magenta
V5/4 – gsg_05771978001_02_EnUk_280x420mm – Yellow
V5/5 – gsg_05771978001_02_EnUk_280x420mm – PMS 158 C