OPERATING INSTRUCTIONS
6
Operating Instructions
Look for the “How to Operate” sticker on the side of your AccuCut MARK IV
™
machine for easy step-by-step
instructions! (See page 3 for location of sticker.) Here’s how the AccuCut machine works…
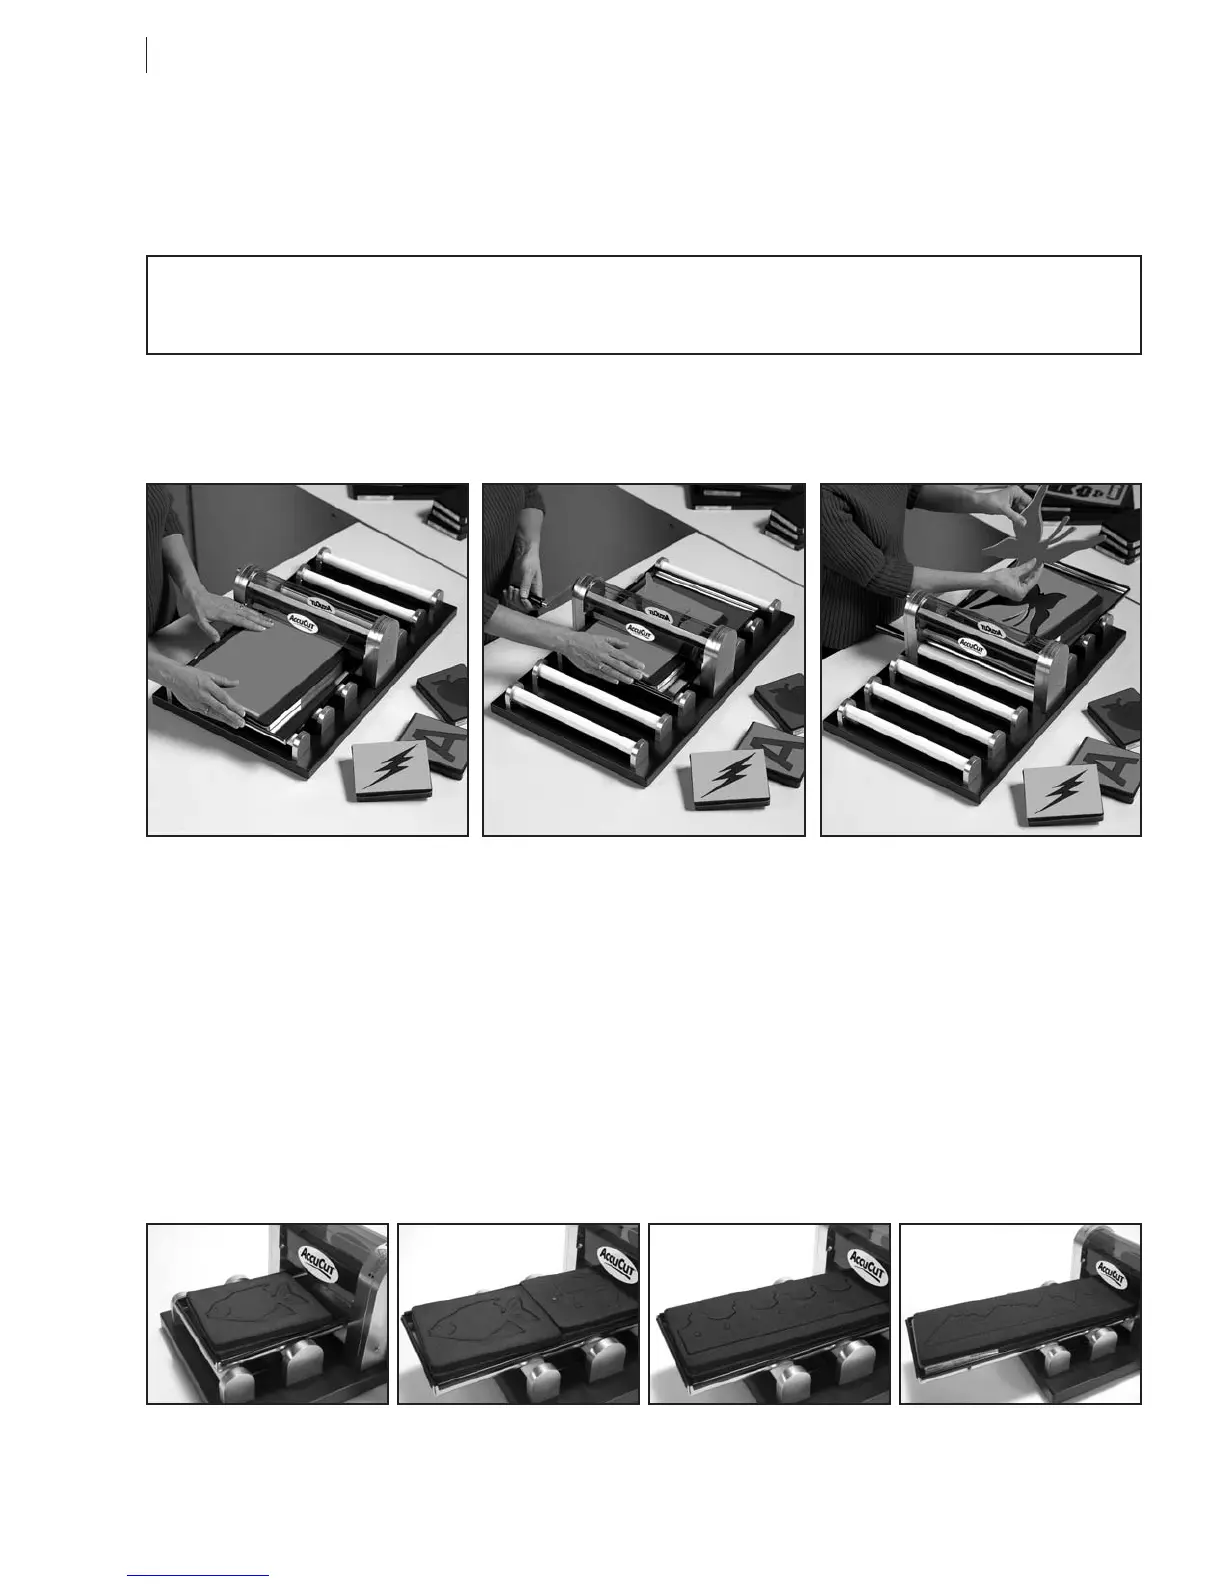
Three Easy Steps for Perfectly Cut Letters and Shapes
HINT: For best cutting results, position die at a slight angle to the roller. This creates diagonal pressure, much
like scissors, and makes cutting easy!
STEP 1
Place die completely inside the tray
with FOAM SIDE UP. It is often
helpful to angle die slightly in the
tray. Place material on top of die.
STEP 2
Push die and tray until die meets
roller. Turn handle in the direction
you want die and tray to go
through the machine. Pressure is
preset, so there is no guessing
how hard to press.
STEP 3
Remove die-cut shape. Place new
material on top of die and roll
through machine from the opposite
direction. No handling of die
between cuts. Replace roller and
tray once a year. Call 800-288-1670
or visit www.accucut.com.
One Die at a Time Mini, Small, Large
Die Capacity: 2
Long Cut
Die Capacity: 1
Extra Long Cut
Die Capacity: 1 (with extended
tray, Item 406104)
WARNING: SAFETY GUARD MUST BE IN PLACE DURING OPERATION. KEEP
HANDS AND FINGERS CLEAR OF ROLLER OR SERIOUS BODILY INJURY CAN OCCUR.
How to Place Dies in the MARK III
™
Die Tray
For best results, place each size of AccuCut die into the machine’s die tray as shown below. Make sure dies
lie completely inside of die tray—not on top of any edge of the die tray. Always place dies in die tray with
FOAM SIDE UP.