Install the Sawdust Blower Tube (Figure 3)
1. Attach one end of the plastic tubing (1) to the
back of the sawdust blower (3) and the other
end to the pump mechanism (2).
2. Apply a coat of hydrophobic grease to the
saw table surface so that the workpiece can
slide easily. Wipe off all excess grease with
a dry cloth.
WARNING! RISK OF PERSONAL INJURY. ALWAYS DISCONNECT THE TOOL FROM THE POWER
OUTLET BEFORE MAKING ANY ADJUSTMENT, INSTALLING OR CHANGING SAW BLADES.
CAUTION: The scroll saw must be completely assembled before use. DO NOT plug unit into
power source until the unit has been completely assembled and all guards are in place.
5
ASSEMBLY
Teeth/Inch Teeth/cm Width Thickness Speed (SPM) Material Cut
10 4 .110 in. .020 in. 1200-1600 Popular size for cutting
(2.8 mm) (.5 mm) hard and soft woods
3/16 in. (4.8 mm) up to
2 in. (51 mm) plastics,
paper, felt, bone etc.
15 6 .110 in. .020 in. 600-1200 Wood, plastics, extremely
(2.8 mm) (.5 mm) thin cuts on materials
3/32 in. (2.4 mm) to
1/2 in. (13 mm) thick
18 7 .095 in. .010 in. 400-600 For tight radius work
(2.4 in.) (.3 mm) in thin materials 3.32 in.
(2.4 mm) to 1/8 in. (3mm)
such as wood, veneer,
bone, fibre, ivory,
plastic etc.
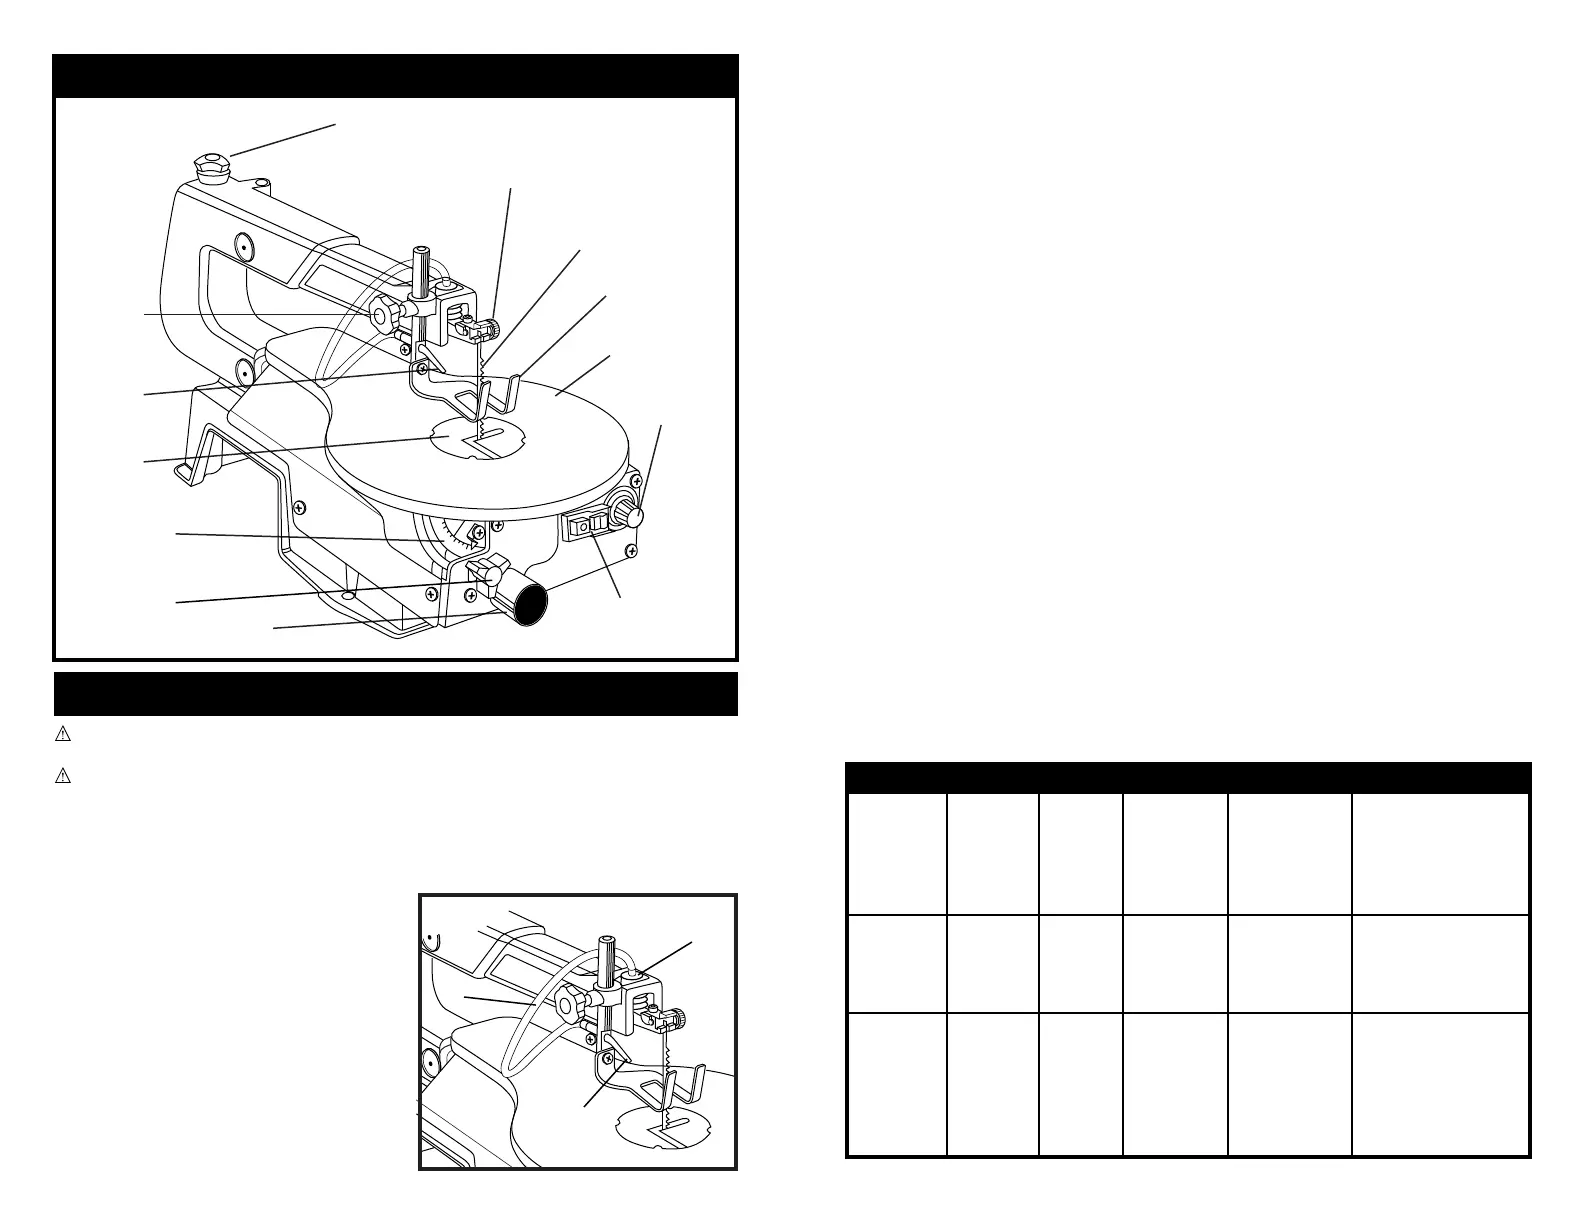
Table
Lock Knob
Sawdust
Blower
Throat
Plate
Bevel Scale
Blade Clamp Screw
Drop Foot
Lock Knob
Variable Speed
Selector Knob
On/Off Switch
with Lockout Key
Drop Foot
(blade guard)
Figure 2
Saw
Blade
Dust Port
Blade Tension Knob
0
15
30
Work table
KNOW YOUR TOOL
Figure 3
1
3
2
10
Jamming of the Saw Blade and Workpiece
When backing out the workpiece, the blade may bind in the kerf (cut). This is usually caused by
sawdust clogging the kerf or by the blade coming out of the blade holder. If this happens:
1. Place the switch in the off position
2. Wait until the saw has come to a full and complete stop.
3. Unplug the saw from the power source.
4. Remove the blade and workpiece (see section on Removing Saw Blade)
5. Wedge the kerf open with a flat screw driver or wooden wedge then remove the blade from
the workpiece.
Avoiding Injury
1. Make sure the saw is level and does not rock. The saw should always be mounted on a firm
level surface with plenty of room for handling and properly supporting the workpiece.
2. Bolt the saw to the support surface to prevent slipping, walking or sliding during operations.
3. Turn the saw off and unplug it form the power source before moving the saw.
4. Do not remove jammed offcuts until the blade has completely stopped.
5. Choose the right size and type of blade for the material and type of cut you plan to make.
6. Use only recommended accessories.
7. Before turning the saw on, clear everything off the saw table except the workpiece
and clamps.
8. Properly support round materials such as dowel rods or tubing because they have a tendency
to roll during cutting, causing the blade to "bite". To avoid this, always use a "V" block or
clamp the workpiece to a mitre gauge.
9. Before removing offcuts from the saw table, turn the saw off and wait for all moving parts
to stop.
Choosing the Right Blade
The scroll saw accepts a wide variety of blades and thicknesses for cutting wood and other fibrous
materials. This saw uses 5 in. (127mm) long blades of either the pin end or the plain end types.
The blade width and thickness, as well as the number of teeth per inch are determined by the type
of material and the size of the radius being cut.
NOTE: As a general rule, always select narrow blades for intricate curve cutting and wide
blades for straight and large curve cutting.
 Loading...