7. Assembly and Disassembly Procedures (continued)
S11
Use a Ph illip s-head screwdriver screwed the No.1~2 screws.
S12
Use a Hex-head screwdriver screwed the D-Sub connectors
No.3~4 Hex Nut to fix it.
S13
Use a Phillip s - h e a d screwd r iv e r fixed Heat-sink on th e
Bracket Chassis module.
S14
Put a Rear Bezel (inner side faced up) on the table and
move the assembled panel module on its top.
S15
Put a Front Bezel on the table
S16
Connect the Function Key cable to connector located on the
Function Key board.
S17
Use a P hillips-head screwdrive r screwed number 1~2
screws and fixed the Function Key board on the Front
Bezel.
S18
Turn over the panel module (screen faced up), and then
press down on the number 1~3 positions of both sides till
two assem b led parts firmly attached.
Steps Photo Procedures
1
2
3
4
D-Sub Cable
2
1
3
2
3
1
2
1
Key Function cable
Part Num ber
Part Nam e
7140330083P0A SCREW_DOUBLE THREAD_NONE_FLAT HEAD_M3_8 2 Screw Size=M3x8; Torque=5~6KGF.CM
7110730082P0A
SCREW_MACHINE_NONE_HEX WASHER HEAD_M 3_8m
m_Fe NI
2 Screw Size=M3x8; Torque=4.5~6.5KGFKGF.CM
7110330052P0A SCREW-MACHING-FLAT HEAD-M3-5-NI 1 Screw Size=M3x5; Torque=5~7KGFKGF.CM
7737616800P0A RC ASSY_#6800_ABS 94V0_ACER_T17ANHW 1 -
7737517400P0A FC ASSY_#6790/#6810_ABS94V0_ACER_T17BNHW 1 -
5113800899P T17BNHW-G1(99)_ACER_FUNCTION KEY BD 1 -
7140130061P0A SCREW_MACHINE_WITHO UT_NINDING_M 3_6L_BLA 2 Screw Size=M3x6; Torque=6~8KGF.CM
-- --
Spare Parts List
Q'ty Remark
Go to cover page
43
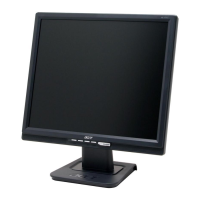
ACER AL1716W
 Loading...