Do you have a question about the Acer AO722 and is the answer not in the manual?
Summary of computer features including OS, platform, memory, display, storage, audio, communication, etc.
Detailed specifications for Processor, System Controller, Clock, Memory, Storage, LCD, I/O, BIOS, and Thermal.
Diagram illustrating the computer's internal component connections.
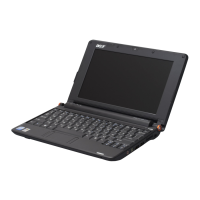
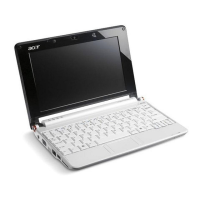
Identifies external components visible from the front of the notebook.
Identifies ports and slots on the left side of the notebook.
Identifies ports and slots on the right side of the notebook.
Shows the battery bay location on the rear of the notebook.
Identifies battery bay, lock, and vents on the bottom.
Details on Caps Lock, Num Lock, Scroll Lock, and numeric keypad.
Explanation of function key combinations for system controls.
Instructions for using the Euro and US dollar symbols.
Explains the hardware configuration program built into the BIOS.
Instructions on how to navigate BIOS menus and change parameters.
Screen displaying a summary of computer hardware information.
Screen for setting system time, date, and boot options.
Parameters for safeguarding and protecting the computer from unauthorized use.
Menu to decide the order of boot devices for loading the OS.
Screen to save or discard changes and quit the BIOS Utility.
Procedure for updating the system BIOS flash ROM.
Methods for removing HDD and BIOS passwords.
Lists the necessary tools for disassembling the computer.
Notes on images used and potential product variations.
General guidance and pre-disassembly instructions.
Overview of the disassembly steps: upper cover, LCD, main unit.
Graphic representation of the disassembly sequence for external modules.
Step-by-step instructions for removing the battery pack.
Instructions for removing the 3G cover.
Step-by-step instructions for removing the keyboard.
Instructions for removing the upper and lower covers.
Graphic representation of the LCD module disassembly steps.
Step-by-step instructions for removing the LCD module.
Instructions for removing the LCD bezel.
Instructions for removing the camera board.
Instructions for removing the MIC board.
Step-by-step instructions for removing the LCD panel.
Instructions for removing LCD brackets and FPC cable.
Graphic representation of the main unit disassembly sequence.
Instructions for removing the WLAN module.
Instructions for removing the USB/LED/Power/Card Reader board.
Instructions for removing the SSD module.
Step-by-step instructions for removing the mainboard.
Instructions for removing the speaker module.
Instructions for removing the HDD module.
Instructions for removing the DIMM module (if applicable).
Instructions for removing the thermal module.
Steps to replace LCD brackets and FPC cable.
Steps to replace the LCD panel.
Steps to replace the MIC board.
Steps to replace the camera board.
Steps to replace the LCD bezel.
Steps to replace the thermal module.
Steps to replace the DIMM module.
Steps to replace the HDD module.
Steps to replace the speaker module.
Step-by-step instructions for replacing the mainboard.
Instructions for replacing the SSD module.
Instructions for replacing the USB/LED/Power/Card Reader board.
Instructions for replacing the WLAN board.
Instructions for replacing the LCM module.
Important notes and steps for replacing the upper cover.
Instructions for replacing the keyboard.
Instructions for replacing the 3G cover.
Steps for inserting and securing the battery.
Guide for diagnosing and resolving common computer problems.
Troubleshooting steps for when the system does not power on.
Steps to resolve intermittent system power-off issues.
Troubleshooting steps for display problems.
Steps for troubleshooting when POST or video does not display.
Steps to resolve issues with abnormal video display.
Troubleshooting steps for intermittent loss of BIOS settings.
Troubleshooting steps for LCD failures.
Troubleshooting steps for built-in keyboard failures.
Troubleshooting steps for touchpad failures.
Troubleshooting steps for internal speaker failures.
Troubleshooting steps for internal microphone failures.
Troubleshooting steps for HDD operational issues.
Troubleshooting steps for right-side USB port failures.
Troubleshooting steps for power button failures.
Troubleshooting steps for external mouse failures.
General steps for troubleshooting various other component failures.
Troubleshooting for intermittent system hang issues.
Procedures to isolate failing FRUs with undetermined issues.
Answers to common troubleshooting questions.
Instructions on how to access the Quick Guide.
Diagram showing jumper and connector locations on the top view of the motherboard.
Diagram showing jumper and connector locations on the bottom view of the motherboard.
Procedures for clearing BIOS passwords and BIOS recovery.
Steps for BIOS recovery using a crisis disk or USB storage.
Exploded view of the laptop with part numbers for identification.
Comprehensive list of all Field Replaceable Units with part numbers.
List of screws used in the assembly with their specifications.
Lists different Aspire one models by region, part number, and configuration.
Model definitions and configurations for Aspire one Blue variants.
Model definitions and configurations for Aspire one White variants.
Compatibility test results for Linux environment components.
Specific compatibility test results for Aspire one Blue models.
Specific compatibility test results for Aspire one White models.
| Operating System | Windows 7 Home Premium |
|---|---|
| Wireless | 802.11b/g/n |
| Processor Speed | 1.0 GHz |
| Display | 11.6 inch |
| Resolution | 1366 x 768 |
| RAM | 2 GB DDR3 |
| Storage | 320 GB HDD |
| Battery | 6-cell Li-ion |
| Bluetooth | Yes |
| Ports | 3 x USB 2.0, HDMI, VGA, Ethernet, Headphone/microphone combo jack |