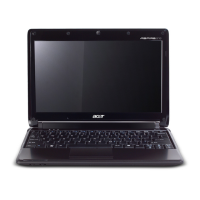
Do you have a question about the Acer Aspire One AO531h and is the answer not in the manual?
Illustrates the internal components and their connections.
Provides detailed hardware specifications for components.
Details CPU type, package, and chipset specifications.
Explains the purpose and activation of the BIOS Setup Utility.
Covers parameters for safeguarding the computer with passwords.
Step-by-step guide for setting user or supervisor passwords.
Instructions for clearing BIOS or HDD passwords.
Explains when and how to update the system BIOS flash memory.
Guides on removing HDD and BIOS passwords.
Lists tools needed for disassembling the computer.
Steps to take before disassembling the computer.
Details the process for removing external modules.
Step-by-step guide to remove the battery pack.
Instructions for removing the memory and wireless covers.
Steps to remove the DIMM memory module.
Guide to disconnecting antenna cables and removing the WLAN module.
Steps to disconnect FFC and remove the power board.
Procedure for removing Mainboard FFC and button board.
Guide to disconnecting LCD power cable and antenna cables.
Details the process for disassembling lower cover components.
Steps to remove the single securing screw and slide out the SSD module.
Instructions for removing Mainboard screws and lifting it out.
Steps to turn Mainboard over and lift out the RTC Battery.
Guide to remove thermal module screws and lift it clear.
Steps to disconnect CPU fan cable and remove securing screw.
Steps to disconnect FFCs and remove the LED board.
Instructions to remove speaker module screws and disconnect cable.
Guide to disconnect Bluetooth cable and remove module.
Steps to remove HDD module screws and slide it out.
Details the process for disassembling LCD module components.
Procedure to remove bezel screw caps and pry away the bezel.
Steps to remove LCD panel screws and lift it out.
Instructions to remove LCD panel bracket screws and brackets.
Details the process for reassembling LCD module components.
Steps to align mainboard screws and replace securing screws.
Procedure to place SSD in carrier, replace screws, and connect interface.
Guide for diagnosing and resolving common computer problems.
Troubleshooting steps for when the system does not power on.
Troubleshooting steps for display problems.
Steps to take when the computer does not display POST or video.
Troubleshooting steps if the LCD fails.
Steps to diagnose and fix internal keyboard issues.
Troubleshooting steps if the touchpad does not work.
Steps to diagnose and fix internal speaker issues.
Troubleshooting steps for internal microphone failures.
Troubleshooting steps for HDD operational issues.
Procedures for clearing passwords and recovering BIOS.
Instructions for recovering BIOS using a crisis disk or USB storage.
Lists global FRU configurations for Aspire one for repair or RMA.
Detailed list of FRU parts, categories, part names, and Acer part numbers.
