4
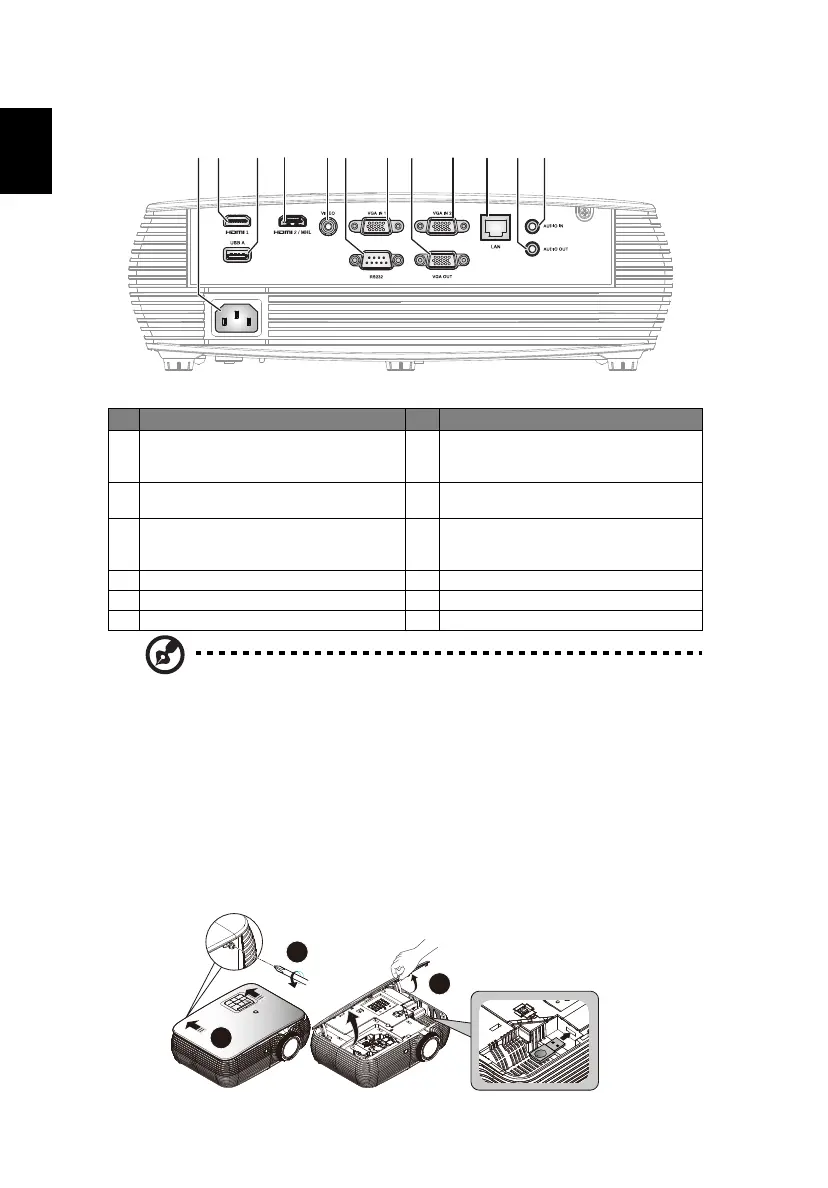
Rear side
Note: Functions vary depending on model definition.
How to Install Acer Wireless Projection Kit (UWA3)
If you had purchased Acer Wireless Projection Kit (UWA3), please follow the
below installation steps:
1 Use a screwdriver to remove the screw from the cover. (Illustration #a)
2 Push the cover toward the rear side of projector. (Illustration #b)
3 Open the top cover. (Illustration #c)
4 Install dongle (Illustration #d)
# Description # Description
1 Power socket
7 PC analog signal/HDTV/component
video input connector (VGA IN 1, VGA
IN 2)
2 HDMI 1 connector
8 Monitor loop-through output
connector (for VGA IN 1 only)
3
USB connector (device charge and USB
displays and upport mouse page up/
down function)
9
LAN (RJ45 Port for 10/100M Ethernet)
4 HDMI 2/MHL connector 10 Audio out connector
5 Composite video input connector 11 Audio in connector
6 RS232 connector
c
a
b
WIRELESS DONGLE
WIRELESS DONGLE