EasyManua.ls Logo

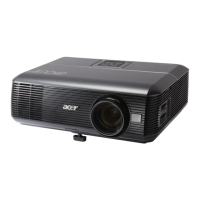
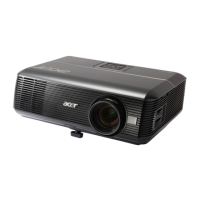
Acer P5270 - XGA DLP Projector User Manual

Acer P5270 - XGA DLP Projector
113 pages
To Next Page IconTo Next Page
Page #1 background imageLoading...
Page #1 background image
Prepared by SI :
________________________________________
Prepared by TSE :
________________________________________
Check by :
________________________________________
Approved by :
________________________________________
Model Name : P5270/P5270 Refresh
SERVICE MANUAL
Date Revise Version Description
2007/07/17 V1.0 Initial Issue
2007/08/08 V2.0 Modify Chapter 5
2008/08/15 V3.0 Add P5270 Refresh,Modify CH1
2008/10/10 V4.0
Add Waveform Download in Chapter5, modify
Chapter4, Chapter6 and AppendixB
Copyright Oct, 2008. All Rights Reserved P/N: 36.87W10G001

Table of Contents

Questions and Answers:

Acer P5270 - XGA DLP Projector Specifications

General IconGeneral
Resolution1024 x 768 (XGA)
Projection TechnologyDLP
Projection Size30 - 300 inches
Lamp Life3000 hours (Normal), 4000 hours (Eco)
Input ConnectorsVGA, HDMI, Composite Video, S-Video

Summary

Preface

Chapter 1 Introduction

Product Highlight

Details key features and specifications of the projector.

Compatible Mode

Lists supported display resolutions and timings.

System Block Diagram

Illustrates the internal architecture and component connections.

Bottom Cover Dimension

Shows the physical dimensions of the projector's bottom cover.

Chapter 2 Disassembly Procedure

Equipment Needed & Product Overview

Lists necessary tools and provides an initial look at product components.

Disassemble Lamp Cover Module and Top Cover Module

Instructions for removing the lamp cover and top housing.

Disassemble Main Board Module

Steps to remove the main circuit board.

Disassemble Engine Module

Procedure for removing the optical engine.

Disassemble DMD Board & DMD Chip Module

Procedure for removing the DMD board and chip.

Disassemble Lamp Driver Module

Procedure for removing the lamp driver.

Disassemble Elevator Module

Procedure for removing the elevator mechanism.

Chapter 3 Troubleshooting

LED Lighting Message

Explains the meaning of different LED status light combinations.

Beep Sound

Describes the projector's beep codes and their meanings.

Main Procedure

Outlines systematic troubleshooting steps for various symptoms.

Chapter 4 Function Test & Alignment Procedure

Test Equipment Needed

Lists the necessary tools and equipment for testing.

Service Mode

Explains how to access and use the projector's service mode.

Reset(OSD)

Procedure for resetting On-Screen Display settings.

Test Condition

Specifies the environmental and setup conditions for testing.

Inspection Procedure

Outlines the steps for inspecting the projector's performance.

Chapter 5 Firmware Upgrade

Equipment Needed

Lists software and hardware required for firmware updates.

Firmware Upgrade Mode

Details how to put the projector into firmware update mode.

Installation Procedure

Step-by-step guide for installing firmware using software.

Firmware Upgrade Procedure

The core process of performing the firmware upgrade.

Waveform Download

Procedure for downloading waveform data.

Chapter 6 EDID Key-in Procedure

Equipment Needed

Lists required software, hardware, and cables for EDID key-in.

Setup Procedure (VGA1,VGA2,DVI)

Steps for connecting and setting up for EDID key-in via VGA/DVI.

EDID Key-In Procedure

The main procedure for inputting EDID data.

Setup Procedure (HDMI)

Steps for connecting and setting up for EDID key-in via HDMI.

Default Language Reset

Procedure for resetting the projector's default language.

Appendix A

Exploded Overview

Provides a visual breakdown of projector components.

Appendix B

Serial Number System Definition

Explains the format and meaning of projector serial numbers.

PCBA Code Definition

Defines the structure and meaning of PCBA codes.

Appendix C

RS232 function command summary table (for P5270/P5270 Refresh)

Lists RS232 commands and their corresponding functions.