EasyManua.ls Logo

Acer SA220Q - User Manual

Acer SA220Q
3 pages
To Next Page IconTo Next Page
Loading...
English
Acer LCD Monitor Quick Start Guide (QSG)
Important safety instructions
Please read the following instructions carefully.
Turn off the LCD monitor and unplug the power cord.
• Spray a non-solvent cleaning solution onto a rag and clean the screen gently
.
2 Do not place the LCD monitor near a window. Exposing the monitor to rain, moisture or sunlight can severely damage it.
3 Do not apply pressure to the LCD screen. Excessive pressure may cause permanent damage to the display.
4 Do not remove the cover or attempt to service this unit yourself. An authorized technician should perform servicing of
any nature.
5 Store the LCD monitor in a room with a temperature of -20° to 60° C (-4° to140° F). Storing the LCD monitor outside this
range may result in permanent damage.
6 Immediately unplug your monitor and call an authorized technician if any of the following circumstances occur:
• Monitor-to-PC signal cable is frayed or damaged.
• Liquid spills onto the LCD monitor or the monitor is exposed to rain.
The LCD monitor or case is damaged.
Package contents
LCD
monitor
Quick start
guide
VGA
cable
AC
Adapter
AC Power
cord
HDMI cable
(Optional)
Audio cable
(Optional)
Adjusting the monitor base
1 Carefully remove the monitor from its packaging.
The monitor base is attached onto the monitor before shipment and it is undetachable.
2 Pull the monitor base out fully so that the monitor can be placed on a stable surface in the upright position.
3
Secure the monitor base by turning the white screws (at the bottom of the base) using the integrated tab or a suitable coin.
Connecting your monitor to a computer
1 Turn off your computer and unplug your computer’s power cord.
Note: Audio output is only for audio output model. Please check user
manual for more instruction.
.noitacol ruoy ni elbaliava rewop CA eht htiw etarepo ot detar yllacirtcele si rotinom ruoy taht erus eB :neercs rotinom DCL eht naelc oT 1
· NEVER SPRAY OR POUR ANY LIQUID DIRECTLY ONTO THE SCREEN OR CASE.
· PLEASE DO NOT USE ANY AMMONIA OR ALCOHOL-BASED CLEANERS ON THE LCD DISPLAY SCREEN OR CASE.
· Acer will not be liable for da mage resulting from use of any a mmonia or alcohol-based cleaners.
2-1 Connect Video Cable
a. Make sure both the monitor and computer are powered-OFF.
b. Connect the VGA video cable to the computer.
2-2 Connect HDMI Cable (Only HDMI-Input Model)
a. Make sure both the monitor and computer are powered-OFF.
b. Connect the HDMI cable to the computer.
3. Connect the Audio Cable. (Only Audio-Input Model) (Optional)
4. Insert the monitor power cable into the power port at the back of the monitor.
5. Plug the power cords of your computer and your monitor into a nearby electrical outlet.
2

Other manuals for Acer SA220Q

Question and Answer IconNeed help?

Do you have a question about the Acer SA220Q and is the answer not in the manual?

Acer SA220Q Specifications

General IconGeneral
Screen Size21.5 inches
Resolution1920 x 1080 (Full HD)
Panel TypeIPS
Refresh Rate75 Hz
Response Time4 ms
Aspect Ratio16:9
Brightness250 cd/m²
Contrast Ratio1000:1
Viewing Angle178° (H) / 178° (V)
Color Support16.7 Million colors
VESA Mount Compatibility100 x 100 mm
PortsHDMI, VGA
Weight2.7 kg (with stand)

Summary

Monitor Setup and Connection

Adjusting the Monitor Base

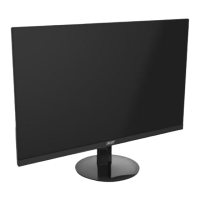
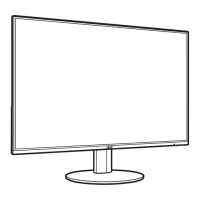
Instructions for safely removing the monitor from packaging and securing its base.

Connecting Your Monitor to a Computer

Step-by-step guide for connecting video, audio cables, and power to the monitor and computer.

Panel Controls Overview

Power Button and Indicator

Describes the function of the power button and the meaning of its indicator light.

OSD Function Navigation

Explains how to view and navigate the On-Screen Display (OSD) menu.

Input Selection

Details on how to select the desired input source for the monitor.

Volume Adjustment

Instructions for adjusting the audio volume using the monitor controls.

Brightness Adjustment

Guide on how to adjust the screen brightness via the OSD menu.

Mode Control

How to access and control different display modes, including Game mode.

FreeSync Technology

Explanation of FreeSync for dynamic adjustment of display refresh rates.

Regulations and Safety Notices

FCC Notices

Information regarding FCC compliance for digital devices and interference.

CE Declaration of Conformity

Statement of compliance with EU directives for EMC, low voltage, and ecodesign.

Shielded Cables and Peripheral Devices

Requirements for using shielded cables and certified peripheral devices.

Operation Conditions and Canadian Notices

FCC operating conditions and compliance statement for Canadian users.

Disposal of Waste Equipment

Instructions for proper disposal of electronic waste in the European Union.

Related product manuals