Do you have a question about the Acer SA270 and is the answer not in the manual?
Read instructions, keep for reference, and follow product warnings and guidance.
Follow cleaning guidelines: unplug monitor first and use a soft cloth for cleaning.
Guidelines for connecting/disconnecting power: ensure base is attached, turn off monitor/computer.
Ensure power outlet is accessible and close to operator for easy disconnection of equipment.
Protect hearing: gradually increase volume, limit high volume listening time, avoid blocking surroundings.
General warnings: avoid water, unstable surfaces, blocking ventilation, inserting objects into slots.
Operate from indicated power type, avoid cord strain, and ensure proper grounding.
Refer all servicing to qualified personnel. Unplug if cord is damaged, liquid spilled, or unit dropped.
Switch off device in potentially explosive areas like gas stations or areas with dust/chemicals.
Keep small parts and enhancements out of the reach of small children.
Acer's commitment to environmental protection and recycling of used equipment.
Do not discard electronics in trash; recycle according to Waste Electrical and Electronics Equipment regulations.
Explains occasional pixel defects (black/red dots) are normal and not a malfunction.
Advice to prevent eyestrain and physical injury from prolonged computer use.
Tips for comfort: adjust viewing angle, use footrest, maintain good posture.
Reduce eyestrain: rest eyes, blink frequently, keep display clean, adjust brightness/contrast.
Develop habits like breaks, stretching, fresh air, and exercise for productive computer use.
Check for LCD monitor, quick start guide, audio, D-sub, HDMI, DVI cables, and AC adapter.
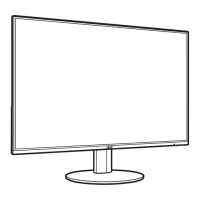
Instructions for securely attaching the monitor base to the monitor stand arm.
Adjust monitor tilt up to 15 degrees up or 5 degrees down for optimal viewing.
Connect the AC power cord to the adapter, then plug into a properly grounded AC outlet.
Monitor enters power saving mode (blinking blue light) and recovers in approximately 3 seconds.
DDC protocol enables plug-and-play and informs host system about monitor capabilities.
Details pin assignments for 15-pin and 24-pin display signal cables.
Details pin assignments for the 19-pin color display signal cable.
Table listing standard display modes, resolutions, and corresponding refresh rates.
Connect VGA, DVI, HDMI, audio cables to computer; ensure both devices are switched off.
Connect AC power cord to adapter, then plug adapter into a grounded AC outlet.
Turn on monitor first, then computer, for correct startup sequence.
Overview of panel buttons: Power, < / >, Menu/Enter, Auto/Exit, Empowering Key, and their functions.
Access common settings via shortcut menu using Empowering, Auto, Menu, Volume, Input buttons.
Select video sources (VGA, DVI, HDMI); options for auto source detection.
Operation and features of Acer eColor Management for picture modes: User, ECO, Standard, Graphic, Movie.
Adjust picture quality settings: Blue Light, Brightness, Contrast, Color Temp, Auto Config.
Adjust OSD menu location and timeout settings. Default timeout is 10 seconds.
Configure general settings: Wide Mode, DDC/CI, OD, ACM, Input, Language, Auto Source, Quick Start Mode, Reset.
Troubleshoot VGA issues: no picture, unstable picture; includes LED status and remedies.
Troubleshoot DVI/HDMI issues: no picture visible; includes LED status and remedies.
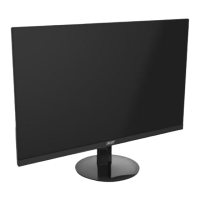
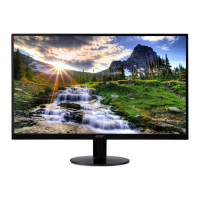
This document is a user guide for an Acer LCD Monitor, providing comprehensive instructions for setup, operation, and maintenance, along with important safety information and troubleshooting tips.
The Acer LCD Monitor is designed to display visual information from a host system. It supports various input signals, including VGA, DVI, and HDMI, allowing for flexible connectivity with different computers and devices. The monitor is equipped with an on-screen display (OSD) menu that enables users to adjust a wide range of settings to optimize picture quality, manage power consumption, and customize the display to their preferences. It supports plug-and-play functionality through the Display Data Channel (DDC) protocol, which allows the monitor to automatically communicate its capabilities to the host system. The monitor is designed for ease of use, with intuitive controls and a clear interface for navigating settings.
The Acer LCD Monitor offers several features to enhance the user experience and ensure comfortable viewing.
Maintaining the Acer LCD Monitor is straightforward, with clear guidelines provided to ensure its longevity and optimal performance.
| 3D | No |
|---|---|
| Screen shape | Flat |
| Display diagonal | 27 \ |
| Display technology | LED |
| Native aspect ratio | 16:9 |
| Contrast ratio (typical) | - |
| Display number of colors | 16.78 million colors |
| Display brightness (typical) | 250 cd/m² |
| Supported graphics resolutions | 1920 x 1080 (HD 1080) |
| RMS rated power | 2 W |
| Number of speakers | 2 |
| Product color | Black |
| Market positioning | Graphics design |
| Tilt angle range | -5 - 15 ° |
| Tilt up angle range | 0 - 15 ° |
| Tilt down angle range | -5 - 0 ° |
| Energy efficiency scale | A to G |
| Power consumption (standby) | 0.3 W |
| Power consumption (typical) | 17.5 W |
| Sustainability certificates | ENERGY STAR |
| Cables included | AC |
| Depth (with stand) | 212 mm |
|---|---|
| Height (with stand) | 453 mm |
| Weight (with stand) | 3560 g |
| Depth (without stand) | 36 mm |
| Width (without stand) | 621 mm |
| Height (without stand) | 372 mm |
| Weight (without stand) | 3200 g |