21
Site and System Installation
Please read the following carefully to ensure maximum performance benefit from your
system.
NOTES:
Aclarus recommends that installation is performed by a certified Aclarus
installer or registered plumber.
System must be installed according to local building regulations and codes.
Only use ozone compatible plumbing components from the discharge of the
Aclarus Ozone Water System to the Activated Carbon filter. Ozone compatible
plumbing includes Schedule 40 or 80 PVC (pipe or braided hose) and/or
PEX with ozone compatible fittings such as poly inserts.
Copper, brass or other oxidizable plumbing parts will break down over time and
can result in leakage and/ or affect overall system performance.
Always prime the system before use and after system has not run for more
than 1 day. Prime by turning tap (closest to the system is best) 6-8 times on
and off to turn system on, circulate ozone before running water through pipes.
Always install an Activated Carbon filter between the Aclarus ozone system
and existing plumbing.
ALWAYS conduct a water quality test via a certified lab following installation.
Site Preparation
1) Select a location that allows the gasses to be vented either to the outside
or two-feet deep into an atmospheric drain.
NOTE: Lines which vented to the outside can freeze and plug with ice,
causing the contact tank to fill with air which could damage the unit.
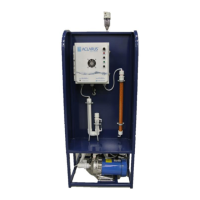
2) Measure the selected area to ensure there is sufficient space for the
system and components. Refer to Components Footprint Chart for space
requirements.
3) Place Aclarus system in selected area.
4) Place filter(s) in selected area. Standard installation is beside the Aclarus system.