39
Checking flow switch function
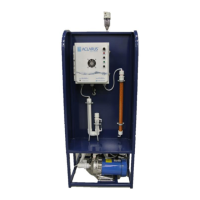
1. Turn off the Aclarus Ozone Water System and drain system (see above).
2. Detach quick-connect wire from the Aclarus Ozone Enclosure going to flow switch.
3. Remove flow switch assembly from unit.
4. Examine flow switch for the presence material interfering with the flow switch.
5. Wrap up the wire and unscrew the flow switch from the PVC T connector. Using a
multi-meter set to connectivity, place the leads of the multi-meter on the connections
of the quick connect and close the flow switch.
NOTE: If there is connectivity, the switch is functioning properly. If there is no
connectivity, the flow switch has ceased functioning correctly and must be replaced.
Replacing the flow switch
1. Screw flow switch into a spare, unconnected 3/4” threaded PVC T connector (not
provided).
2. Ensure there is clearance around the flow switch paddle.
3. Note how far the flow switch can be set in before encountering obstruction from the
T connector.
4. Tape the flow switch, and replace flow switch in ‘T’ plumbed into the system and
make sure the switch is not inserted past the point identified in step 8.
NOTE: Ensure flow arrow on flow switch points in the direction of the water flow in
the pipe.
5. Reconnect the quick connect to the Aclarus Ozone Enclosure.
6. Refill the Aclarus Ozone Water System (see Filling the Aclarus System page 18)
7. Turn on the Aclarus Ozone Water System and run water to verify that switch
activates system.
8. Open closest downstream tap for ten minutes to ensure proper operations.