29
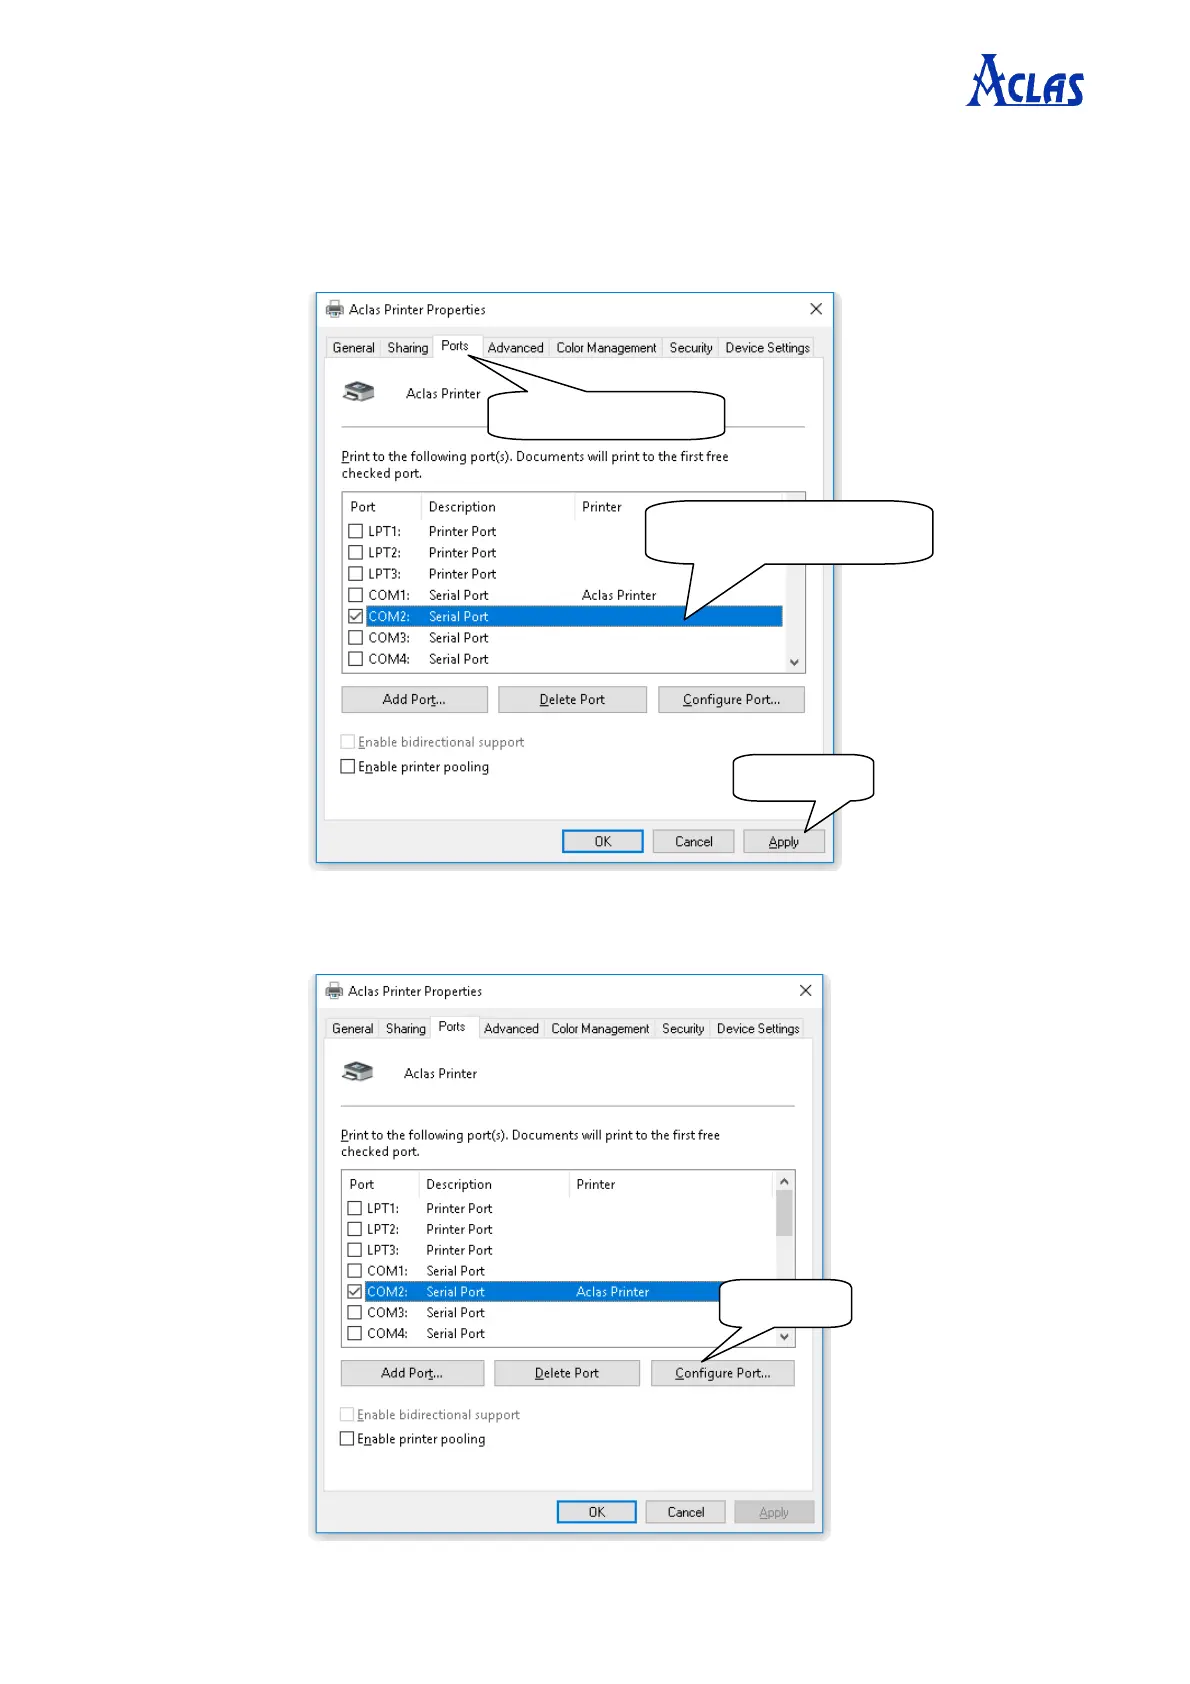
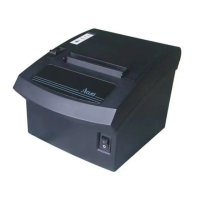
Step 2: Choose connecting port
Choose the connecting port that you have known from Chapter 8.2. For example, the connecting port of the
printer known from Chapter 8.2 is COM2, so you should choose COM2 in the following interface.
Step 3: Configure port
Note: USB printers could skip this step, and go to step 4 directly.
Select the connecting port.