EasyManua.ls Logo

Acom 2100 User Manual

Acom 2100
6 pages
To Next Page IconTo Next Page
Page #1 background imageLoading...
Page #1 background image
ACOM 2100 Transformer Installation
C A U T I O N
After installing the transformer, the weight of the unit is about
30kg, which should preferably be handled by two persons. An
assistant may be needed to hold the amplifier steady during
transformer installation.
Position the amplifier, with the transformer not yet installed, flat on a table near
the place where it will be used. During the process described below, when the
amplifier cover is removed, take care not to torque or twist the chassis nor let
the amplifier stand on edge. Do not lift the unit by only one corner.
Remove the cover by removing all nine M3x6 screws.
Orient the amplifier on the table so that the transformer compartment is in front
of you.
Unplug all five connectors from the Mains board and remove two M3x8 screws
and one M3x6 screw.

Other manuals for Acom 2100

Question and Answer IconNeed help?

Do you have a question about the Acom 2100 and is the answer not in the manual?

Acom 2100 Specifications

General IconGeneral
CoolingForced air
Frequency Coverage1.8 - 30 MHz
Intermodulation DistortionTypically better than -35 dB below rated PEP output
Harmonic Output Suppression-50 dB
Input and Output Impedances50 Ohm nominal
Primary Power220 - 240 V AC, 50/60 Hz
Tube4CX800A
Dimensions16.5 x 6.5 x 19.3 inches
Power Supply220 - 240 V AC, 50/60 Hz
ALCAdjustable

Summary

Transformer Installation and Preparation

Safety Precautions for Transformer Handling

The transformer weighs 30kg; handle with two persons and support securely.

Amplifier Preparation and Disassembly

Position amplifier flat, remove cover (9 M3x6 screws), orient compartment forward, and unplug connectors.

Transformer Mounting and Securing

Transformer Preparation and Insertion

Remove transformer from packaging, keep shipping materials, use provided M6x12 screws.

Securing the Transformer

Align transformer, use lock/flat washers, loosely screw in, then tighten all 4 screws.

Transformer Mounting Assistance

Requires an assistant to support the amplifier as captive nuts are accessed.

Wiring and Voltage Configuration

Connecting Primary Leads

Plug in the filament supply connector and HV fast-on connectors to the HV Rectifier board.

Routing HV Transformer Leads

Thread 8 primary leads of the HV-transformer through chassis openings, using rubber grommets.

Voltage Selector Configuration

Connect HV-transformer primary wires to voltage selector terminals based on mains voltage table.

Final Connections and Assembly

Connect remaining connectors, replace cover, reinstall screws, and check fuses for 100-120VAC.
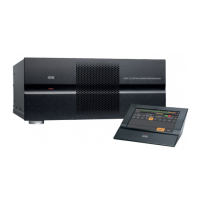
Related product manuals