Installation Guide
9
Step 5: Attach the Ceiling Bracket to the Camera
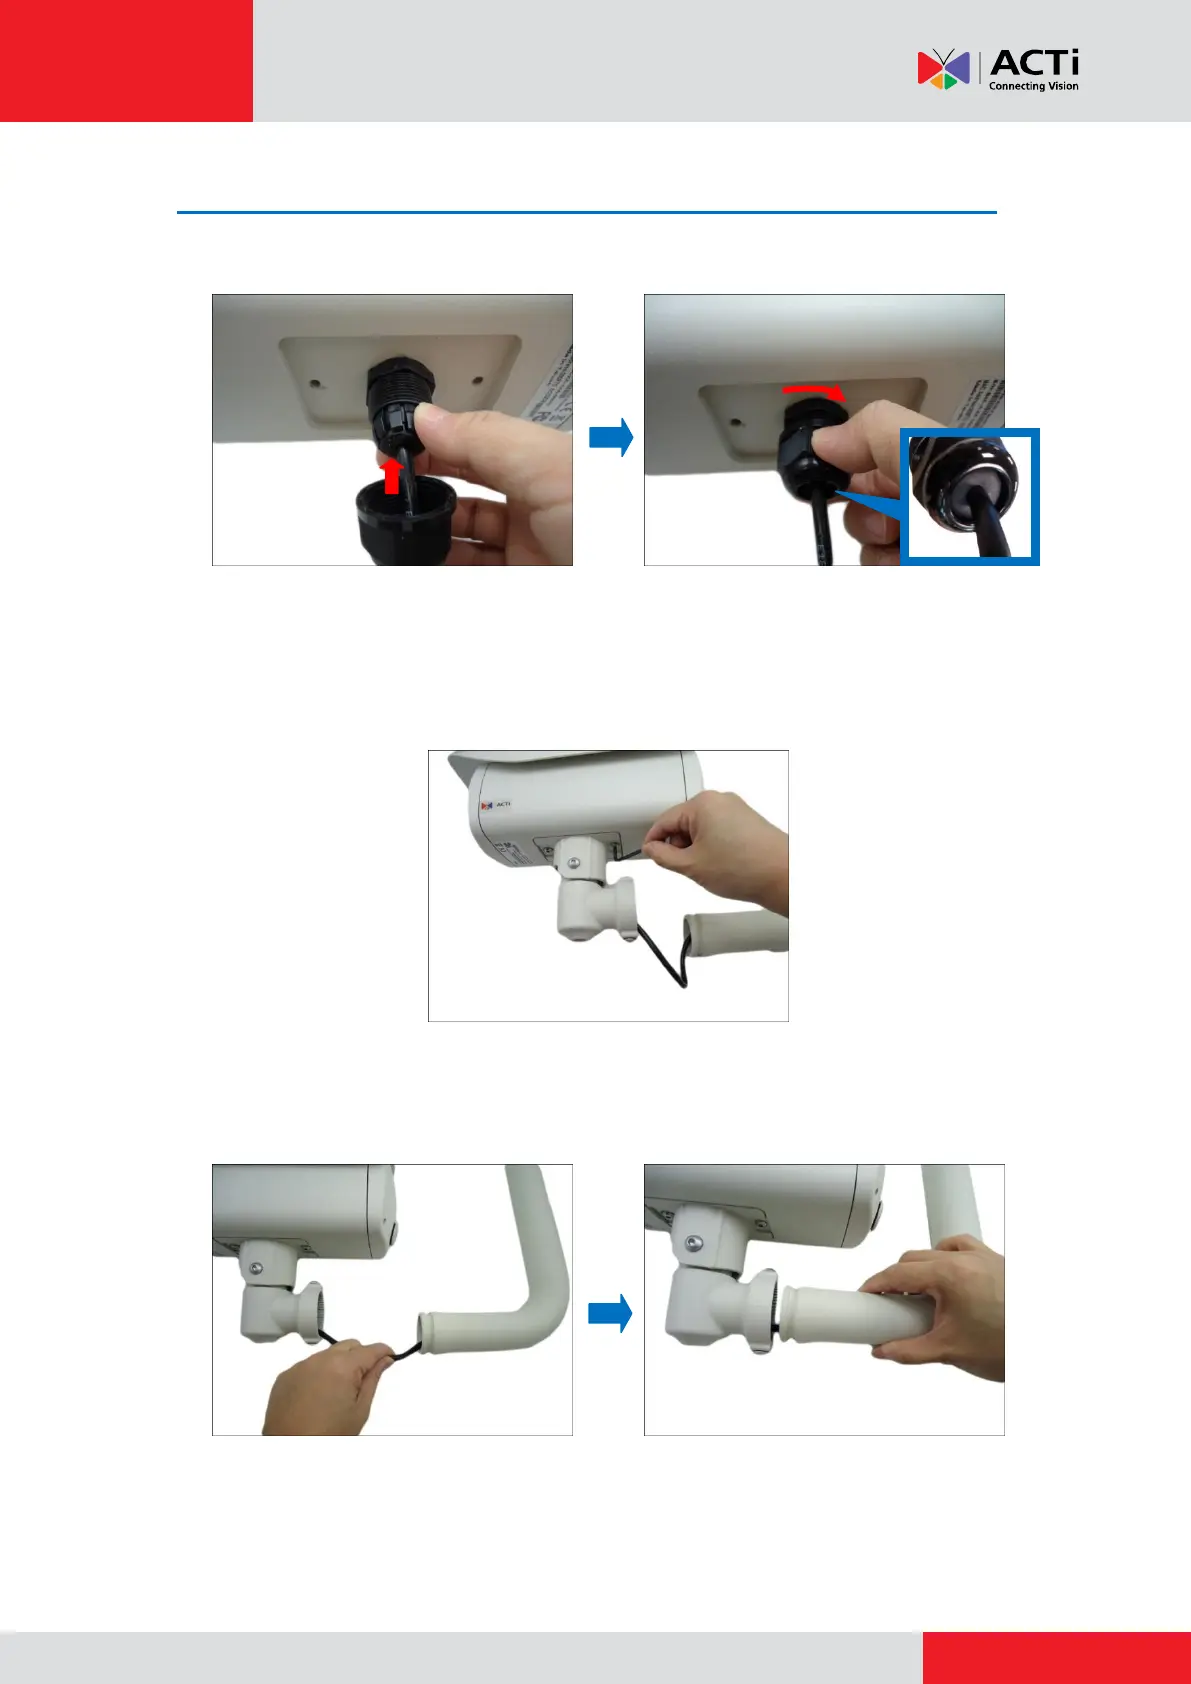
1. Insert the sealing insert through the gland body and attach the clamping nut.
NOTE: Make sure the clamping nut is tightly attached to the gland body and the sealing
insert is squeezed tightly.
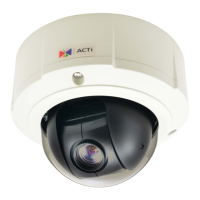
2. Secure the two (2) screws using the bundled bracket wrench to attach the main bracket to the
camera.
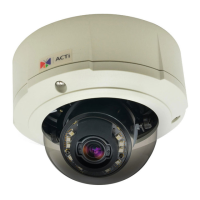
3. Push the excess length of cable through the ceiling bracket and align the ceiling bracket to
the main bracket.