DRAINAGE INSTALLATION
DRAINAGE WITH THE BUILT-IN WATER TANK
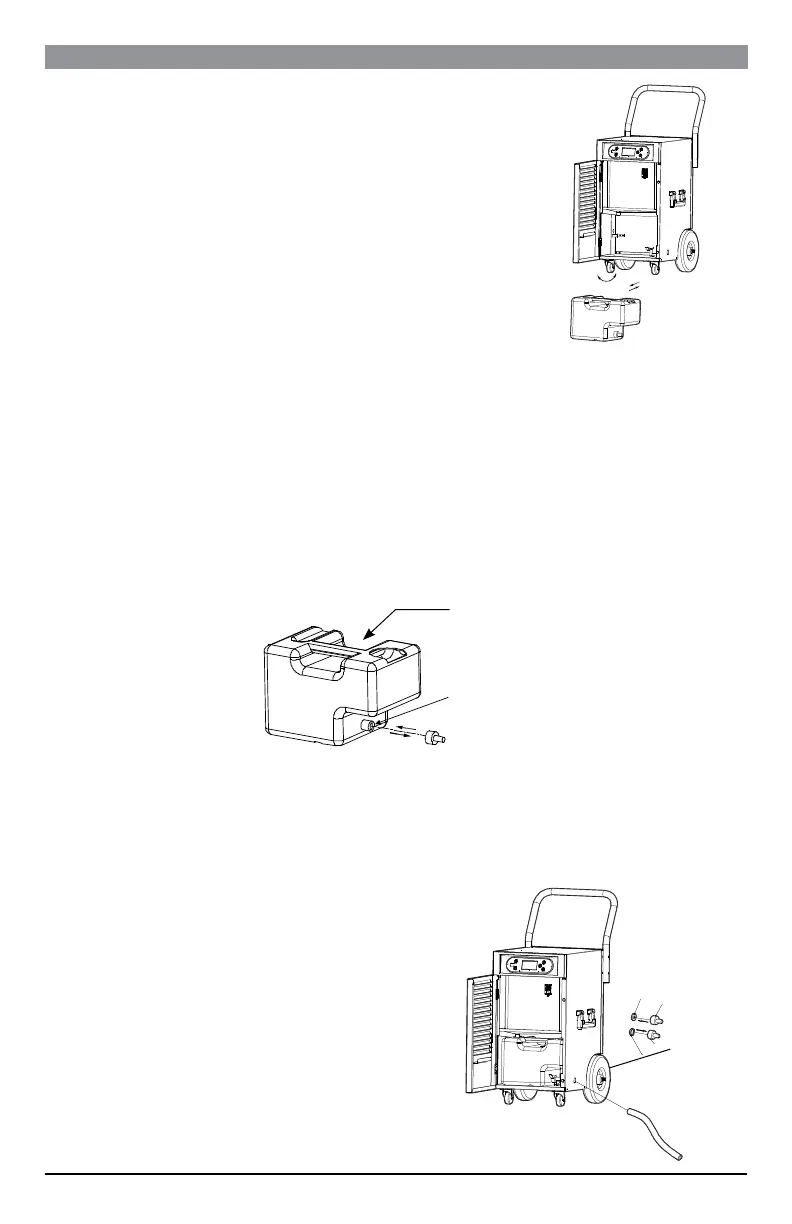
The unit is designed to use the built-in water tank for drainage by
default. When the tank is full, the screen will display “FULL” and also
make a buzzing sound.
1. Press the POWER button to turn off the machine.
2. To empty the water tank, open the front panel to access the
water tank.
3. Grab the handle of the water tank and pull it out horizontally.
4. After disposing of the water, insert the tank back into place until
you feel the internal clamp fully clamp onto the nozzle of the
tank. Close the front panel.
5. Press the POWER button to resume operation.
CONTINUOUS DRAINAGE WITH THE DRAINAGE PIPE
In extremely wet conditions, the water tank may be filled up frequently. You may consider setting up
continuous drainage by using the drainage pipe for convenience.
1. Open the front cover of the machine, remove the tank, and empty the water from the tank.
2. Screw the water pipe connector off the water tank outlet. Set the connector aside.
3. The outlet at the side of the water tank is sealed by default for drainage. If you decide to install a
pipe for continuous drainage, use a power tool to drill the side outlet so you to have an opening
of sufficient size to allow water to drain through smoothly.
4. Screw the connector back to the outlet tightly. A washer is pre-installed into the connector to
prevent leakage.
5. Install the included drain pipe to the water pipe connector on the tank, through the opening on
the machine housing. Direct the pipe to the desired area before operating the machine.
6. If needed to replace or extend the drainage pipe, use 7/16" (ID Ф11 mm) piping.
7. Shut the front panel.
WARNING: Do not block the drainage pipe. The end
of the drainage pipe should not be higher than the
water tank outlet. If the drainage pipe end is higher
than the outlet, water will not drain properly and
could damage components of the unit.
Water tank
Outlet at the
side of water
tank
Water pipe
connector
Opening
for drain
pipe
Connuous
drain pipe
6