7 8
SurfacePreparation
Before starting any cleaning task, it is important to inspect the area for objects that could
create a hazard. Remove any objects from the work area that could be tripped over, such as
toys or outdoor furniture. Ensure that all doors and windows are closed tightly.
WaterSupply(ColdWaterOnly)
Only draw water through the unit. For use with cold water supply only. Water hose must be
at least a 1/2” (13 mm) in diameter. Flow rate of water supply must not fall below 2 GPM
(gallons per minute) [9.1 lpm (litres per minute)]. Flow rate can be determined by running
the water for one minute into an empty 5-gallon (19 L) container.
CAUTION
•Neverusethepressurewashertodrawinwatercontaminatedwithsolvents(e.g.
paintthinners,gasoline,oil,etc.).
•Dirtinthewaterinletwilldamagetheunit.Toavoidthisrisk,werecommendchecking
thewaterlter(locatedinsidethewaterinlet.TocleanitoutseeMaintenancesection).
•Alwayspreventdebrisfrombeingdrawnintotheunitbyusingacleanwatersource
andanadditionalaccessorywaterlterifrequired.
•Toprolongthelifeoftheunit,resttheunitfor5minutesafterevery30minutesofuse.
ASSEMBLY AND OPERATING INSTRUCTIONS ASSEMBLY AND OPERATING INSTRUCTIONS
3
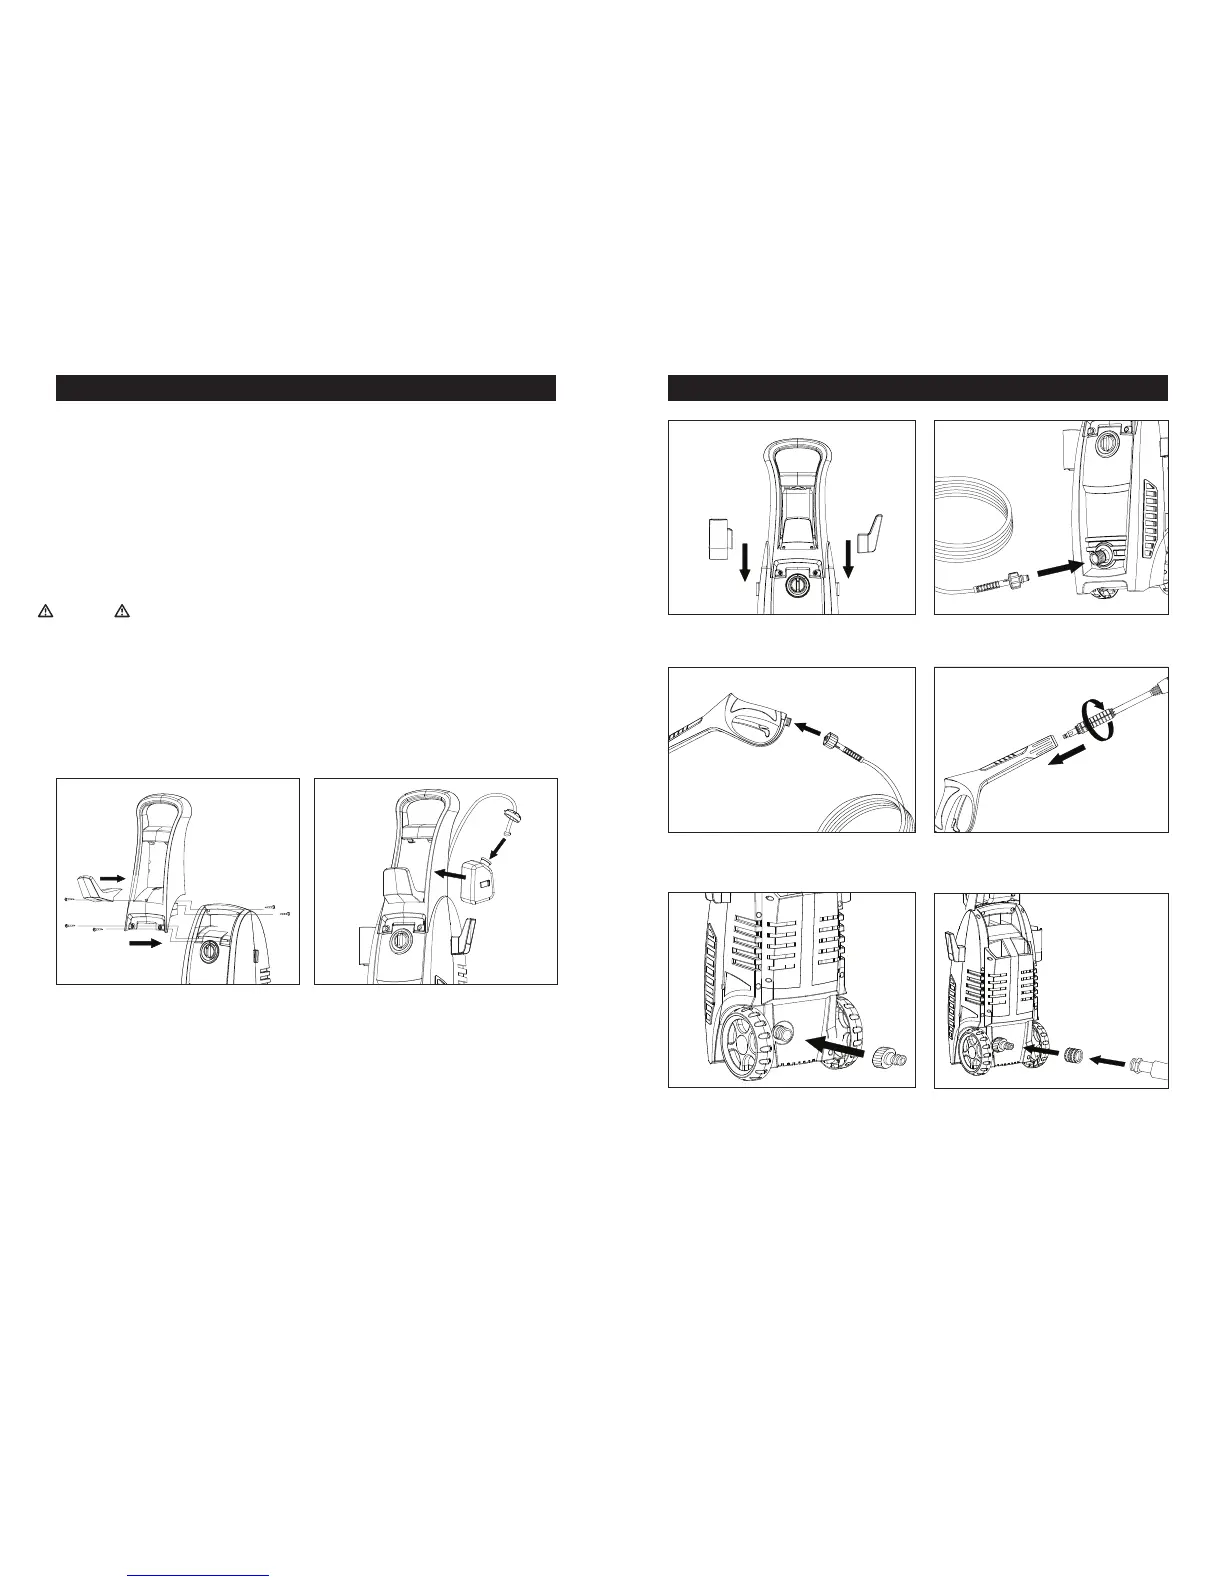
Attach gun holder and power cord bracket.
Attach the inlet adapter to the machine’s
water inlet. Hand tighten only. (Some models
come with inlet adapter pre-assembled.
Check your unit.)
Attach high pressure hose to the machine’s
water outlet (hand tighten only)
Attach quick connect coupling to garden
hose (hand tighten only) and attach to inlet
adapter.
1
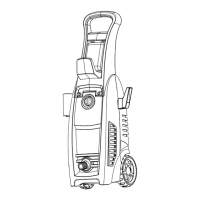
Assemble handle onto pressure washer
and attach hose bracket to handle. Tighten
the screws.
Connect detergent suction tube to the
bottle and attach to the handle.
2
4
7
8
5
Attach high pressure hose to the gun assembly
(hand tighten only).
Insert choice of wand to the gun and twist
¼ turn to lock in position.
6