Installation and Wiring
The Acumen CAT3.1 consists of the following main
components;
• CAT3.1 main unit ECU (Electronic Control Unit)
• CAT3.1 wiring harness
• 1 x Remote Fob
• Fitting kit including System fuse, spare fuse & Blue LED system
indicator
Tool Required:
• Pliers/Cable strippers/Cable cutters
• Drill with 5.5mm and 8mm bits
• Soldering equipment
• Adhesive lines heatshrink tubing
• High quality insulating tape
• Masking tape (for drilling LED hole)
• Multimeter
• General workshop tools
• Motorcycle wiring diagram
CAT3.1 main unit ECU (Electronic Control Unit)
Ensure the fitting of the equipment and the associated wiring does not
affect the operation of the motorcycle. Be sure the alarm and wiring does
not affect moving parts (such as control cables, brakes) and does not
touch hot parts.
The CAT3.1 is designed for motorcycle use and is fully encapsulated so
water ingress is not of a concern. Likewise, the Key Fob is also of a
waterproof design. We recommend however that the unit is not placed in a
position where it is continually subjected to water and/or pressure
washing.
SSiittiinngg//ppoossiittiioonniinngg tthhee CCAATT33..11 mmaaiinn uunniitt//EECCUU ((EElleeccttrroonniicc CCoonnttrrooll uunniitt))
When mounting the unit, use the 5mm screws/nuts supplied in the fitting kit
or cable tie the unit to a suitable frame tube. Take care to mount the unit
where access to it is protected (the more difficult it is to reach, the harder
the job the ‘thief’ has to bypass the alarm).
Route the wiring alongside the motorcycle wiring, and tape it in the style of
the original motorcycle wiring.
SSiittiinngg//ppoossiittiioonniinngg tthhee LLEEDD ssyysstteemm IInnddiiccaattoorr
Be aware the LED will result in a small increase of electrical current drain.
The LED draws 1mA of electrical current. The LED provides a visual
indication of the alarm’s status, helps with the diagnostic mode of the
alarm, and will warn a potential thief that your motorcycle is alarmed and
that the alarm is armed.
For this reason, it is preferable to position the LED where it can be easily
seen. Having decided on a suitable position, drill an 8mm hole, pass the
LED through from the back of the hole and then insert the LED into the LED
holder. Then push the LED holder back into the 8mm hole to mount it
securely. Route the LED wires to the position of the CAT3.1 ECU.
The alarm has a loom which ends in a 6-way connector. This connector
connects to the wiring loom which is connected to the motorcycle.
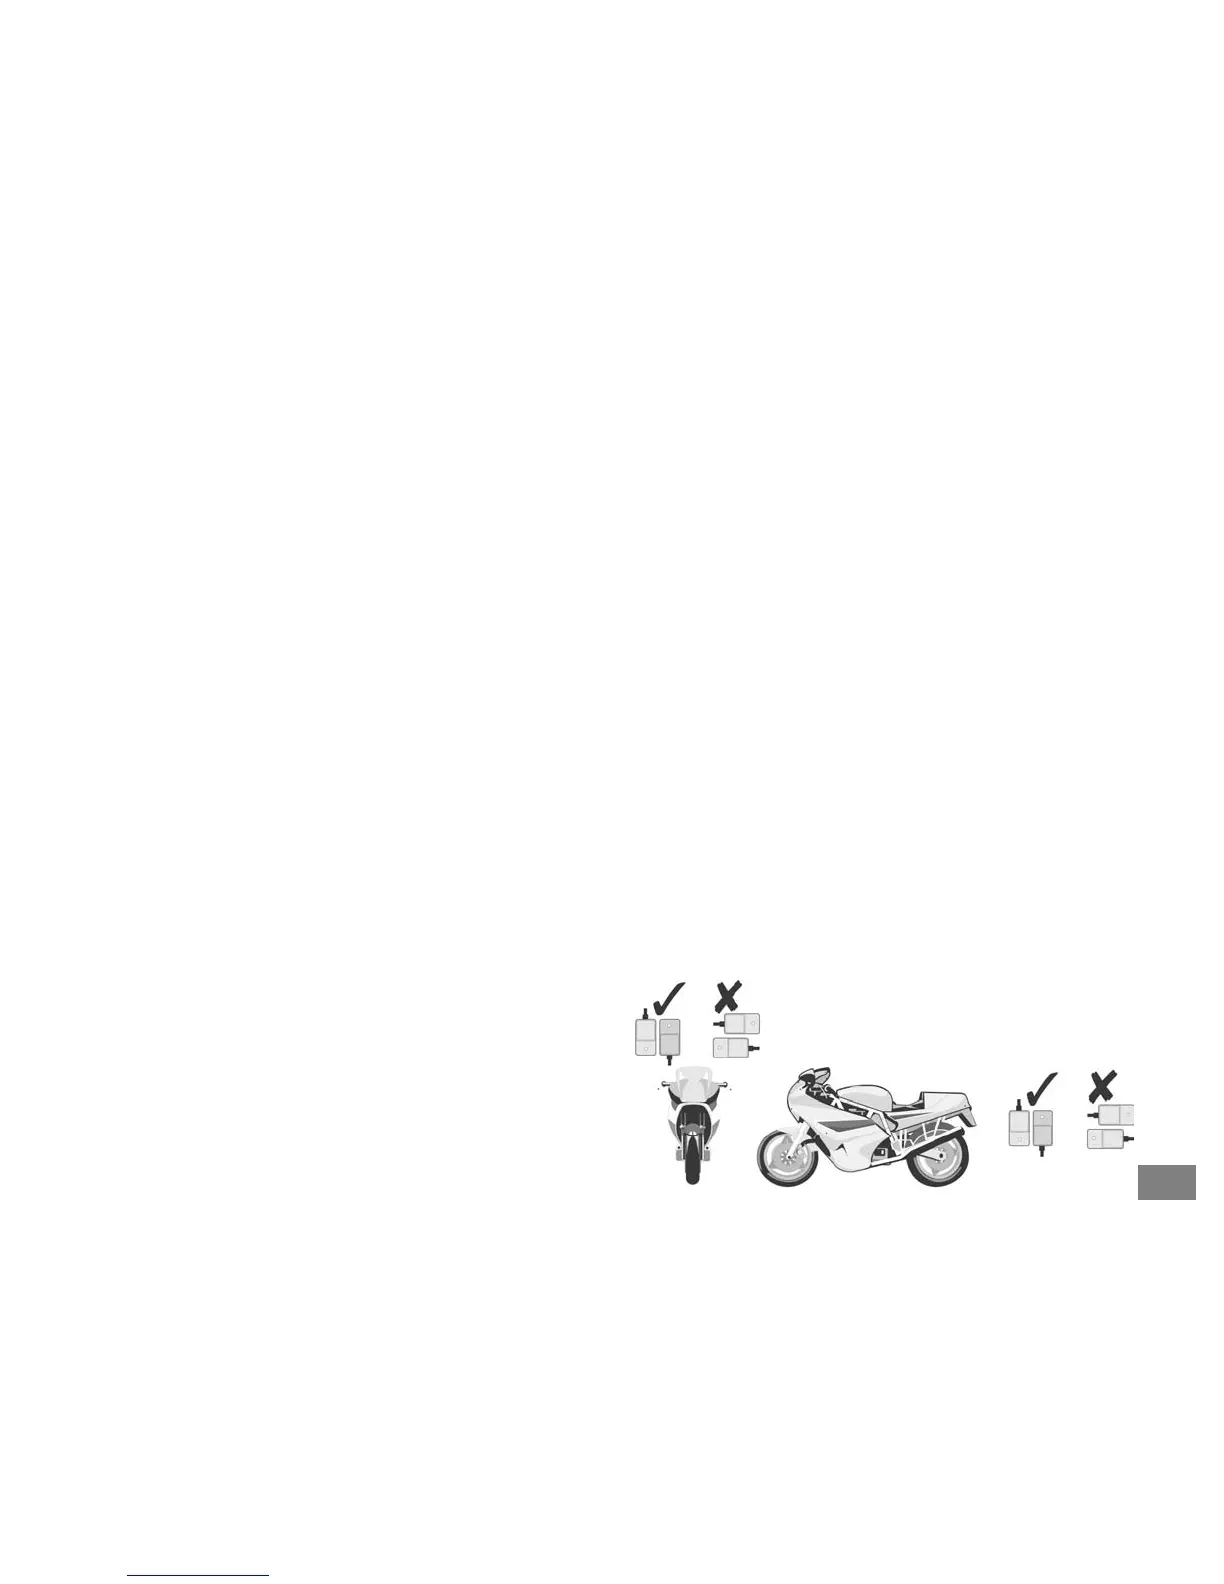
MMoovveemmeenntt SSeennssoorr
Mount the movement sensor so the wire is vertical +/- 30 degrees. No
other setting or adjustment is required. The nearer the centre of the
bike laterally, the less sensitive it is.
MMoouunntt tthhee mmoovveemmeenntt sseennssoorr ssoo tthhee wwiirree
iiss vveerrttiiccaall
1
 Loading...