44 | | 45
VEHICLE CONTROLSVEHICLE CONTROLS
TABLE OF
CONTENTS
INDEX
VISUAL INDEX
VOICE COMMAND
INDEX
SAFETY
INFORMATION
CLIENT
INFORMATION
INSTRUMENT
PANEL
SPECIFICATIONS
VEHICLE
CONTROLS
MAINTENANCE
AUDIO AND
CONNECTIVITY
HANDLING THE
UNEXPECTED
BLUETOOTH®
HANDSFREELINK®
DRIVING
ACURALINK®
NAVIGATION
HomeLink® Garage Opener
Program your vehicle to operate up to three remote-controlled devices around your
home—such as garage doors, lighting, or home security systems—using the buttons
on the ceiling.
Training a Button
Park near the system you want to program, and follow the instructions in the
owchart below.
To retrain a button or erase codes, see the Owner’s Manual on the Owner
Information CD or at owners.acura.com (U.S.) or www.myacura.ca (Canada).
If you need help, call HomeLink at (800) 355-3515 or visit www.homelink.com.
Press and hold the button on the remote
and the HomeLink button at the same
time. Then, while continuing to hold the
HomeLink button, press and release the
button on the remote every 2 seconds.
Does the LED blink at a faster rate within 20 seconds?
Press and hold the
HomeLink button
again.
Training
complete
YESNO
HomeLink indicator
flashes for 2 seconds,
then remains on.
HomeLink LED
remains on.
YESNO
YESNO
1
Press and hold the desired HomeLink
button and the button on the remote
transmitter.
Does the HomeLink indicator (LED) blink at a faster
rate after about 10 seconds?
2
a
The remote has a rolling code. Press
the “learn” button on the
remote-controlled device (e.g., garage
door opener).
Press the programmed HomeLink
button again; the remote-controlled
device should operate.
Within 30 seconds, press and hold the
programmed HomeLink button for 2
seconds.
a
Press and hold the programmed
HomeLink button for about a second.
Does the device (garage door opener) work?
3
b
4
5
Position the remote transmitter you
wish to link 1-3 inches (3-8 cm) from
the HomeLink button you want to
program.
Indicator
HomeLink buttons
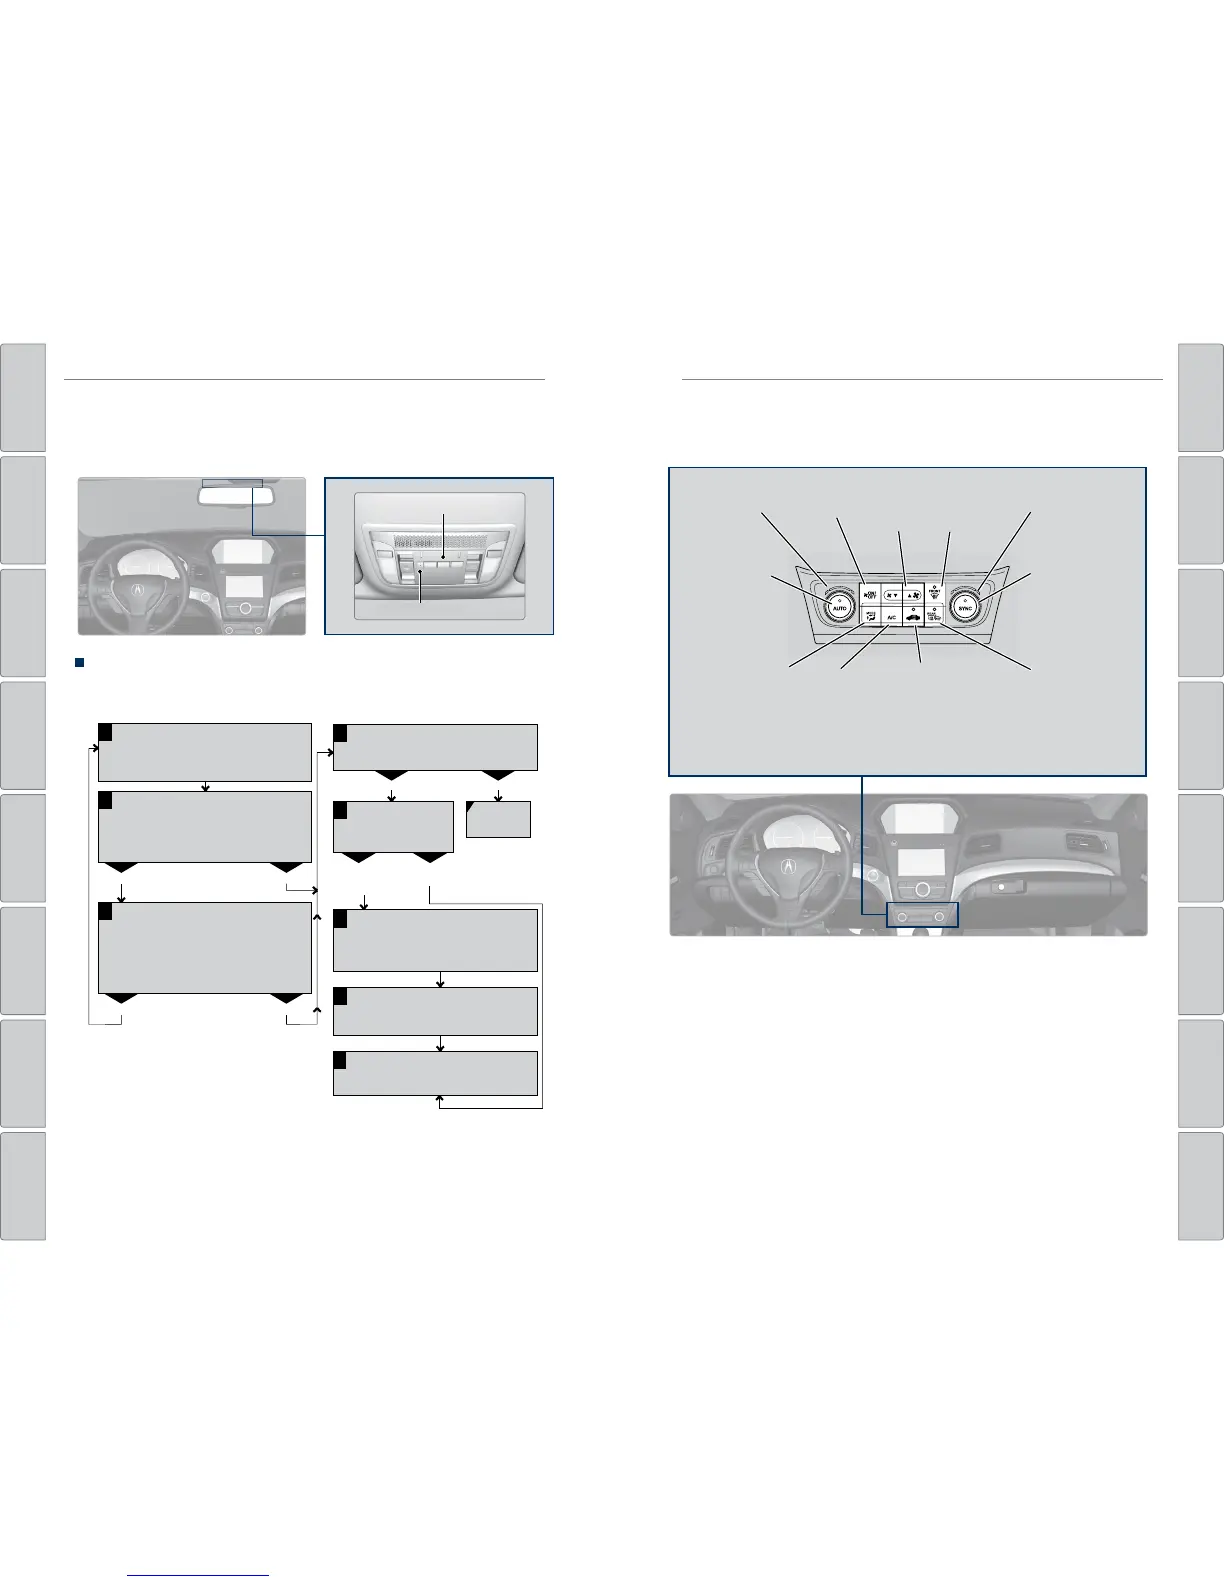
Climate Control System
Set your preferred interior temperature by selecting the proper mix of heated or
cooled air and fan speed. Use the buttons to operate the system.
On vehicles with ODMD, climate information is displayed on the screen, but cannot
be selected via touch. Adjust the climate settings using the buttons.
Windshield
defroster
button
Driver’s side
temperature
dial
ON/OFF
button
AUTO button:
Press, then adjust
the temperature
to your preferred
setting.
Rear window
defogger/
heated mirror
button
Passenger’s side
temperature dial
Fan
speed
buttons
A/C
button
SYNC button: Set
the passenger’s
side temperature
to the same as
the driver’s side.
Recirculation button:
Recirculation mode (indicator
on): Recirculates air from the
vehicle’s interior.
Fresh Air mode (indicator off):
Maintains outside ventilation.
Mode
button
 Loading...