16 American Dryer Corp. 450374 - 1
a. Loosen and remove the nuts and washers from the
tumbler tie rods. Remove the rods.
b. Replace either tumbler or tumbler support by reversing
the procedure.
6. Reassemble components into dryer by reversing steps 1
through 4.
7. Check tumbler lateral and vertical alignment. Also, check
belt tension and alignment.
NOTE: Check tension of belts and alignment of tumbler
before operating dryer.
8. Replace back guard and reestablish power to dryer.
V-Belts
V-Belts should have proper tension. If too loose, they will
slip, if too tight excessive wear on the bearing will result. If
the pulleys are not properly aligned, excessive belt wear will
result. Proper belt tension will allow 1/2” displacement under
normal thumb pressure at mid span of the belt.
V-Belt Tension Adjustment – Tumbler to Idler
1. Loosen two bolts connecting to backup plate.
2. Back off jam nut on the adjustment bolt.
3. Tighten belts by turning adjustment bolt clockwise. (Turn
counterclockwise to loosen belts.)
4. Tighten both bolts connecting to backup plate.
5. Check vertical plane of idler pulley for parallel alignment
with tumbler pulley.
6. If realignment is required, loosen tumbler pulley and move
tumbler pulley to proper position.
7. Retighten jam nut.
V-Belt Tension Alignment – Motor to Idler
1. Loosen two bolts connecting idler arm to backup plate.
2. Back-off on jam nut(s) on the adjustment bolt.
3. Loosen/tighten adjustment bolt to relax/increase belt
tension.
4. Tighten adjustment bolt jam nut(s).
5. Tighten the two bolts loosened in step 1.
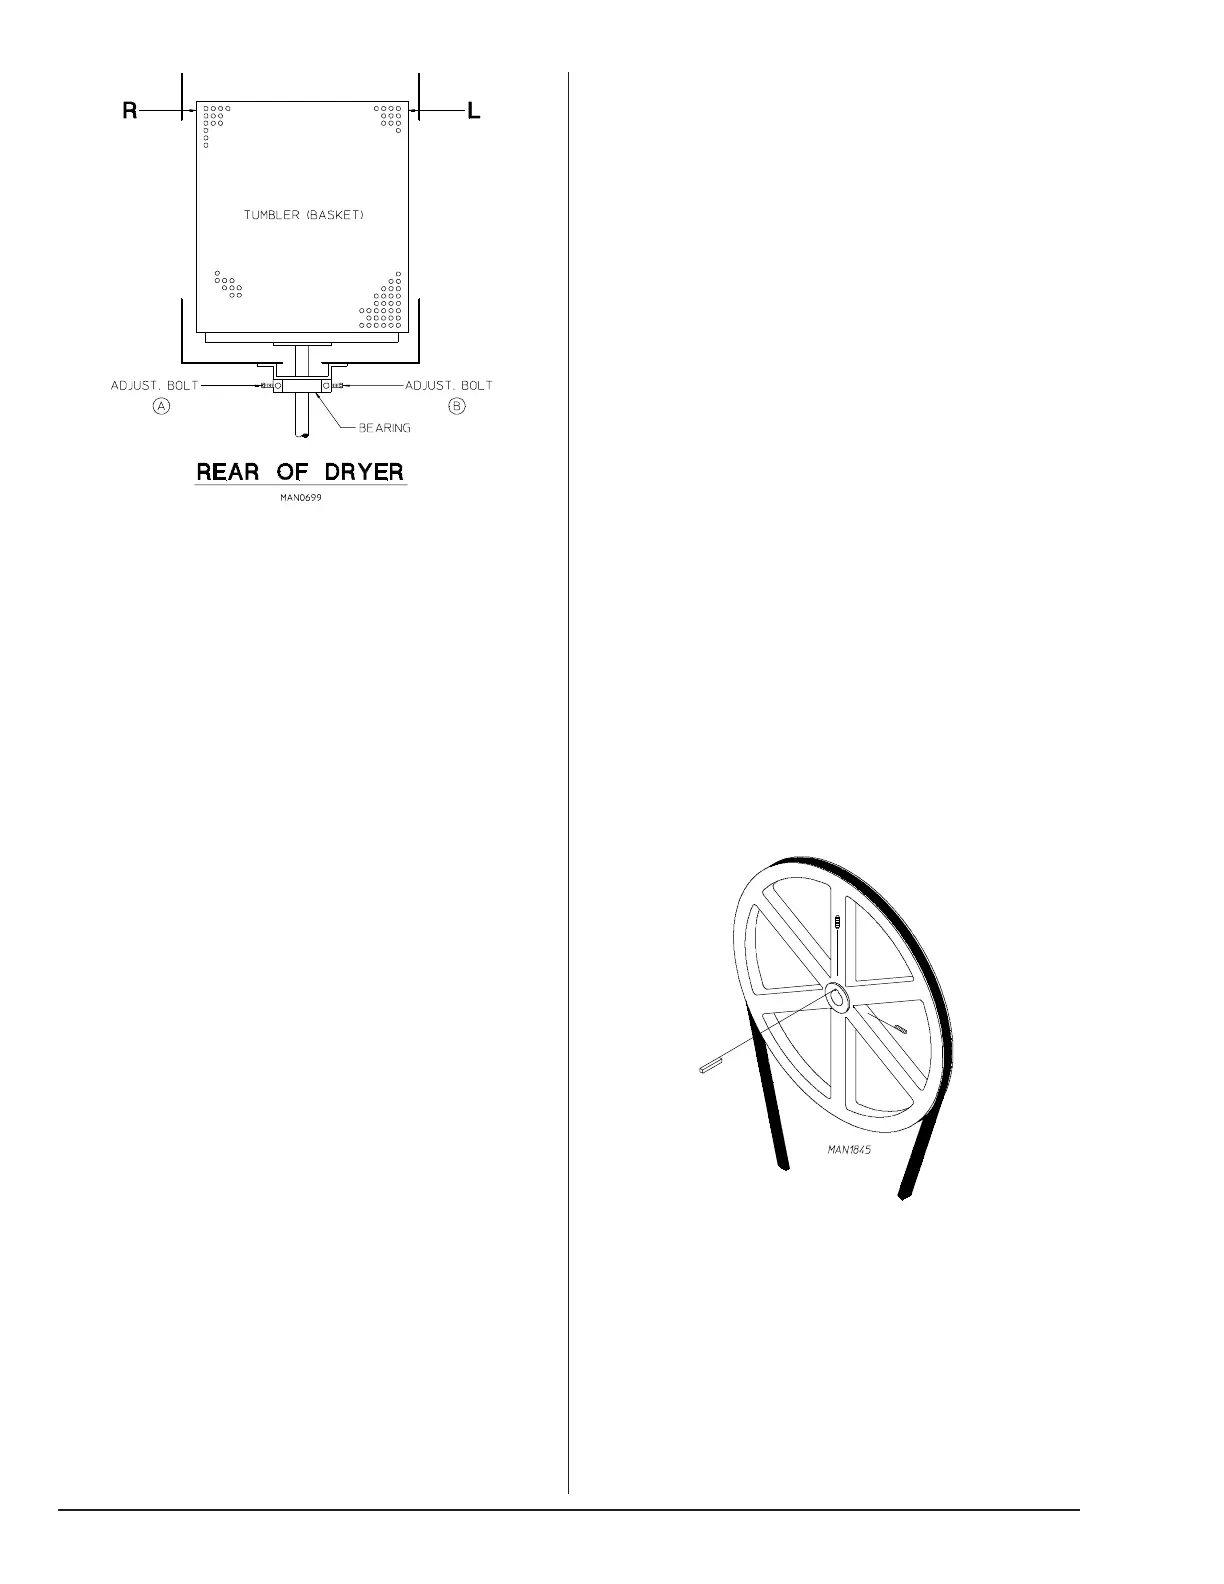
Tumbler Alignment (Lateral)
1. Discontinue power to dryer.
2. Remove back guard.
3. Loosen the two (2) hex head bolts, (one turn is enough),
that holds the pillow block bearing to the bearing box.
4. Back off the two (2) jam nuts on the side adjustment bolts.
Now rotate the tumbler from the front of the dryer, checking
the space between the tumbler and front panel. This
should be equal on the left-hand and right-hand side.
5. Lateral adjustment (viewing from the rear)
a. Loosening (by turning counterclockwise) the left-hand
adjustment bolt and tightening (by turning clockwise)
the right-hand adjustment bolt will shift the basket to
the right.
b. Loosening (by turning counterclockwise) the right-hand
adjustment bolt and tightening (by turning clockwise)
the left-hand adjustment bolt will shift the basket to
the left.
6. Tighten and secure both adjustment bolts and jam nuts.
7. Tighten the bearing box bolts.
8. Replace back guard and reestablish power to the dryer.
To Replace the Tumbler and/or Tumbler Support
1. Remove tumbler pulley and bearing box (follow “To
Replace the Rear Tumbler Bearing” steps 1 through 4).
2. Remove front panel assembly (follow “To Replace Front
Panel Assembly”).
3. Loosen setscrews on front tumbler bearing.
4. Using a wheel puller gently push the tumbler shaft towards
the front through the front tumbler bearing.
NOTE: An alternate method would be to place a block of
wood on the end of the tumbler shaft and strike it with a
heavy hammer. To prevent damage to the shaft, the wheel
puller method is preferred.
5. Remove the tumbler and support through the front of the
dryer.