Unpowered Riding
You can also use an unpowered bicycle. Turn off the power-assisted system and the bicycle is an unpowered
bicycle.
e.g.: When the batteries are exhausted.
If you have never ride a power-assisted bicycle, please get familiar with it in an open space. The
power device will be activated only after it is powered on and the rider is stepping on the pedal. It
may be a little uncomfortable in the beginning, but the rider will get used to it soon. The rider should
set on the saddle before stepping on the pedal.
Do daily exercise from the minimum level of riding, e.g.:
Stop stepping on the pedal and the power-assisted system will still provide power within a short time.
The power-assisted endurance mileage is determined by the following factors:
1.Starting
2.Accelerating
3.Braking
4.Turning a corner
1.Total weight of bicycle, rider and luggage
2.Speed control
3.Tire pressure
Power-assisted Riding
Troubleshooting
The display does not work
The green light of the
charger lights up, but the
batteries cannot be charged
Please be sure to connect
the charger to the batteries
and then insert it into the
socket in the wall
The batteries have been exhausted or
the bicycle is not connected to the
batteries
The batteries are not connected to
the charger correctly
It may be caused by adverse wind,
mountain road, rider’s weight, speed
adjustment and tire pressure
Please be sure to connect the charger to
the batteries and then insert it into the
socket in the wall
Ensure the batteries have been charged
and installed correctly. Ensure the batteries
have been locked in order to avoid
disconnection between the batteries and
the bicycle during riding
Problem
Possible cause Solution
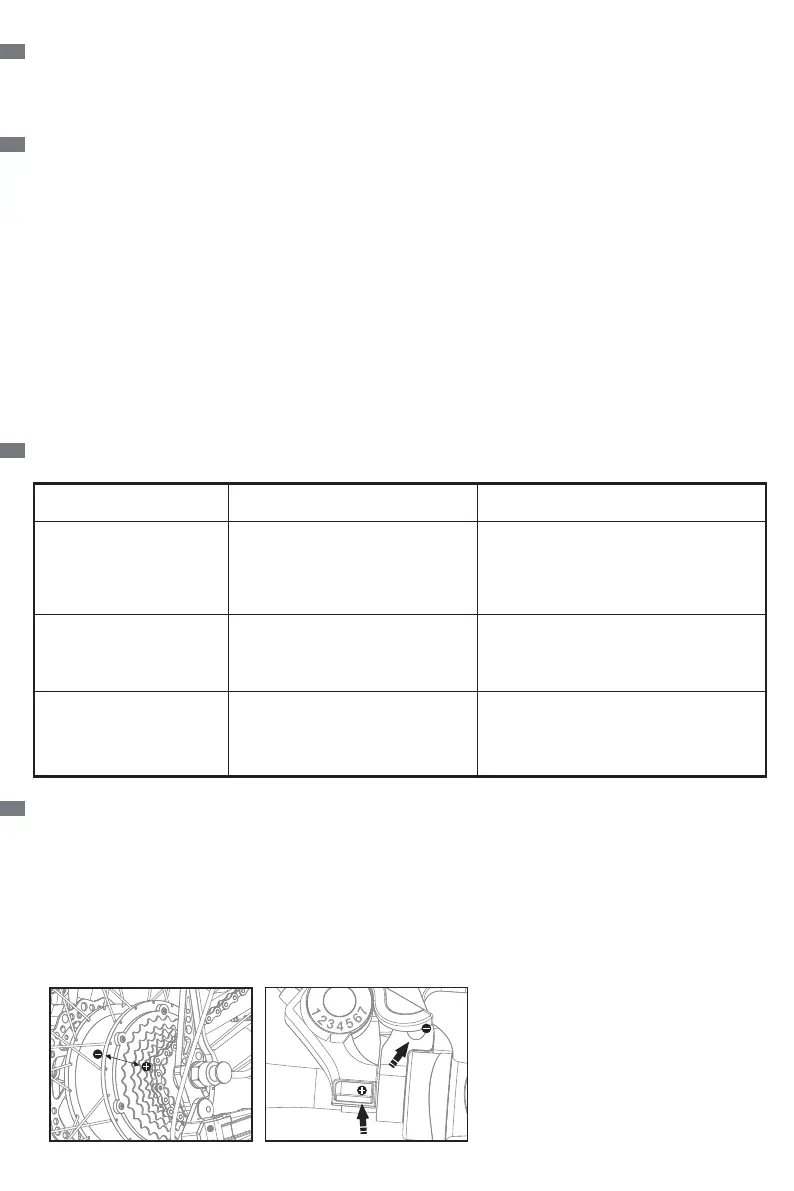
Know the gear level:
1.The gear has the same working principle as ordinary bicycle, which is unrelated to the motor.
2.The DIP shifter is installed on the right of the handlebar. Pull the “+”/ “-” handle to raise/lower the gear.
3.The lower the gear level is the more energy will be saved. Vice versa.
4.The gear level has been preset upon delivery and needs not be adjusted.
5.After used for a period of time (3 months), the shift cable will be extended and may need to be adjusted.
6.A local bicycle store or the exclusive shop of the electric bicycle can provide this service.
Gear Adjustment
08