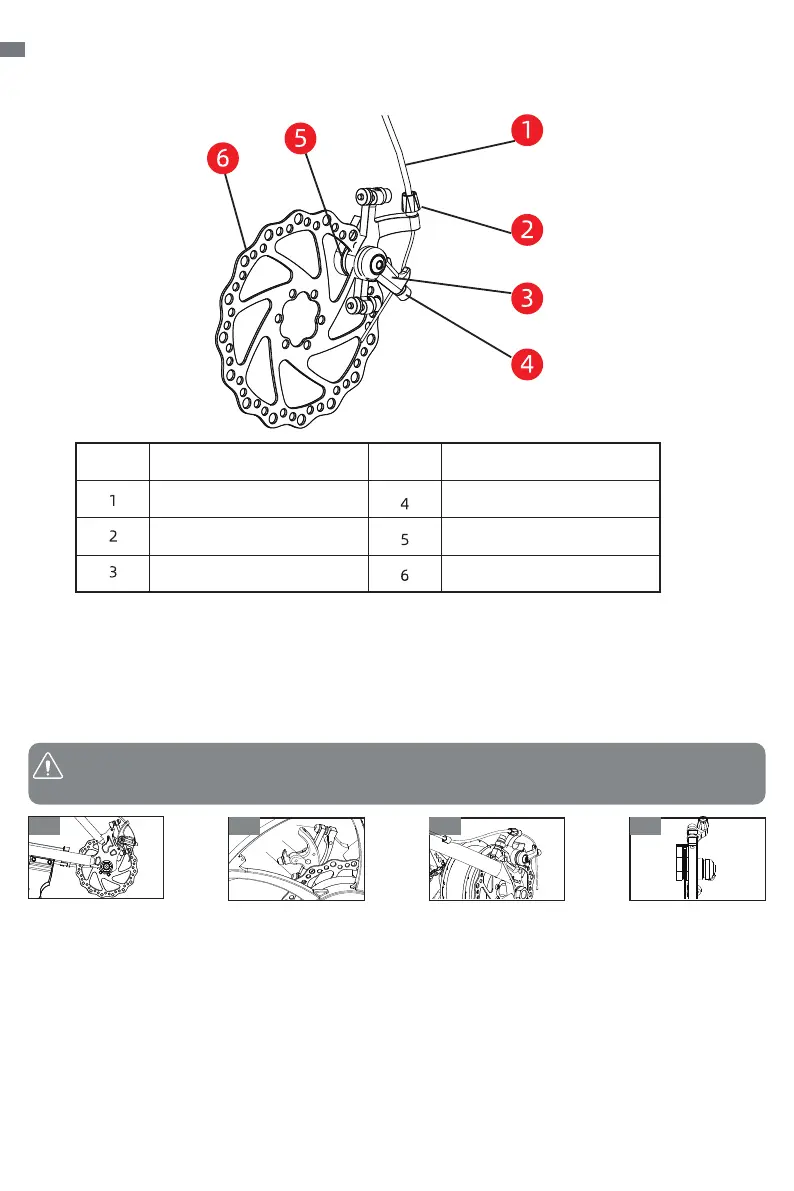
Description No. Description No.
Brake cable
Adjust screw of brake
Brake arm
Locking screw of brake
Brake lining
Brake disc
Brake System
The brake is installed on the front wheel and the rear wheel. The disc brake block acts on the disc to slow down.
The brake disc will be worn and is controlled by the handlebar. The disc brake is a mechanical drive.
05
I.Adjustment of front and rear brake system: (the adjustment method of front and rear brakes is the same)
1.The rear integrated disc brake(see figure 1); Adjust the upper and lower nuts of the disc brake to make the
spacing between disc brake and brake caliper 1.5-3mm, adjust the height of disc brake, and then tighten the
nuts.
2.Front integrated disc brake (see figure 2): Adjust the A and B nuts of the disc brake and adjust the height of the
disc brake so that the distance between the disc brake and the caliper is 1.5-3mm. If the distance is deviated,
use the C screw to adjust, and then tighten the nut.
Rotate the Adjusting nut to rotate the Adjusting nut forward, the brake becomes tight, otherwise it becomes loose.
When adjusting, hold the brake handle at the same time, so that when the position of the brake handle is 1/3 of
the total stroke, the brake rubber block can be tightly attached to the brake drum.
3.Disc brake: (see Figure 3 and 4)
Key points of disc brake adjustment: there is enough clearance between disc brake and brake pad (there is no
interference between the brake disc and the brake skin when rotating, and the best braking effect is appropriate)
adjust the nut, lengthen about brake cable, check whether the brake handle has been adjusted to the appropriate
tightness; Then test ride to ensure effective and normal braking.
Note: To ensure driving safety, brake rubber the working face is worn to 1/2 of brake rubber, a new brake
rubber should be replaced.
A
B
C
1 2 3 4