2 Installation
Isolate ALL sources of power before installing or removing printed circuit boards.
Observe anti-static precautions at all times when handling printed circuit boards.
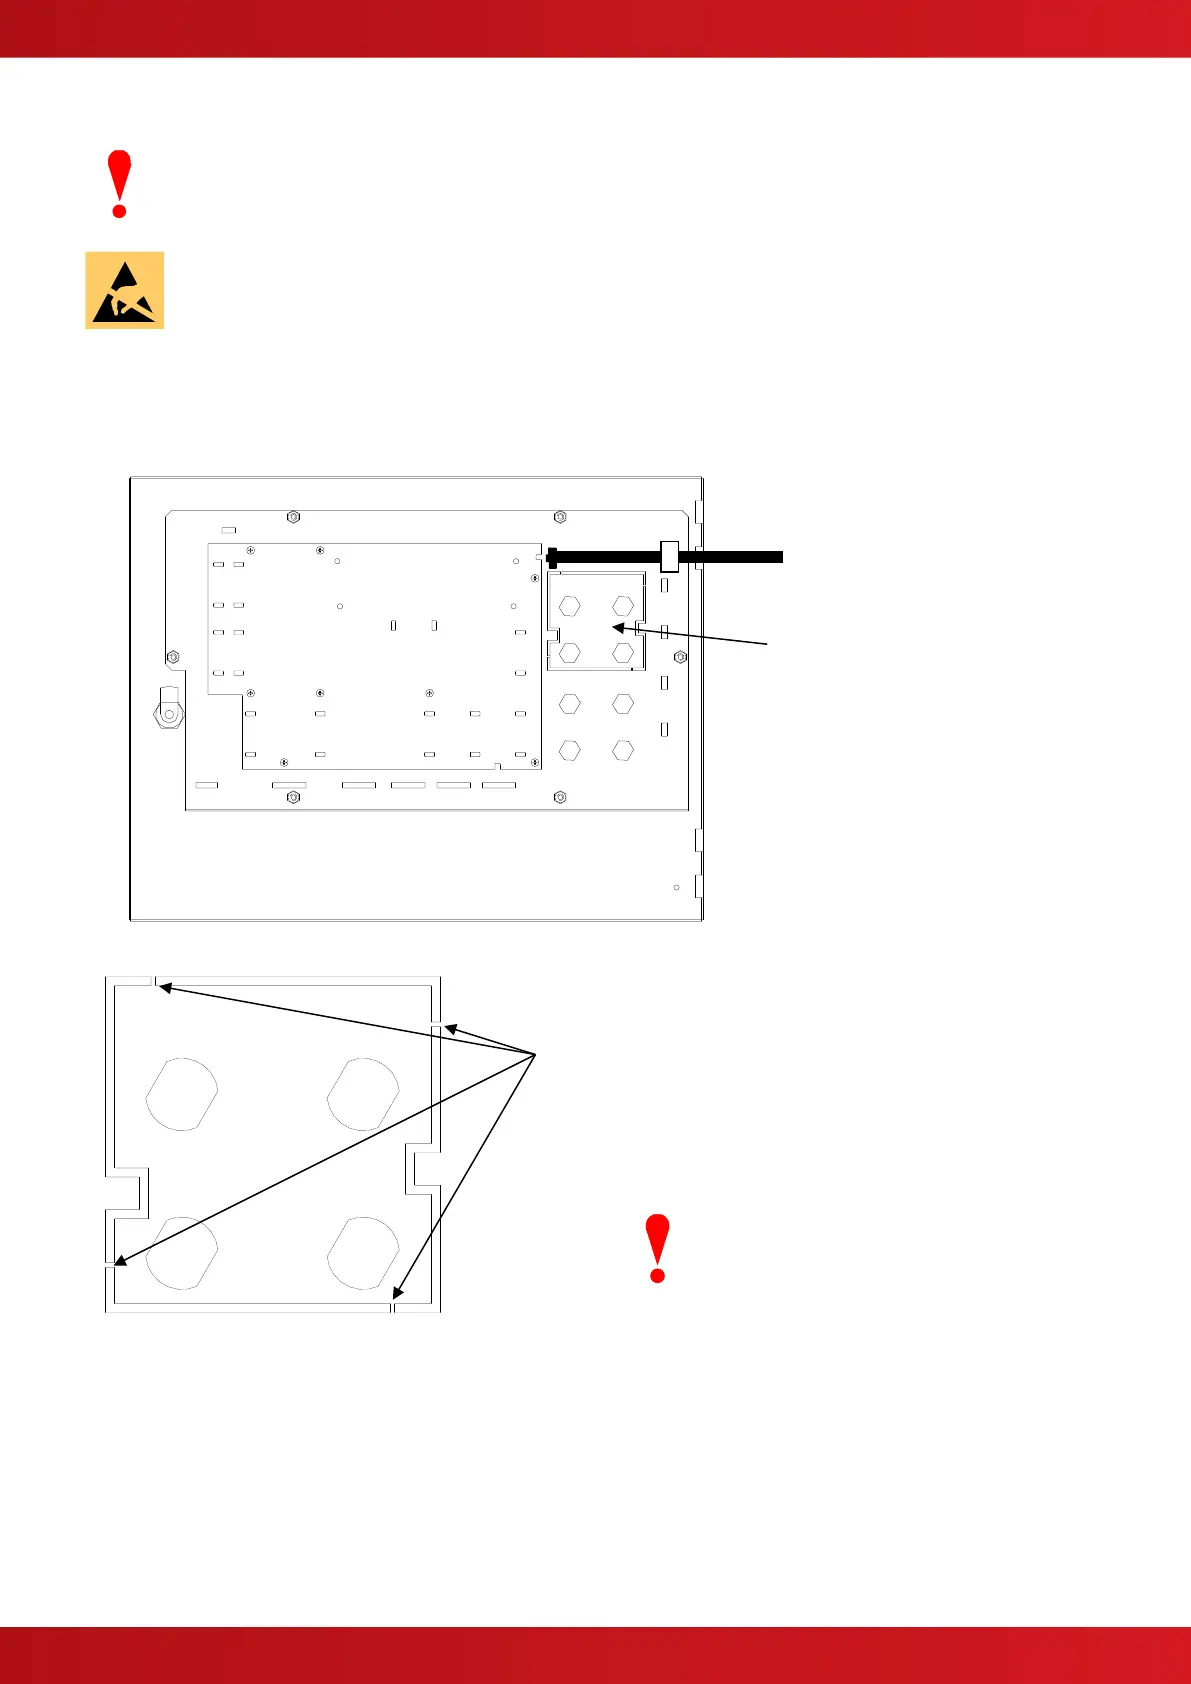
2.1 Mounting the printer assembly
The printer is mounted onto the display plate in a pre-defined aperture.
Using a pair of strong side cutters, cut through the
1mm pips of the metal plate as shown below:
Using a sharp knife and working from the front
face, cut through the membrane label using the
outer edge of the aperture as a guide.
When the aperture plate is free, trim off and tidy
the edge of the label to the edge of the aperture.
Take care not to damage the fascia label.
Offer up the printer to the aperture and
guide the printer into position (at an angle)
ensuring that the connector on the PCB does not collide with the metalwork.
Push into position. Open up the paper roll aperture and then secure the printer mechanism using the two self-
tapping screws in the two holes either side of the printer paper roll recess.
 Loading...