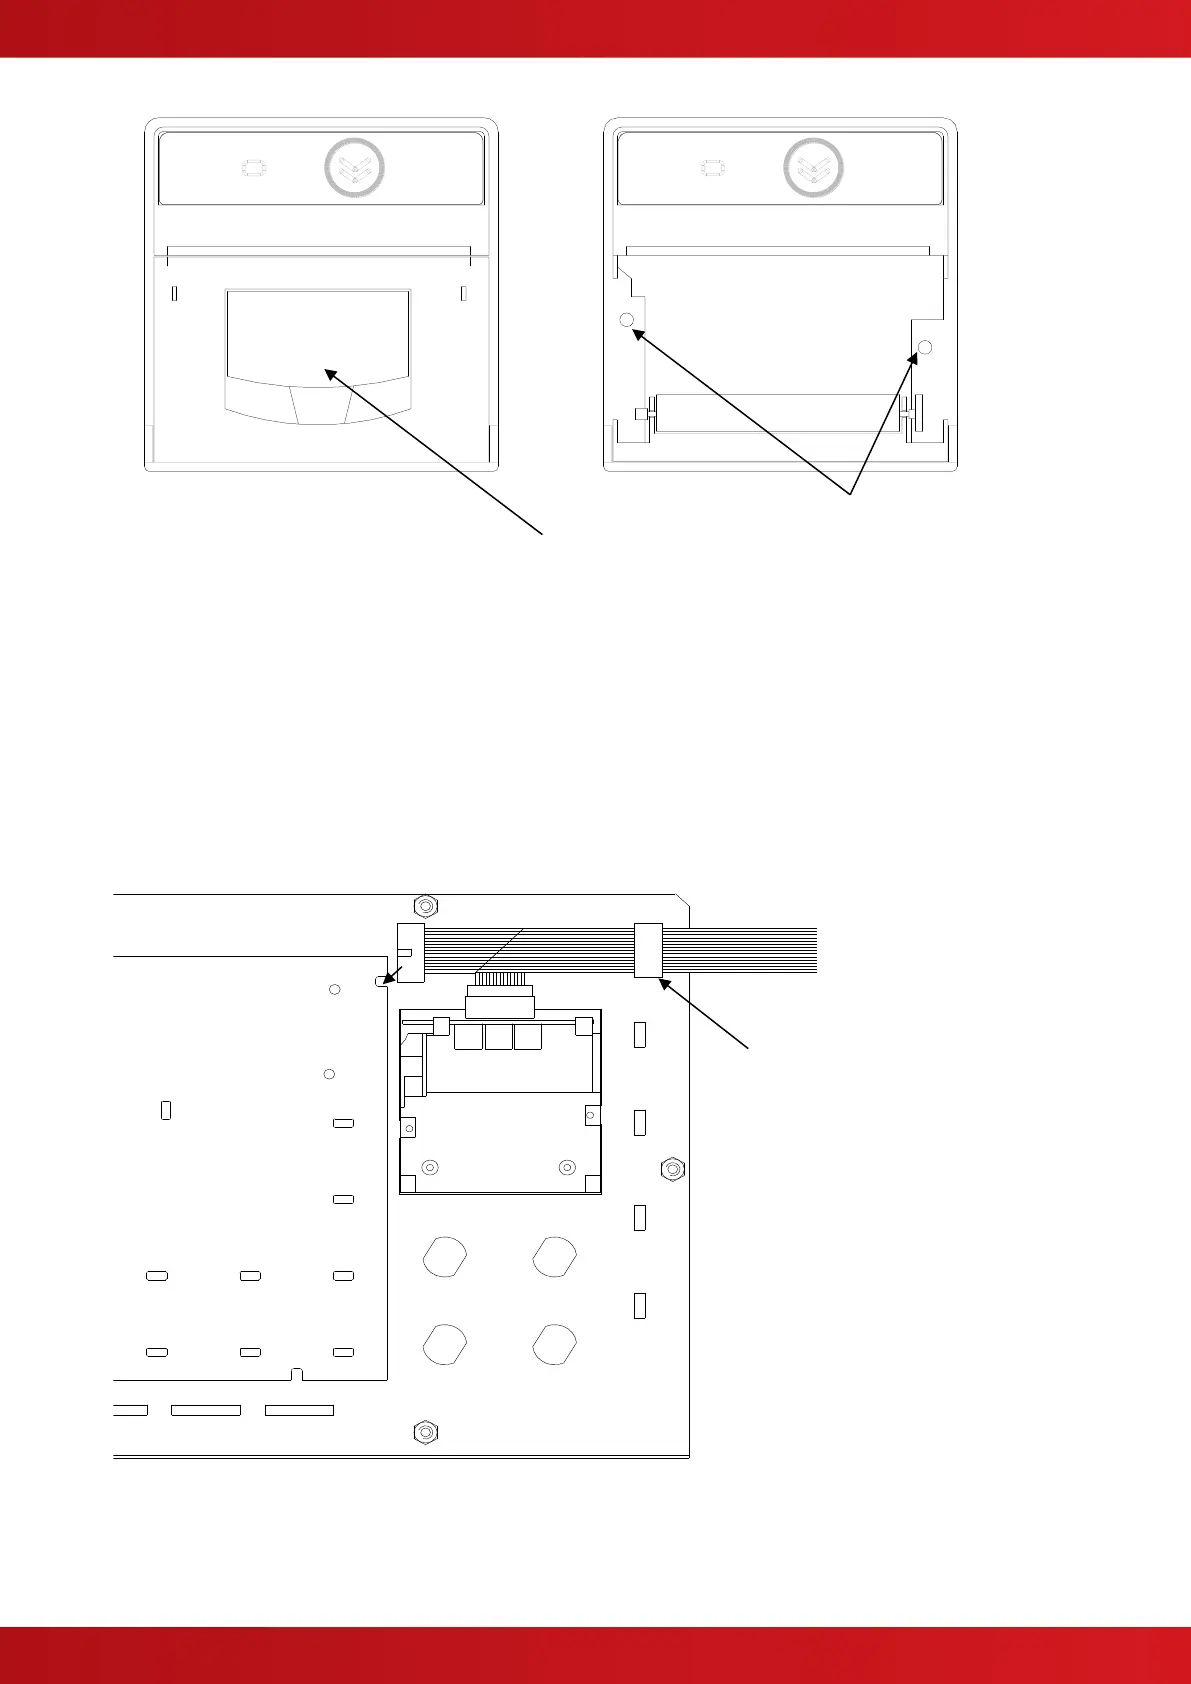
2.2 Cable Installation
Remove the existing ribbon cable between the display and the base card.
The supplied cable is provided with three connectors. Plug one connector into the display card and then plug
the second connector into the printer.
Route the cable through the clamp and plug into the connector on the base card (ensure that the heat shrink
protection is in place under the tabs on the base card chassis plate.
The cable is common to all panels. Route the cable up the side of the back box and fold up any excess and use
the clamp to hold in place.
CAUTION: Observe orientation (bumps) on the connectors when mating with the headers.
 Loading...