12
V1.7
CHANGING TEMPERATURE UNITS (°C TO °F)
Step 1 – Start with the unit on the HOME SCREEN
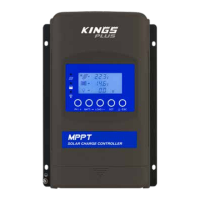
Step 2 – Press the SET button to enter battery settings interface
Step 3 – Press and hold the BATT button to enter battery type interface
Step 4 – Press the SET button 2x to jump to temperature units interface
Step 5 – Press the + or – buttons (PV/+ or LOAD/-) to set temperature units °C or °F
Step 6 – Press SET to confirm selection and return to battery parameter menu
The default cycle time for the home screen is 2 seconds. This can be set from 0 seconds
(no cycling) to 20 seconds. If set to 0 Seconds, you’re able to choose which parameters
will stay on your home screen*.
Step 1 – Start with the unit on the HOME SCREEN
Step 2 – Press the SET button to enter PV settings interface
Step 3 – Press and hold the PV button to enter LCD Cycle Time Menu Step 4 – Press
the + or – buttons (PV/+ or LOAD/-) to set from 0~20
Step 4 – Press SET to confirm selection
* Once 0 Seconds has been selected, exit to the home screen by pressing ESC x 2
or wait 10 seconds. Now to set your own home screen display parameters, press the
corresponding button (PV, BATT or LOAD) until the desired parameter is shown.
ADJUST HOME MENU LCD CYCLE TIME
ADJUST LOAD TYPE / TIMER
The Adventure Kings Plus Solar Charge Controller / Regulator has two sophisticated load
settings available – users can set the load to turn on or off for certain time periods
at certain times or turn on and off manually.
Step 1 – Start with the unit on the HOME SCREEN
Step 2 – Press the SET button to enter load settings interface
Step 3 – Press and hold the LOAD button to enter load type interface
Step 4 – Press the + or – buttons (PV/+ or LOAD/-) to set load type (see table below)
Step 5 – Press SET to confirm selection then SET again to return to battery
parameter menu

 Loading...