English
35
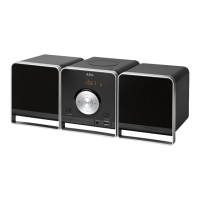
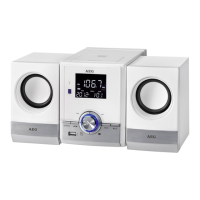
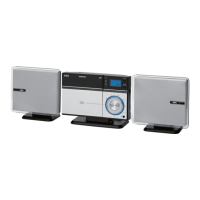
General Operation
NOTE:
Some buttons are to be found both on the device itself and
on the remote control. Buttons with the same designation
have the same function.
Turning the unit on/off
• Pressthe
STANDBYbutton(9/23),toturntheuniton.
• Pressthe STANDBYbuttonagaintoturntheunitoff.
The power indicator lamp (11) lights up.
Volume
YoucanusetheVOL+/VOL-buttons(10/5)tosetthedesired
volume.
MUTE (1 on the remote control)
Quickly turn off the sound. The indication “MUTE” appears
in the display. To cancel this function, press
MUTE again.
EQ (13 on the remote control)
(Preset equalizer function). There are different sound modes
available(FLAT,JAZZ,CLASSIC,ROCK,POP).
Setting the sleep timer
When the sleep timer has been set, the unit is switched off
after a preset time. Press the SLEEP button (14 on the remote
control) to activate the sleep timer. By repeatedly pressing
the SLEEP button, the off time can be set as 90, 80, 70, 60, 50,
40, 30, 20, 10 minutes. To turn off the sleep timer, press the
SLEEP button until the symbol “SL” on the display goes out.
“S - 00” appears in the display for a short amount of time.
Restore factory settings (in the CD (without inserted CD),
USB or BT-Mode)
Allsettingsthatyouperformedwillbelostintheprocess.
• KeeptheAUTO/STOPbutton(9ontheremotecontrol)
held down until “rESEt” is shown on the display. The
device will switch to operational readiness after the reset.
Listening to the Radio
Find stations
1. PresstheSOURCEbutton(6/8),untilFMshowsinthe
display.AlternativelyyoucanalsopresstheFMbutton
(7 on the remote control) to select radio mode.
2. Use the buttons TUN+ (6 on the remote control) and
TUN- (18 on the remote control) to tune to the desired
station. When you hold down either button, the unit
tunestothenextradiostation.Thedisplayshowsthe
tuned frequency.
3. In case the reception is too weak and if the received
station has atmospheric noise, you will have the following
possibilities:
a) Switch the device to Mono operation. Press the ST/
MONO button (11 on the remote control) to do so.
The stereo indicator “ST” lights up on the display.
b) Try to improve the reception through a position
change or through coiling in and out of the antenna.
Save radio stations
The unit can store up to 30 radio stations. To store a station,
proceed as follows:
1. Find a station as described in “Find stations”.
2. PresstheMEMORYbutton(12ontheremotecontrol).
Thedisplaystartsashing.
3. Use the buttons
and (5 on the remote control)
to select the memory where the station is to be stored.
4. PresstheMEMORYbuttonagain.Thestationisstored
andthedisplaystopsashing.
Call a stored radio station
• Youcancallthestoredradiostationswiththenumber
buttons (2 on the remote control). For stored radio sta-
tions above 10, first press the 10+ button.
• Alternatively,youcanalsousethebuttons
and
(5 on the remote control).
Automatic scanning
BrieyholddowntheAUTO/STOPbutton(9ontheremote
control). With this, the entire frequency range is scanned
automatically for stations. The stations found by scanning are
stored in ascending order in the memory locations 1 to 30.
NOTE:
The sequence cannot be changed afterwards. The preset
radio stations will be lost.
To play back music via Bluetooth
Bluetooth involves a technology for wireless radio connec-
tion of devices over a short distance. Devices with Bluetooth
standard are transmitting between 2.402 and 2.480 GHz in
the ISM band (Industrial, Scientific and Medical). Interference
canbecausedforexamplebyWLAN-networks,DABradios,
cordless phones, or microwave ovens which work on the
same frequency band.
This device offers you the possibility to use a Bluetooth-
enableddevice.Thefunctionalradiusislimitedtoapprox.
15 metres depending on the surroundings and the unit used.
IfyourplayingdevicesupportstheA2DPprole(Advanced
Audio Distribution Profile) and has a music-player function,
then you can also wirelessly transfer music to the device. The
A2DPproleinvolvesamulti-vendorBluetoothprole.By
streaming, stereo-audio signals are wirelessly transferred be-
tween the playing device (source) and the receiving device.
To be able to control the source remotely, the playback de-
vicemustsupporttheAVRCPprole(Audio Video Remote
Control Profile).