13
L’unitéestfournieavecunetélécommandeinfrarouge(K),ainsiquesabasedesupport(L)quipeutêtrefixéeaumur.Un
aimantmaintientlatélécommandeattachéeàlabase.
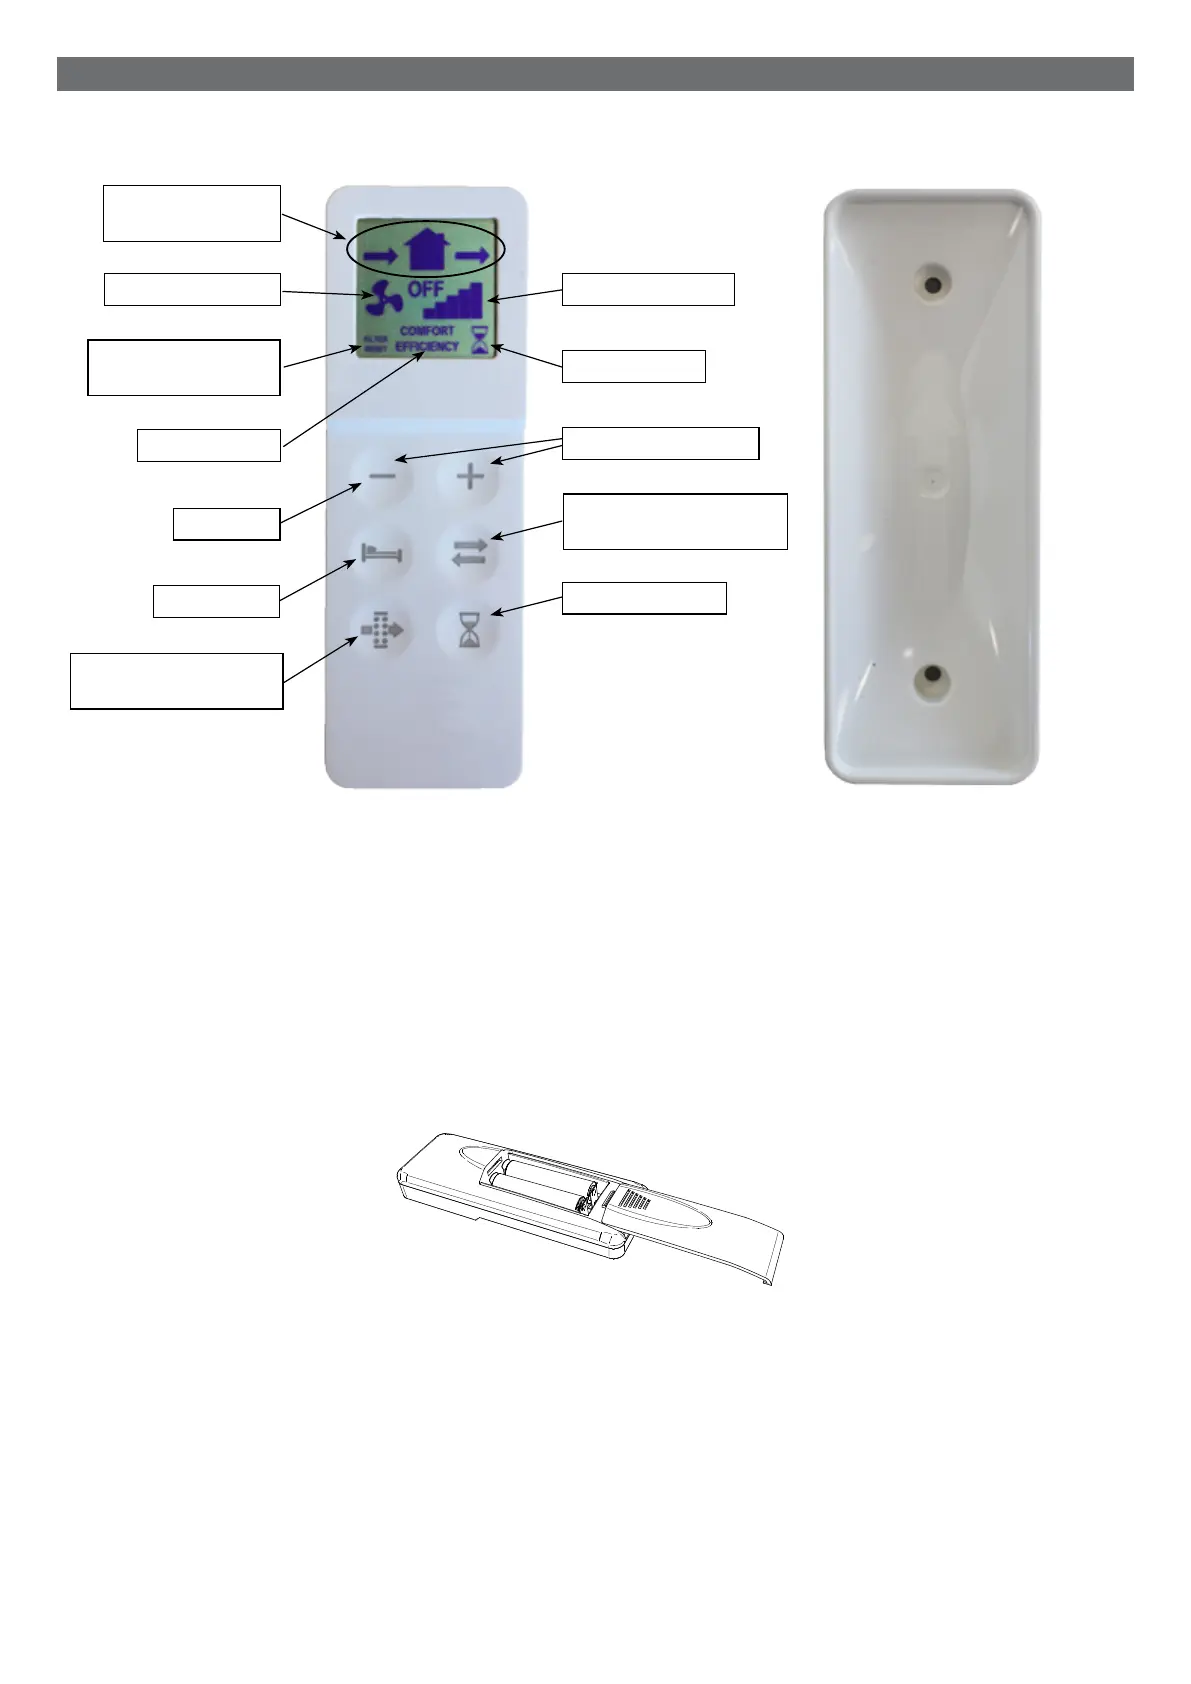
latélécommandeestéquipéed’unécranLCDpourvisualiserleréglageàtransféreràl’unité;Chaquefoisquevousappuyez
surunboutontactile,leréglageaffichésurl’écranLCDesttransférésurl’appareil.LerécepteurIR(imageJpage12)est
placésurlecôtégauchedel’unitédeventilation:ilestrecommandédepointerlecontrôleurverslerécepteurquandun
réglagedoitêtretransféré.
Unetélécommandepeutcontrôlerplusieursunités.
Pouractiverlatélécommande,ilestnécessaired’insérerdeuxpilesdetypeAAA(nonfournies).
OPÉRATION
BOUTON DU CHANGEMENT
DE FILTRE
BOUTON MODE
ICÔNE DU MODE
ICÔNE DU CHANGEMENT
DE FILTRE
ICÔNE DE DIRECTION
DU FLUX DE L’AIR
ICÔNE DE LA VITESSE
ICÔNE DU BOOST
BOUTONS DE LA VITESSE
BOUTON DE LA DIRECTION
DU FLUX DE L’AIR
BOUTON DU BOOST
K L
TÉLÉCOMMANDE
external grille - installation
Ø5x40mm
5mm
cambio batterie telecomando
ICÔNE DE LA VITESSE
BOUTON OFF