Do you have a question about the aero pure AP904-SL and is the answer not in the manual?
Explains how the humidity sensor works and user-adjustable set-points.
Details how to adjust the humidity sensor sensitivity for optimal performance.
Guides on adjusting the fan's run time after humidity levels drop below set-point.
Instructions for connecting ductwork to the fan housing for proper ventilation.
Guides on connecting the fan's electrical wiring to the house power supply.
Steps for attaching the grille assembly to the fan housing after installation.
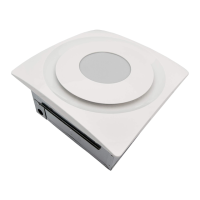
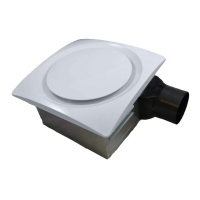
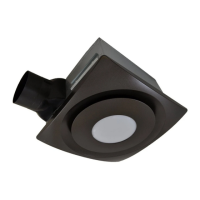
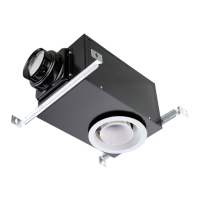
This document provides comprehensive instructions for the installation, operation, and maintenance of a ventilation fan, specifically models AP904-SL, AP904H-SL, AP124-SL, and AP124H-SL. It emphasizes safety precautions, proper installation techniques, and features related to humidity sensing and timer functions.
The primary function of this device is general ventilation, designed to exhaust air from indoor spaces to the outdoors. It is explicitly stated that the fan should not be used in cooking areas or to exhaust hazardous or explosive materials and vapors. The fan is suitable for ceiling installation, accommodating pitches up to 12/12 (45 degrees), and can also be installed in a wall for non-wet applications. A key safety feature is its suitability for use over a tub or shower when connected to a GFCI (Ground Fault Circuit Interrupter) protected branch circuit, but only for ceiling installations. The unit must be grounded, and switches should not be placed where they can be reached from a tub or shower. Furthermore, the fan must be installed at least 2.5 meters (8 feet) above the floor and should not be used with any solid-state speed control device. It is also important that the fan is not installed in a ceiling thermally insulated to a value greater than R40.
Installation involves several critical steps. First, the installer needs to identify the appropriate hanger bar length (short or long) based on the distance between framing members. The hanger bars are designed to fit between joists, and the housing is secured to the joist using screws. The manual illustrates two methods for mounting: with mounting holes and a hanger bar, or with hanger bars only. It also provides specific instructions for mounting to I-joists. Proper ductwork connection is crucial for optimal performance. The manual recommends using insulated flexible duct for the quietest operation and advises keeping duct runs short and straight. All ductwork connections must be secured with duct tape to ensure airtightness. The importance of insulation around ducts to reduce energy loss and inhibit mold growth is also highlighted. Electrical wiring involves connecting the unit to a 120V AC power supply using UL-approved connectors, with detailed wiring diagrams provided for both the standard (AP904/124-SL) and humidity-sensing (AP904/124H-SL) models. After installation, the grille assembly is attached by pinching its springs and positioning it into the housing until it secures to the ceiling.
Usage features vary slightly between the standard and humidity-sensing models. For the AP904/124-SL, the humidity control, fan, and light can be operated separately. However, a dimmer switch should not be used for either the humidity control or the light. The AP904/124H-SL model incorporates a sophisticated humidity sensor. This sensor automatically turns the fan ON in response to rapid or moderate increases in humidity, or when humidity levels exceed a user-adjustable set-point (ranging from 50% to 100% relative humidity). The factory default for humidity sensitivity ("H") is set at approximately 75% RH, which is suitable for most shower applications. Users can adjust this sensitivity if the fan responds too often to changing environmental conditions or if it's used in a tub area or for general dampness control. Adjustment involves disconnecting power, locating the "H" slot on the grille, and rotating it towards "+" for increased sensitivity or "-" for decreased sensitivity. The humidity-sensing fan also includes a timer ("T") function, adjustable from 5 to 60 minutes (factory-set at about 20 minutes). This timer controls how long the fan remains ON after the sensor stops detecting a rise in humidity and the humidity level drops below the set-point. Similar to humidity sensitivity, the timer can be adjusted by disconnecting power, locating the "T" slot, and rotating it to the desired setting.
Maintenance features for this ventilation fan are straightforward and designed for long-term, efficient operation. For cleaning, users are instructed to lower or remove the grille and vacuum the interior of the unit using a dusting brush attachment. This helps maintain quiet and efficient operation, as well as the attractive appearance of the unit. A significant advantage is that the motor is permanently lubricated and never requires oiling, reducing the need for complex maintenance procedures. Users are also advised to keep drywall and construction dust off the power unit to prevent motor bearing damage and noisy or unbalanced impellers. The manual includes a detailed list of service parts, such as the grille assembly, grille springs, humidity sensor, motor plate, motor, blower wheel, wire panel/harness assembly, hanger bar kit, wiring plate, housing, and damper/duct connector, along with smaller components like nuts, washers, screws, and isolators. Instructions for replacing parts, particularly the blower assembly, are provided, emphasizing the need to disconnect power before any replacement work.
The product comes with a limited warranty covering all defects in workmanship or materials for the mechanical and electrical parts for 72 months from the date of purchase. The warranty requires the original sales receipt as proof of purchase and is valid for the original retail purchaser. It covers replacement of defective mechanical or electrical parts under normal household use. However, the warranty explicitly excludes damages from improper installation, shipping, misuse, abuse, accident, alteration, lack of proper care and maintenance, service by unlicensed electricians, and labor or transportation charges for repairs. It also does not cover fluorescent lamp starters and tubes. This limited warranty is provided in lieu of all other warranties, expressed or implied, including those of merchantability and fitness for a particular purpose. The warranty states that the provided remedy is exclusive and does not cover incidental or consequential damages, though some state laws may vary regarding these exclusions and limitations.
| Model | AP904-SL |
|---|---|
| Oscillation | No |
| Timer | No |
| Remote Control | No |
| Power Consumption | 11.7 Watts |
| Power | 11.7 W |