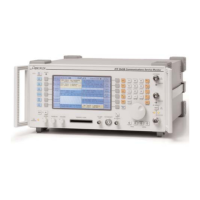
RADIO PARAMETERS screen
From the SYSTEM PARAMETERS menu, pressing the [SET-UP]
softkey will show the RADIO PARAMETERS menu. This shows the
radio logical identity, the IFR logical identity and the group identi-
ty. A logical identity is the individual number used to identify a par-
ticular radio, while the group identity specifies the group a radio
belongs to. The radio logical ID is the logical identity of the radio
under test and the IFR logical ID is the logical identity assumed by
the 2945B Communications Service Monitor for the purposes of
testing radios. The group identity is the number of the group that
both the radio and the service monitor belong to, since they both
need to be in the same group in order to perform some of the
tests.
Although these identities are used by the 2945B
Communications Service Monitor to communicate with EDACS
radios, both the radio logical ID and the group ID are changed
when a radio initiates a transaction - in effect the service monitor
assumes that the last radio that "talked" to it is the one under test.
Hence, you won't need to change these values explicitly since
they will be updated when a radio places a call or logs in.
Checking the set-up is right
The simplest way of checking that the parameters you've entered
are correct is to use a radio with the same set-up. This is most
easily accomplished using the MANUAL TEST mode. Press the
[manual test] softkey on the left hand side of the screen. Connect
an appropriate radio with an RF cable to the N-type connector on
the front of the 2945B Communications Service Monitor. The first
check is to turn on the radio and ensure it sees service. Many
radios show "NC" for "No Control" Most radios will automatically
login to the system when switched on and this will be acknowl-
edged by the Service Monitor, which will display "LOGIN
ACKNOWLEDGED" at the bottom of the screen.
Basic radio connection
If this login occurs, then the set-up information for the control
channel is correct. If it doesn't, then there are several things that
might be wrong. First, ensure that the frequency information for
the system in the EDIT CURRENT menu screen is correct. Other
things to check are the data rate and the Tx polarity. If any of
these are wrong, the radio will not detect the control channel.
If the control channel information is correct, try placing a call by
pressing the PTT (push to talk) button on the radio. The Service
Monitor should respond and go into working channel mode.
Releasing the PTT on the radio should cause the Service Monitor
to return to control channel mode. Press [mode], [call group] soft-
keys to make a call to the radio. The radio should respond by indi-
cating that it is on a working channel.
If either of these tests fail, check that the frequency information for
the working channel in use is correct.
Testing radios using automatic testing
The primary method of testing radios is the automatic testing
mode. This uses a test program which runs a sequence of tests
according to parameters set using the various set-up menus and
allows you to print test results for your records.
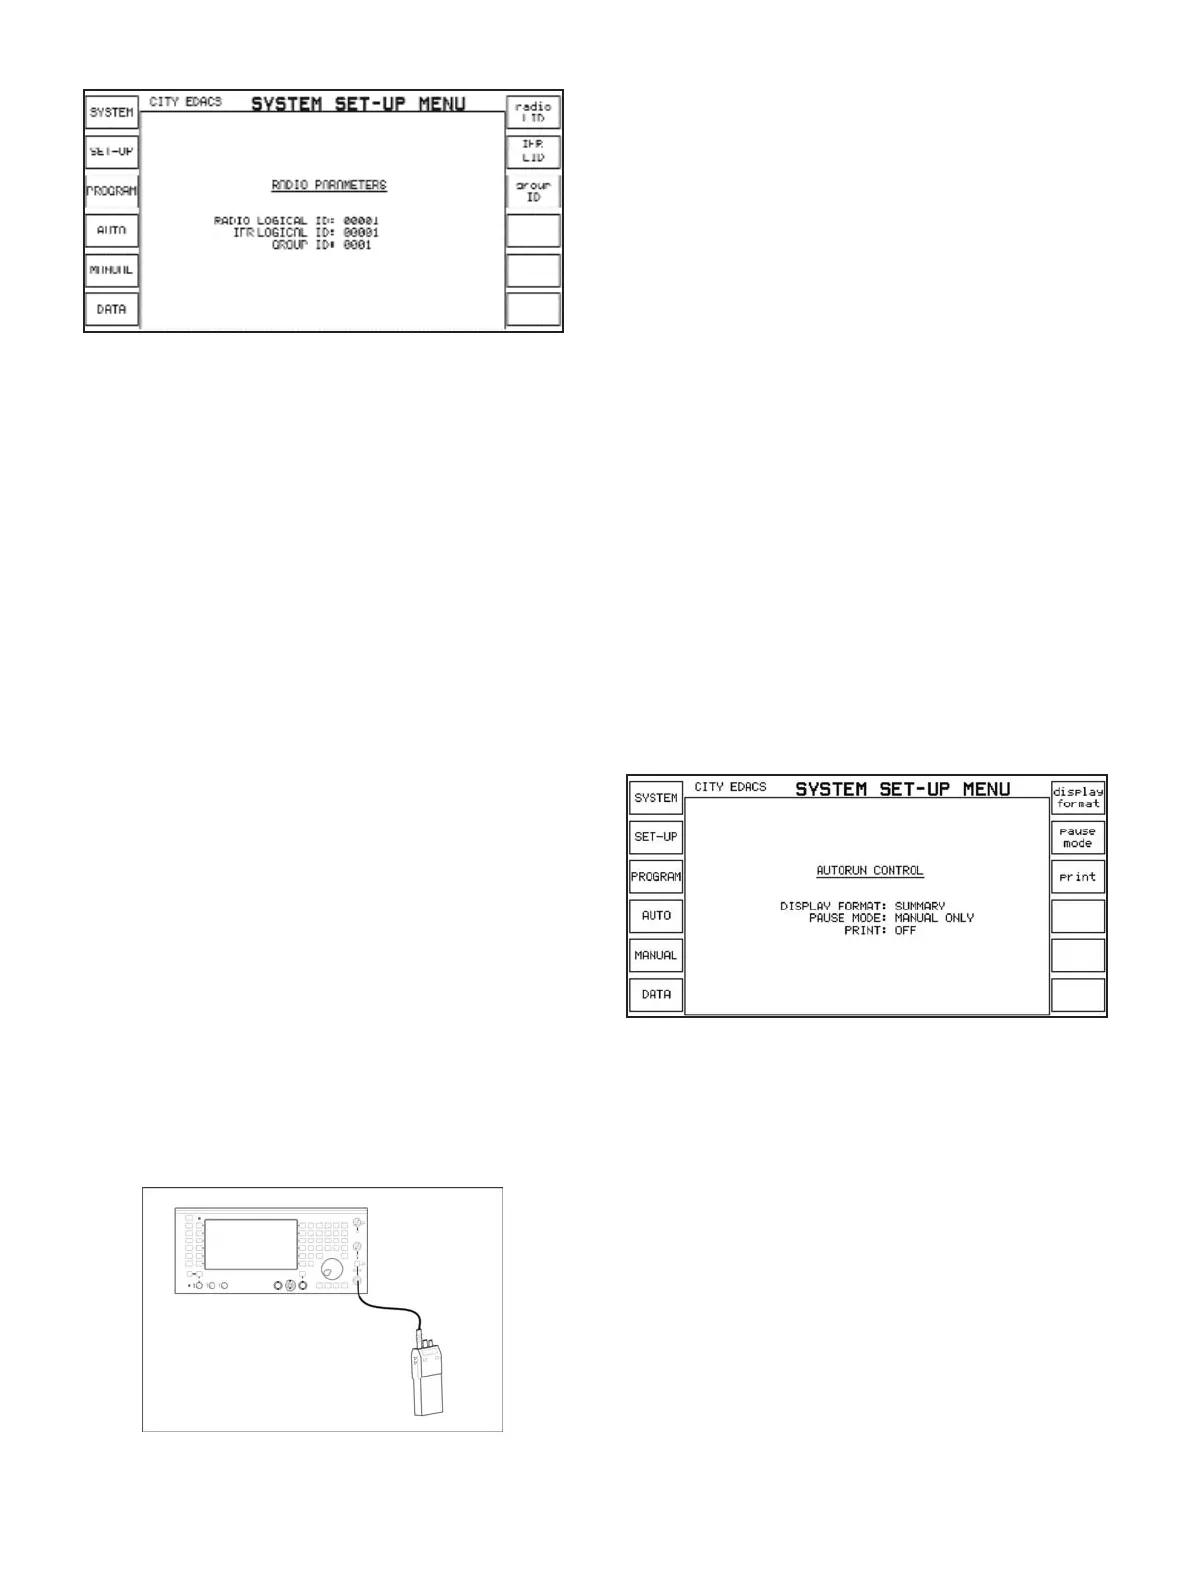
Changing program flow control
The third set-up menu, AUTORUN CONTROL, determines the
flow of automatic testing. Each field can be changed by selecting
the softkey associated with it and selecting one of the softkeys
that subsequently appears.
Autorun control set-up menu
The display format determines the information shown in the
results window. The default value is summary, which shows one
line results. Full display format displays, in addition, the parame-
ters relating to the test.
Pause mode can be manual only, on failure or always. Selecting
[pause mode], [manual only] means that the automatic test pro-
gram will pause on completion of a test only when the [pause]
softkey on the AUTO screen has been pressed. When the pause
mode is set to [on failure], the automatic test program will pause
if a test has failed, or if the [pause] softkey has been pressed.
Selecting [pause mode], [always] means that the automatic test
program will pause after each test has finished.
When [print], [on] is selected, the results are sent to the printer at
the same time as being displayed on the screen.
Changing Autorun parameters
The parameters for automatic tests are found in the AUTORUN
 Loading...