EasyManua.ls Logo

AFG 4.0 AR - ASSEMBLY STEP 8; ASSEMBLY STEP 9

AFG 4.0 AR
19 pages
Print Icon
To Next Page IconTo Next Page
To Previous Page IconTo Previous Page
Loading...
BEFORE
YOU BEGIN
14
INTRODUCTION
IMPORTANT
PRECAUTIONS
ASSEMBLY
BEFORE
YOU BEGIN
BIKE
OPERATION
LIMITED
WARRANTY
TROUBLESHOOTING
& MAINTENANCE
CONDITIONING
GUIDELINES
BEFORE
YOU BEGIN
ASSEMBLY
15
INTRODUCTION
IMPORTANT
PRECAUTIONS
BIKE
OPERATION
CONDITIONING
GUIDELINES
TROUBLESHOOTING
& MAINTENANCE
LIMITED
WARRANTY
ASSEMBLY ST EP 8
SEAT BACK
PLASTIC PIECE
Note: There is no hardware bag for this step. All hardware is pre-attached.
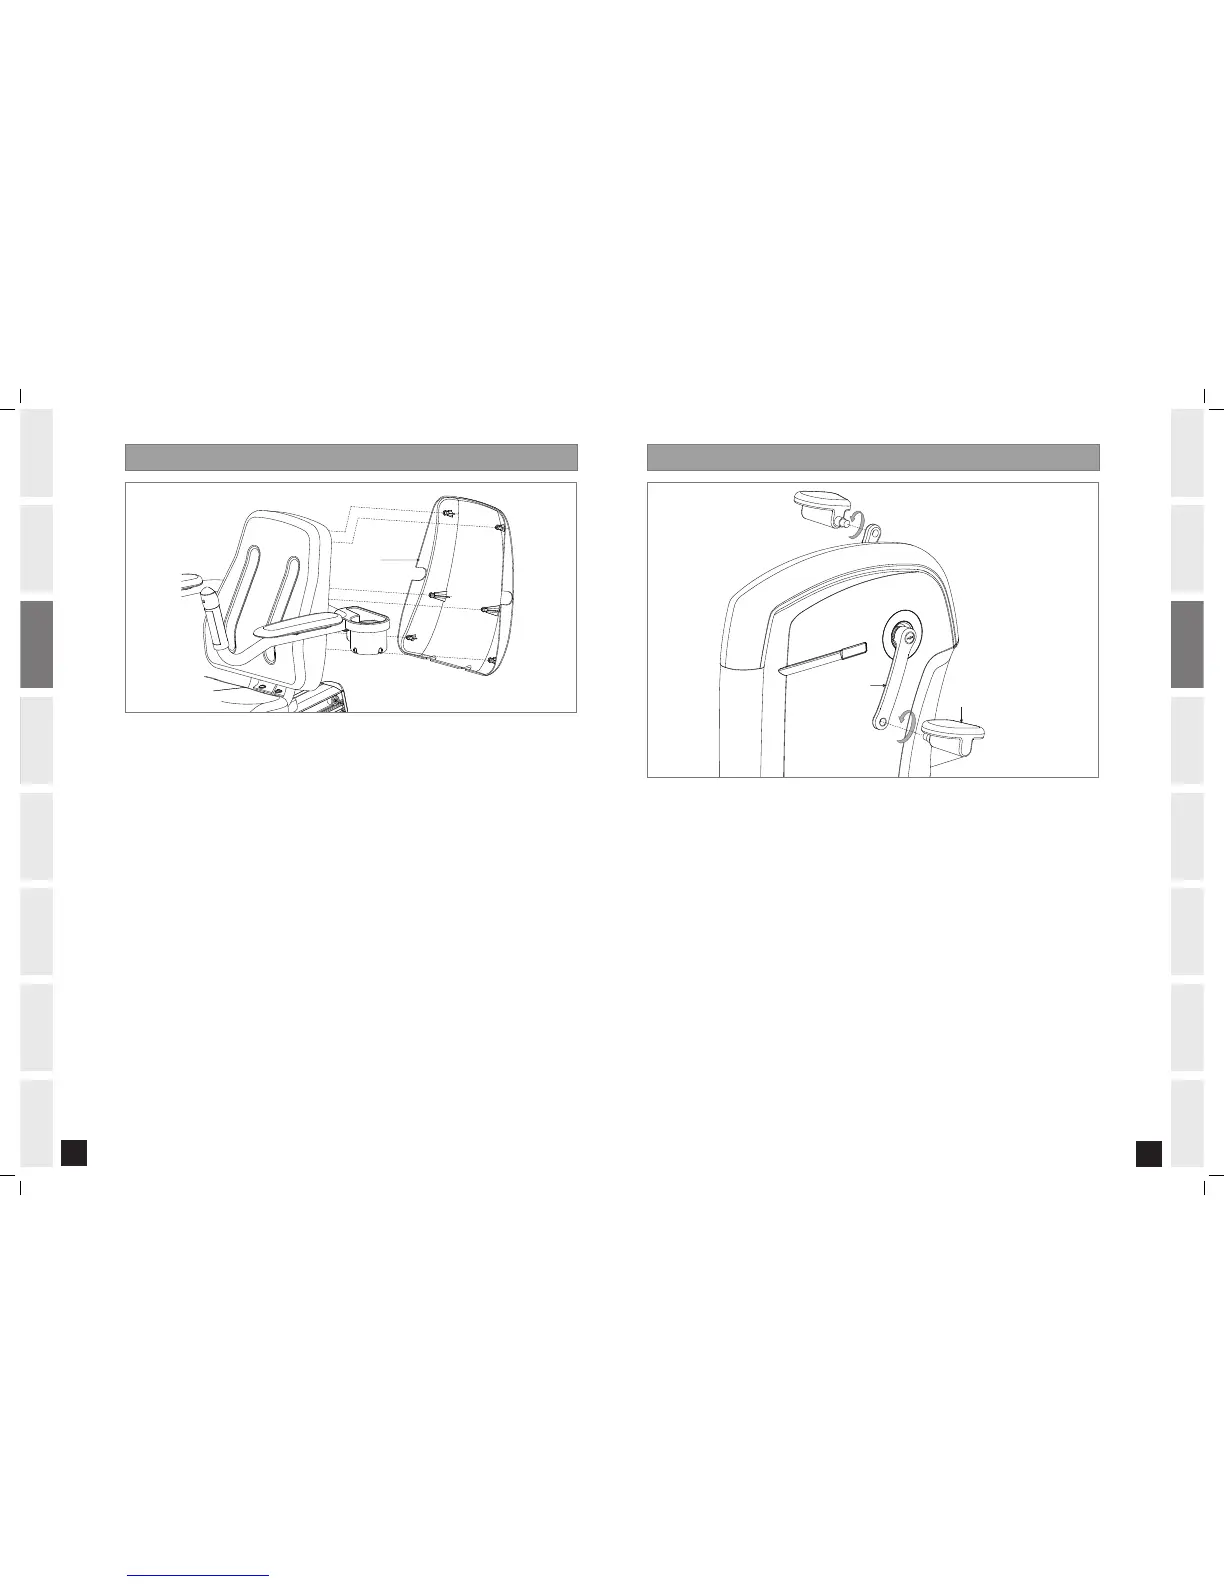
Press the SEAT BACK PLASTIC PIECE onto the back of the SEAT BACK.A)
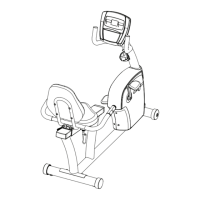
ASSEMBLY ST EP 9
LEFT PEDAL
LEFT CRANK ARM
Note: There is no hardware bag for this step.
Attach the RIGHT PEDAL onto the RIGHT CRANK ARM, tightening it CLOCKWISE with the provided
13mm/15mm FLAT WRENCH.
Attach the LEFT PEDAL onto the LEFT CRANK ARM, tightening it COUNTER-CLOCKWISE with the provided
13mm/15mm FLAT WRENCH.
Note: The LEFT CRANK ARM is reversed threaded so it is very important that the LEFT PEDAL is tightened
COUNTER-CLOCKWISE. Tightening it the opposite way can damage the pedal or the crank arm or both.
A)
B)
4.0_AR_Rev.1.7.indd 14-15 7/16/07 4:47:35 PM

Related product manuals