©Copyright Lotronic 2018 Manual DMX512-PRO 5
Plug in the mains cable of the supplied power unit here.
18. Power on/off
Switches the controller on and off.
Installation and Connections
Switch off the DMX controller prior to connecting any units or to changing any
existing connections.
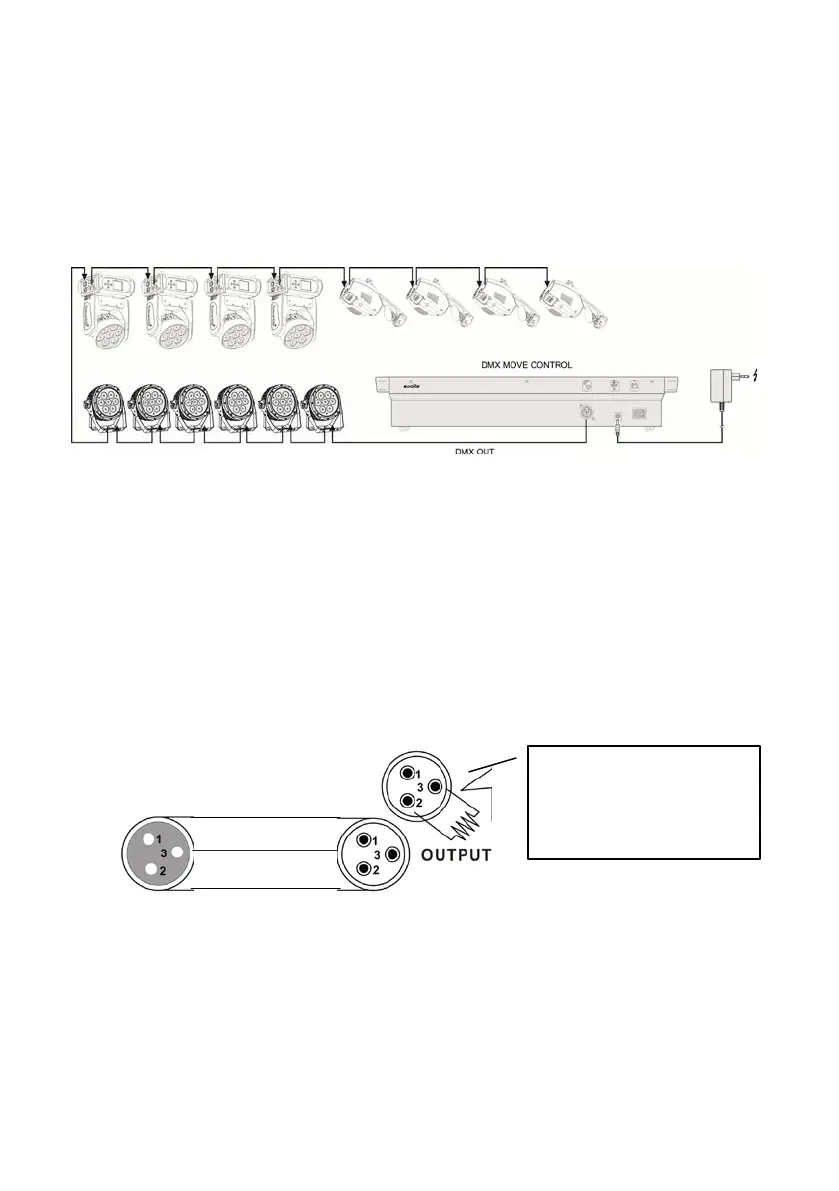
Fig. 5.1 Example for connection
Installation
Install the unit on a plane surface or in your rack. When choosing the installation spot
make sure that there is enough space around the unit for ventilation or that heated
air from the rack can be passed on to improve heat radiation. Steady overheating will
damage the unit.
CABLE CONNECTORS
Cabling must have a male XLR connector on one end and a female XLR connector on
the other end.
DMX connector configuration
Termination reduces signal errors. To avoid signal transmission problems and
interference, it is always advisable to connect a DMX signal terminator.
CAUTION
Do not allow contact between the common and the fixture’s chassis ground.
Grounding the common can cause a ground loop, and your fixture may perform
erratically. Test cables with an ohm meter to check correct polarity and to make sure
the pins are not grounded or shorted to the shield or each other.
Resistance 120 ohm
1/ 4w between pin 2
(DMX-) and pin 3 (DMX+) of
the last fixture.
 Loading...