This document outlines the procedure for cleaning the image plate and tray of CR MD4.0T and CR MM3.0T systems, which are likely components of a computed radiography (CR) imaging system used in healthcare. The primary function of these devices is to capture X-ray images, with the image plate being the medium that records the X-ray exposure and the tray serving as its housing within the cassette. Proper maintenance, specifically cleaning, is crucial to ensure optimal image quality and extend the lifespan of these components.
Function Description:
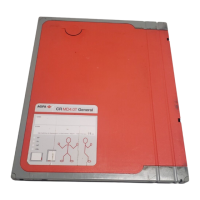
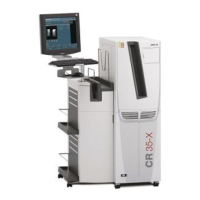
The CR MD4.0T and CR MM3.0T systems utilize image plates to convert X-ray energy into a latent image. These image plates are housed within a tray, which in turn is part of a cassette. When exposed to X-rays, the phosphor layer on the image plate stores the energy, forming a latent image. This image is then read by a CR reader, which converts the stored energy into a digital image. The tray's function is to securely hold the image plate, protect it from damage, and facilitate its insertion and removal from the cassette and reader. The inner lining of the cassette is made of fleece, designed to protect against electrostatic charging and dust accumulation on the image plates, which are critical for maintaining image quality.
Important Technical Specifications (Inferred):
While specific technical specifications like dimensions, weight, or material composition are not explicitly detailed, the document provides insights into the operational characteristics and maintenance requirements that imply certain technical aspects:
- Image Plate Types: The document distinguishes between "CR MD4.xT General image plates" and "CR MM3.0T Mammo image plates." This indicates that there are different types of image plates optimized for various applications, such as general radiography and mammography. Mammography plates typically require higher resolution and sensitivity due to the demanding nature of breast imaging.
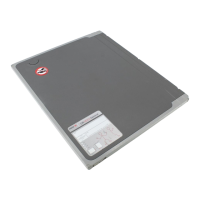
- Cassette Design: The cassette is designed with a lock mechanism and a shutter to protect the image plate. The presence of a "black tube side" and a "white phosphor side" on the image plate, and the need to orient the white phosphor side towards the black tube side of the cassette during re-insertion, suggests a specific design for proper image acquisition and protection.
- Cleaning Cycle for CR MM3.xT: The CR MM3.xT image plate requires cleaning "at least once a week or after every 200 cycles (whatever comes first)." This specification highlights the sensitivity of mammography plates to dust and particles, likely due to the high-resolution requirements of mammography, where even minute imperfections can affect diagnostic quality.
- Cleaning Cycle for CR MD4.xT: The CR MD4.xT image plates require cleaning "at least once every month or whenever there is doubt about particles visible on the X-ray images." This suggests a slightly less frequent cleaning schedule compared to mammography plates, but still emphasizes the importance of regular maintenance for general radiography.
- Material Compatibility: The document specifies approved cleaning products (AGFA CR Phosphor Plate cleaner) and materials (soft lint-free cellulose cloth or Polynit wipes) for the image plates. This implies that the image plate's phosphor layer is sensitive to certain chemicals and abrasive materials, necessitating specific cleaning agents to avoid damage. For the tray, only a dry cloth or compressed air is permitted, indicating that the tray material might also be sensitive to liquid cleaners or that liquid residue could interfere with the image plate.
Usage Features:
The document focuses primarily on maintenance rather than daily operational usage. However, the cleaning procedure implicitly describes certain usage features:
- Cassette Access: The cassette features a lock and shutter mechanism that requires a key or pen to open, allowing access to the image plate and tray. This design ensures the image plate is securely enclosed during handling and operation, protecting it from light exposure and physical damage.
- Image Plate and Tray Removal: The process of carefully sliding out the black tray and image plate from the cassette, after holding back the shutter, indicates a user-friendly design for maintenance. The instruction to turn the cassette around so the "black tube side is above" suggests a specific orientation for safe and easy removal.
- Tray Hooks: The tray is equipped with "2 little hooks" that are designed to reach over the border of the cassette when the tray is placed onto it. This feature helps prevent bending of the tray and image plate during handling and re-insertion, ensuring proper alignment and protection.
- Orientation Guidance: Clear instructions are provided for the correct orientation of the image plate (white phosphor side towards the black tube side of the cassette) during re-insertion. This is a critical usage feature to ensure the image plate functions correctly within the CR system.
Maintenance Features:
The core of this document is dedicated to the maintenance features, specifically the cleaning process:
- Cleaning Frequency:
- CR MD4.xT (General): Clean at least once a month, or whenever particles are visible on X-ray images. More frequent cleaning is needed in dusty or very dry conditions.
- CR MM3.xT (Mammo): Clean at least once a week, or after every 200 cycles, whichever comes first. This highlights the higher maintenance demands for mammography applications.
- Approved Cleaning Products:
- Image Plates (CR MD4.xT and CR MM3.0T): AGFA CR Phosphor Plate cleaner and a soft lint-free cellulose cloth or Polynit wipes. This ensures that the delicate phosphor layer is not damaged by incompatible chemicals or abrasive materials.
- Tray: Only a dry cloth or compressed air (canned air) is permitted. This prevents potential damage to the tray material or interference with the image plate if liquid residues were left behind.
- Cleaning Procedure:
- Open Cassette: Insert a key or pen into the cassette lock to open the shutter.
- Remove Key/Pen: Take out the key or pen.
- Orient Cassette: Turn the cassette so the black tube side is above.
- Extract Tray and Plate: Hold back the shutter with both thumbs and carefully slide out the black tray and image plate onto a table.
- Position Tray: Place the black tray with the image plate onto the cassette, ensuring the tray's hooks reach over the cassette border to prevent bending.
- Clean Image Plate:
- Moisten a soft lint-free cellulose cloth or Polynit wipe with AGFA CR Phosphor Plate cleaner.
- Wipe the image plate surface softly and evenly.
- Allow the image plate surface to dry for approximately 10 minutes for solvents to evaporate.
- After drying, check for any remaining particles or impurities.
- Clean Tray: Use only a dry cloth or blow away dust with compressed air. Do not use a screen cleaner on the tray.
- Re-insert Tray and Plate:
- Carefully slide the tray with the image plate back into the cassette.
- Ensure the white phosphor side is oriented towards the black tube side of the cassette.
- Warning: Slide in carefully; do not let the plate fall vertically into the cassette, as this can damage the phosphor.
- Close Shutter: Once the black tray is completely inside, close the shutter by inserting a key or pen into the cassette lock while closing. Remove the key or pen.
- Post-Cleaning Erase: After cleaning, it is necessary to erase the image plate before use. This ensures that any residual signals from previous exposures or cleaning processes are removed, guaranteeing a clean slate for the next image acquisition.
- Component Matching: A critical maintenance note emphasizes that the tray and image plate set must always go into the same cassette when cleaning. It is important not to mix an image plate with a tray initialized for another image plate. This suggests that these components might be paired or calibrated together, and mixing them could lead to operational issues or incorrect image processing.